I’m a bit late to the party, but I finally picked up a Raspberry Pi 4B 8GB board to use with VMware’s new ESXi on Arm technical preview. I initially tested it without a case, and a small USB 3.1 flash drive. It wasn’t long until I realized the system was pretty much unusable without decently performing storage attached. It did a lot better with an external USB drive I had lying around, but I didn’t like the mess of cables and having devices larger than the Raspberry Pi attached just seemed wrong.
After looking around for a suitable case, I was immediately drawn to Argon Forty’s new Argon One M.2 case.


I had seen the original Argon One, which ticked many of the right boxes, but this one adds one feature I really wanted – built in storage. As the name implies, there is an M.2 SATA storage adapter that is enclosed within the case. If you have already bought an Argon One, you can buy the M.2 bottom kit as a standalone option to convert yours as well!

Along with the Argon One M.2, I purchased their 18W 5.25V power supply, which came highly recommended. I also picked up a very inexpensive 240GB M.2 SATA drive on Amazon made by Asseno. The case itself is comprised of a top and bottom shell with attached circuit boards. An additional board is included that attaches to the Pi as well as a USB to USB bridge.

A small circuit board attaches to the ports at the side of the Raspberry Pi and redirects them toward the rear. I absolutely love this feature as the default placement of ports on the Pi can make wiring a bit of a mess. As an added bonus, the adapter converts the two micro-HDMI ports to full size HDMI connectors. The larger connectors are a much more popular connector type, and this could save you from having to buy a micro-HDMI cable or adapter. You’ll also notice that the USB Type C power connector is not attached and left unused. This is because power input is provided through the pin bank once the top of the case is attached.
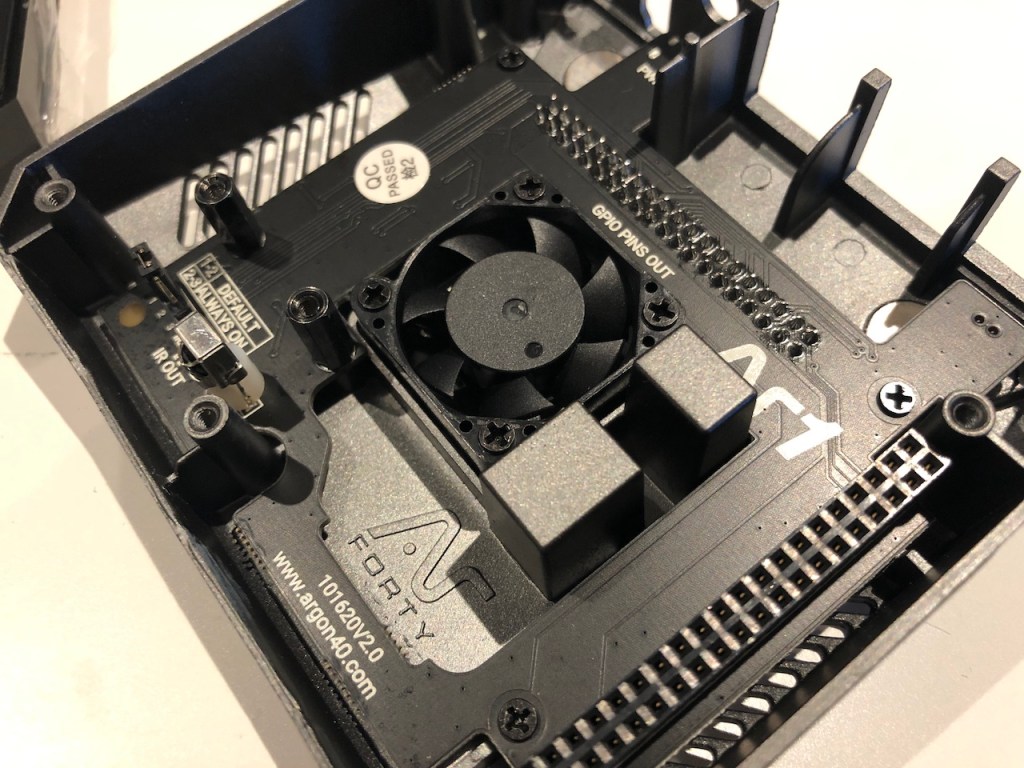
The underside of the top half of the case includes a small 30mm fan, and two protruding aluminum blocks. These contact the Pi’s CPU and memory and allow the aluminum top to act as a large heatsink. The case’s aluminum construction is hefty and there is enough material there for this to act as a very effective passive heatsink. The fan really isn’t essential here as the passive cooling is already quite good.
You’ll also notice that there is a 40-pin female connector that redirects all of the GPIO and other pins to an access port on the top of the case. It also allows the case to tap into certain pins for power delivery, fan control and power button control. A small jumper bank also allows configuration of the power button. You can have the Pi power up as soon as power is connected or power up when the button is pressed (the default).
In addition, there is an Infrared sensor that can be used for remote controls. I haven’t tried it but Argon Forty does make a remote for those interested.

Before installing the Pi and expansion board into the case, you’ll need to use the included thermal pads for the CPU and memory. These appear to be proper thermal pads and not the cheap non-thermal tape some cheap cases include.

The Pi and expansion board are then installed into the top of the case. Everything lined up well. There are several included screws that hold everything down. Don’t forget to install your SD card if you are going to be using one because it will not be accessible after the case is closed up, unfortunately.
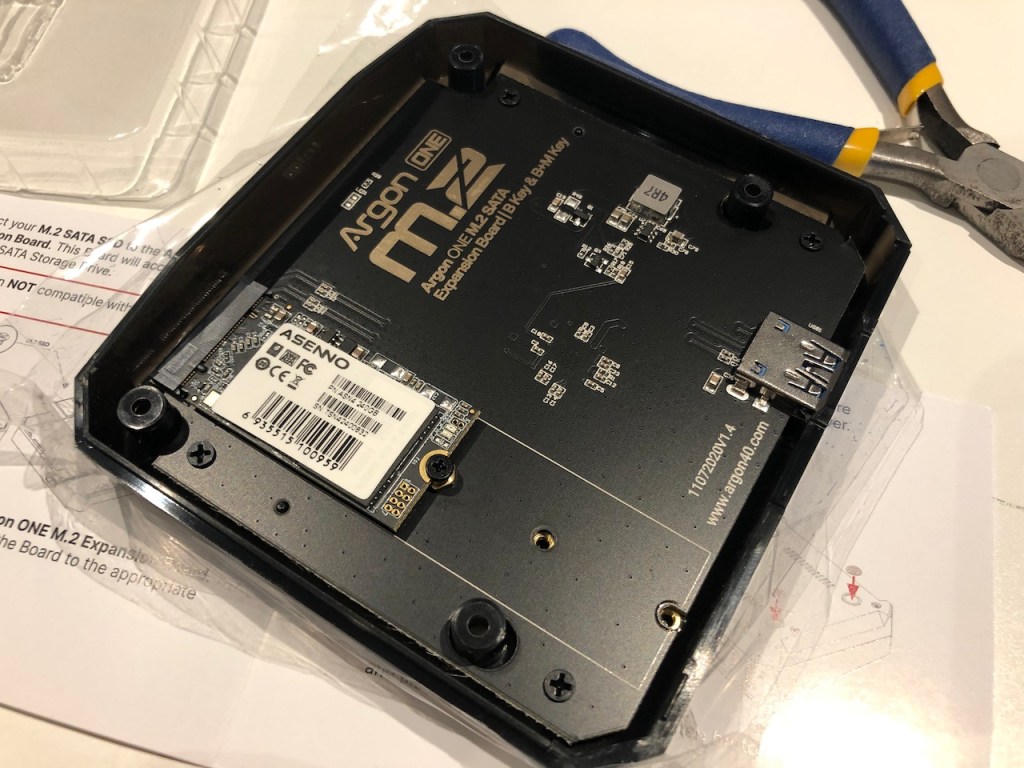
The bottom half of the case includes the M.2 expansion board, which will accommodate several M.2 SATA sizes up to 80mm in length. Keep in mind that MSATA drives with the two corner screws are not compatible and as this is SATA only, NVMe drives can’t be used. Once the drive is installed, you simply attach the bottom of the case using four included screws.

The M.2 expansion board is then connected to the Pi’s lower USB3 port using the included SATA bridge connector. This is nice and clean and avoids unnecessary cables hanging of the back of the case.
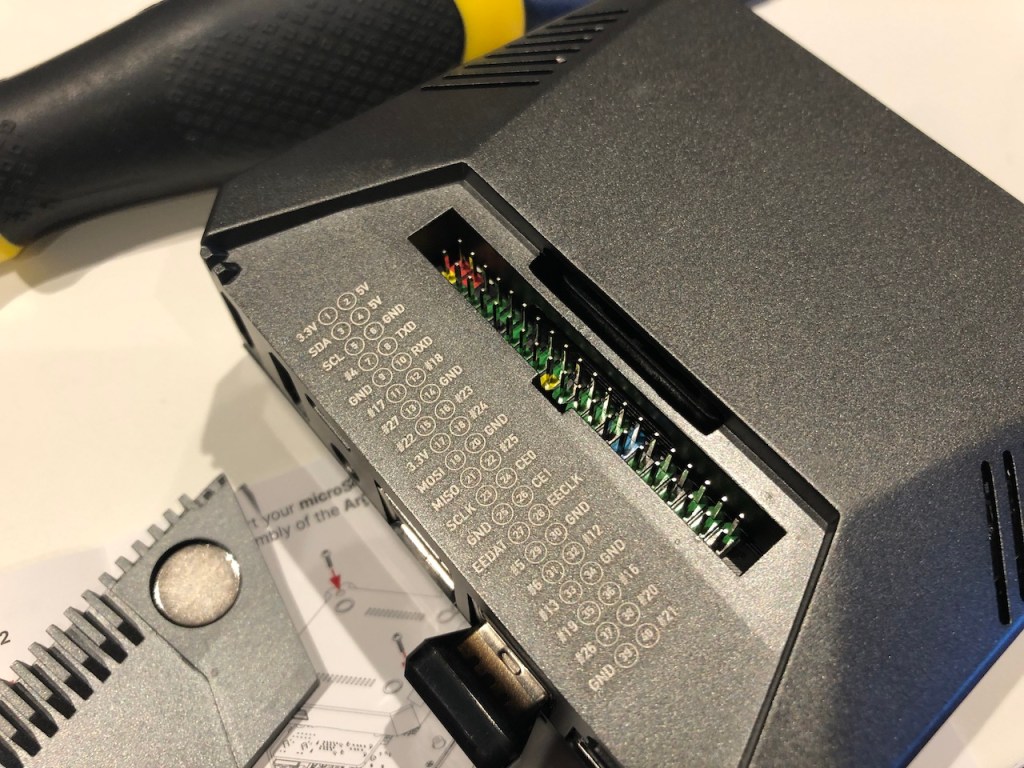
All of the GPIO and other pins are accessible at the top of the case and are protected by a magnetic cover. I appreciate the color coding and labels as well!
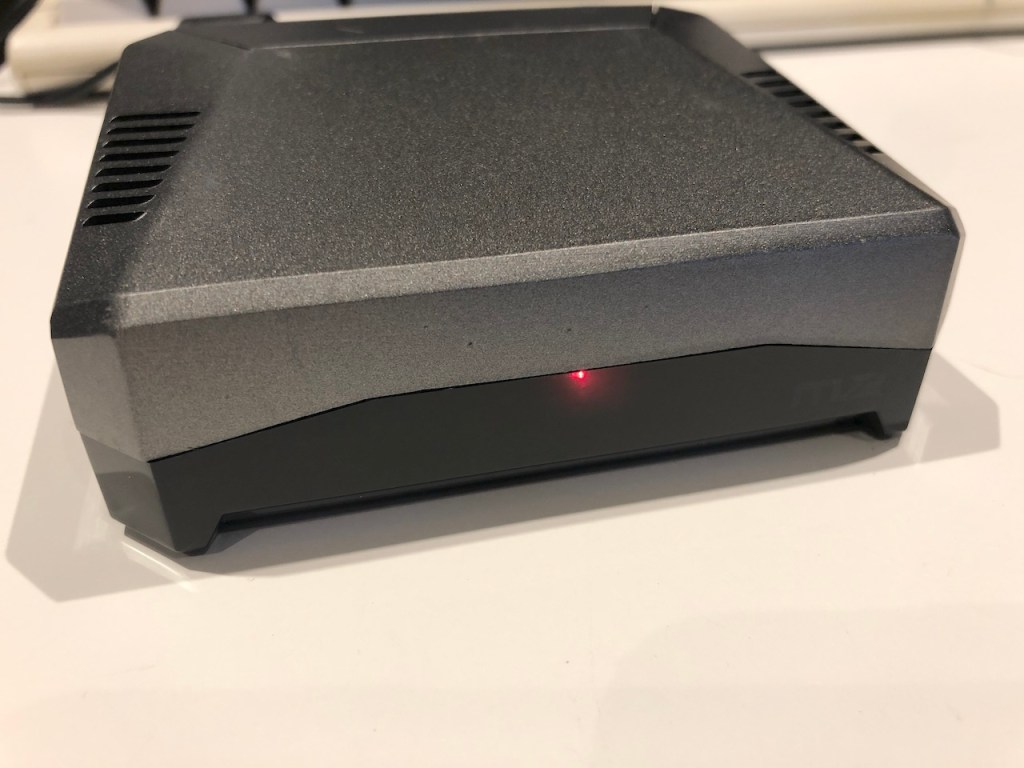
After all is said and done, you have a very clean looking Pi4 case with included, high-performance storage.
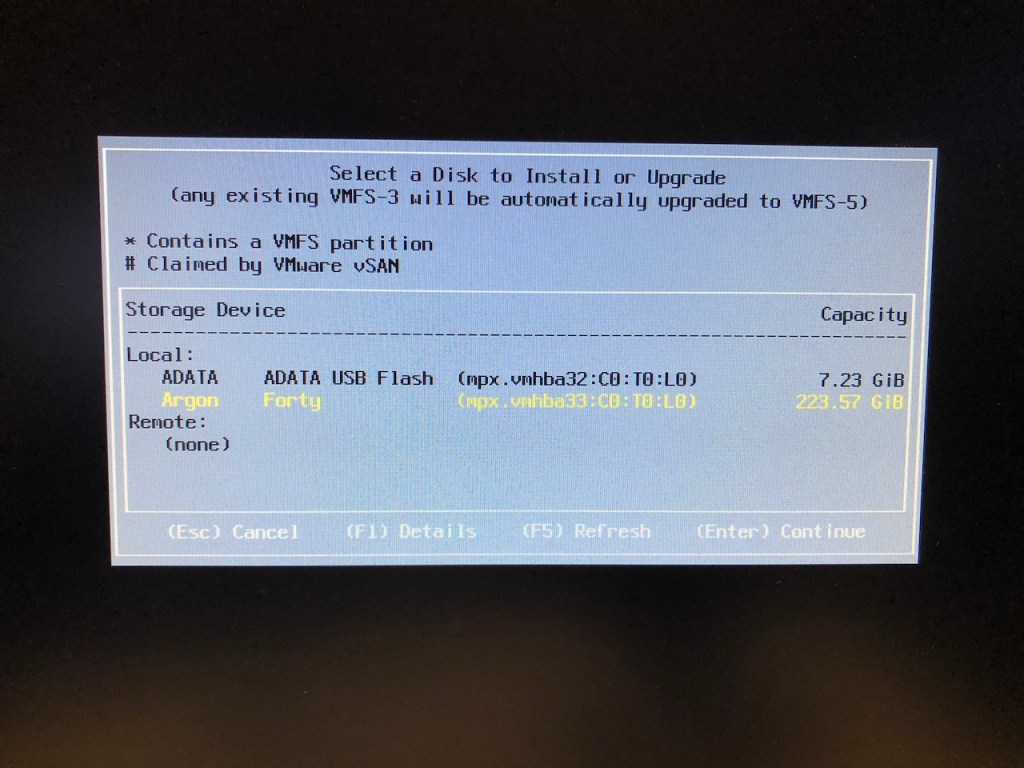
Best of all, the M.2 storage adapter is recognized by ESXi and works perfectly!
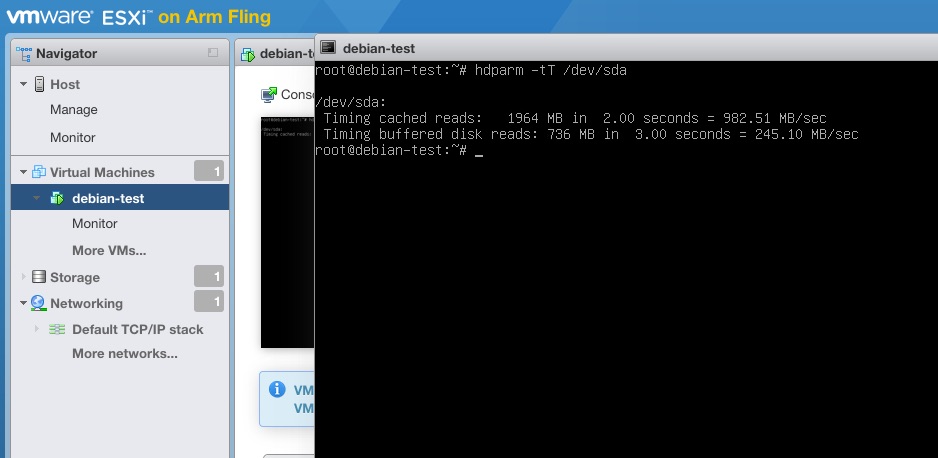
The M.2 drive performance is also excellent. Although USB3 is capable of more, my very inexpensive M.2 drive managed 245MB/s in sequential throughput. More importantly, however, is that my ESXi on Arm install has been rock solid and VMs feel nice and responsive. It was a huge improvement over USB sticks and old external USB drives.
[root@rpi-esxi:/vmfs/volumes/5f4e578c-24f3e3da-10ac-dca632c561d4/thpimon/thpimon-main/pyUtil] ./pimon_util.py |grep Temp:
Temp:                          39.0 (deg. C)
When it comes to thermals, I am very impressed. ESXi doesn’t support the fan scripts as there is no way to access the i2C bus that it is on at this time. Despite this, the passive cooling is fantastic. My ESXi host has been up for weeks and the temperature has been hovering in the high 30s.
Conclusion
I couldn’t be happier with Argon 40’s Argon One M.2 case. For those looking for the perfect case to use with their ESXi on ARM hypervisor, look no further. At $45 USD, it isn’t cheap compared to many cases out there, but I’d argue it is a great value and that you get what you pay for.
Pros:
- Excellent cooling and the case acts as a large passive heatsink
- 30mm fan included.
- M.2 SATA support (up to 80mm) with excellent storage performance.
- All I/O ports redirected to the rear of the case!
- Solid, high quality metal construction.
- Access to GPIO pins via magnetic top cover.
- ESXi Arm Edition compatible!
- Great value considering the features.
Cons:
- No access to the SD card without removing the bottom of the case.
- Redirecting I/O to the rear means the case is about 40% wider than most RPi cases.
- Fan does not operate in ESXi. Requires an OS capable of running the control scripts and access to i2C bus.

Can we use the official Raspberry Pi adapter (15W) with this and will it work fine or not? I plan to install either Windows or Ubuntu on the SSD.
I don’t have the original RPi PSU to try but I don’t see why it wouldn’t work. The storage drive really doesn’t use much power and I’m sure they factor in enough extra power to handle some attached USB accessories. Let me know if it worked out for you. Cheers, Mike.