Argon ONE M.2 Raspberry Pi 4 Case

The perfect Raspberry Pi 4 case to use for VMware’s ESXi on Arm fling. It doesn’t get much better than this.

I’m a bit late to the party, but I finally picked up a Raspberry Pi 4B 8GB board to use with VMware’s new ESXi on Arm technical preview. I initially tested it without a case, and a small USB 3.1 flash drive. It wasn’t long until I realized the system was pretty much unusable without decently performing storage attached. It did a lot better with an external USB drive I had lying around, but I didn’t like the mess of cables and having devices larger than the Raspberry Pi attached just seemed wrong.

After looking around for a suitable case, I was immediately drawn to Argon Forty’s new Argon One M.2 case.

I had seen the original Argon One, which ticked many of the right boxes, but this one adds one feature I really wanted – built in storage. As the name implies, there is an M.2 SATA storage adapter that is enclosed within the case. If you have already bought an Argon One, you can buy the M.2 bottom kit as a standalone option to convert yours as well!

The case parts after unboxing. Everything has a high quality feel to it.

Along with the Argon One M.2, I purchased their 18W 5.25V power supply, which came highly recommended. I also picked up a very inexpensive 240GB M.2 SATA drive on Amazon made by Asseno. The case itself is comprised of a top and bottom shell with attached circuit boards. An additional board is included that attaches to the Pi as well as a USB to USB bridge.

Raspberry Pi 4B 8GB with side board installed.

A small circuit board attaches to the ports at the side of the Raspberry Pi and redirects them toward the rear. I absolutely love this feature as the default placement of ports on the Pi can make wiring a bit of a mess. As an added bonus, the adapter converts the two micro-HDMI ports to full size HDMI connectors. The larger connectors are a much more popular connector type, and this could save you from having to buy a micro-HDMI cable or adapter. You’ll also notice that the USB Type C power connector is not attached and left unused. This is because power input is provided through the pin bank once the top of the case is attached.

Continue reading “Argon ONE M.2 Raspberry Pi 4 Case”

3dfx Voodoo 2 Repair Attempt

I’m always keeping an eye out for old parts on eBay. One of my saved searches, of course, is for the string “3dfx”. I’ve always had a soft spot for the original king of 3D gaming, but just about everything made by 3dfx is collectable and commands a hefty price premium these days. I usually try to steer clear of things marked “untested” or “for repair” but sometimes a deal is just too good to pass up.

When I came across this as-is, untested 3dfx Voodoo 2 for a great price, I decided to take a chance on it. It did show some obvious signs damage in the eBay listing pictures, including some visible scratches and a bent PCI bracket. I could also see some of the chip legs were bent, which can sometimes be tricky to get straightened out. I knew it would probably not work without a repair or two, but maybe I’d get lucky?

Continue reading “3dfx Voodoo 2 Repair Attempt”

Noctua NH-U12S chromax.black Heatsink Review

Great cooling performance and low noise. An excellent heatsink for the AMD Ryzen 3000 Series.

After over six years of use, it was time to put my faithful desktop gaming system out to pasture and to build a new one. Like many others building systems recently, I decided to step back over to the red team and put together a Ryzen 3000/X570 system this time around.

All the rave reviews of AMD’s new Zen 2 architecture were not exaggerated in my opinion – The new system is very responsive and feels much faster than the second generation Intel i7 processor it replaced.

nh-u12s_23

My initial impressions of AMD’s new heatsinks were positive as they are quite impressive looking – much taller and heftier than Intel’s boxed heatsinks. Even their screw and spring based mounting system is far superior to stock heatsinks of the past. This heatsink seemed so promising that this was one of the first builds I have ever done where I had no plans to replace the stock cooler.

When I powered on the system for the first time, I was appalled by the terrible acoustic profile of the wraith spire fan. At its full 3000 RPM it’s unbearably loud and to make matters worse, Gigabyte’s default PWM fan profile had the fan constantly spinning up and down in response to temperature changes. I was so annoyed by the fan cycling that I just gave up and created a custom profile forcing the fan to about 50% until the CPU reaches a very high temperature. I actually preferred the constant annoyance of 50% to the horrible spinning up and down that would happen all the time. The cooling performance wasn’t horrible, but I just couldn’t handle the fan. I think I used the system for about an hour before I was determined that I needed an aftermarket cooler.

Noctua was kind enough to provide me with a review sample of their NH-U12S chromax.black edition heatsink to try out today.

Noctua

noctua_200x200px
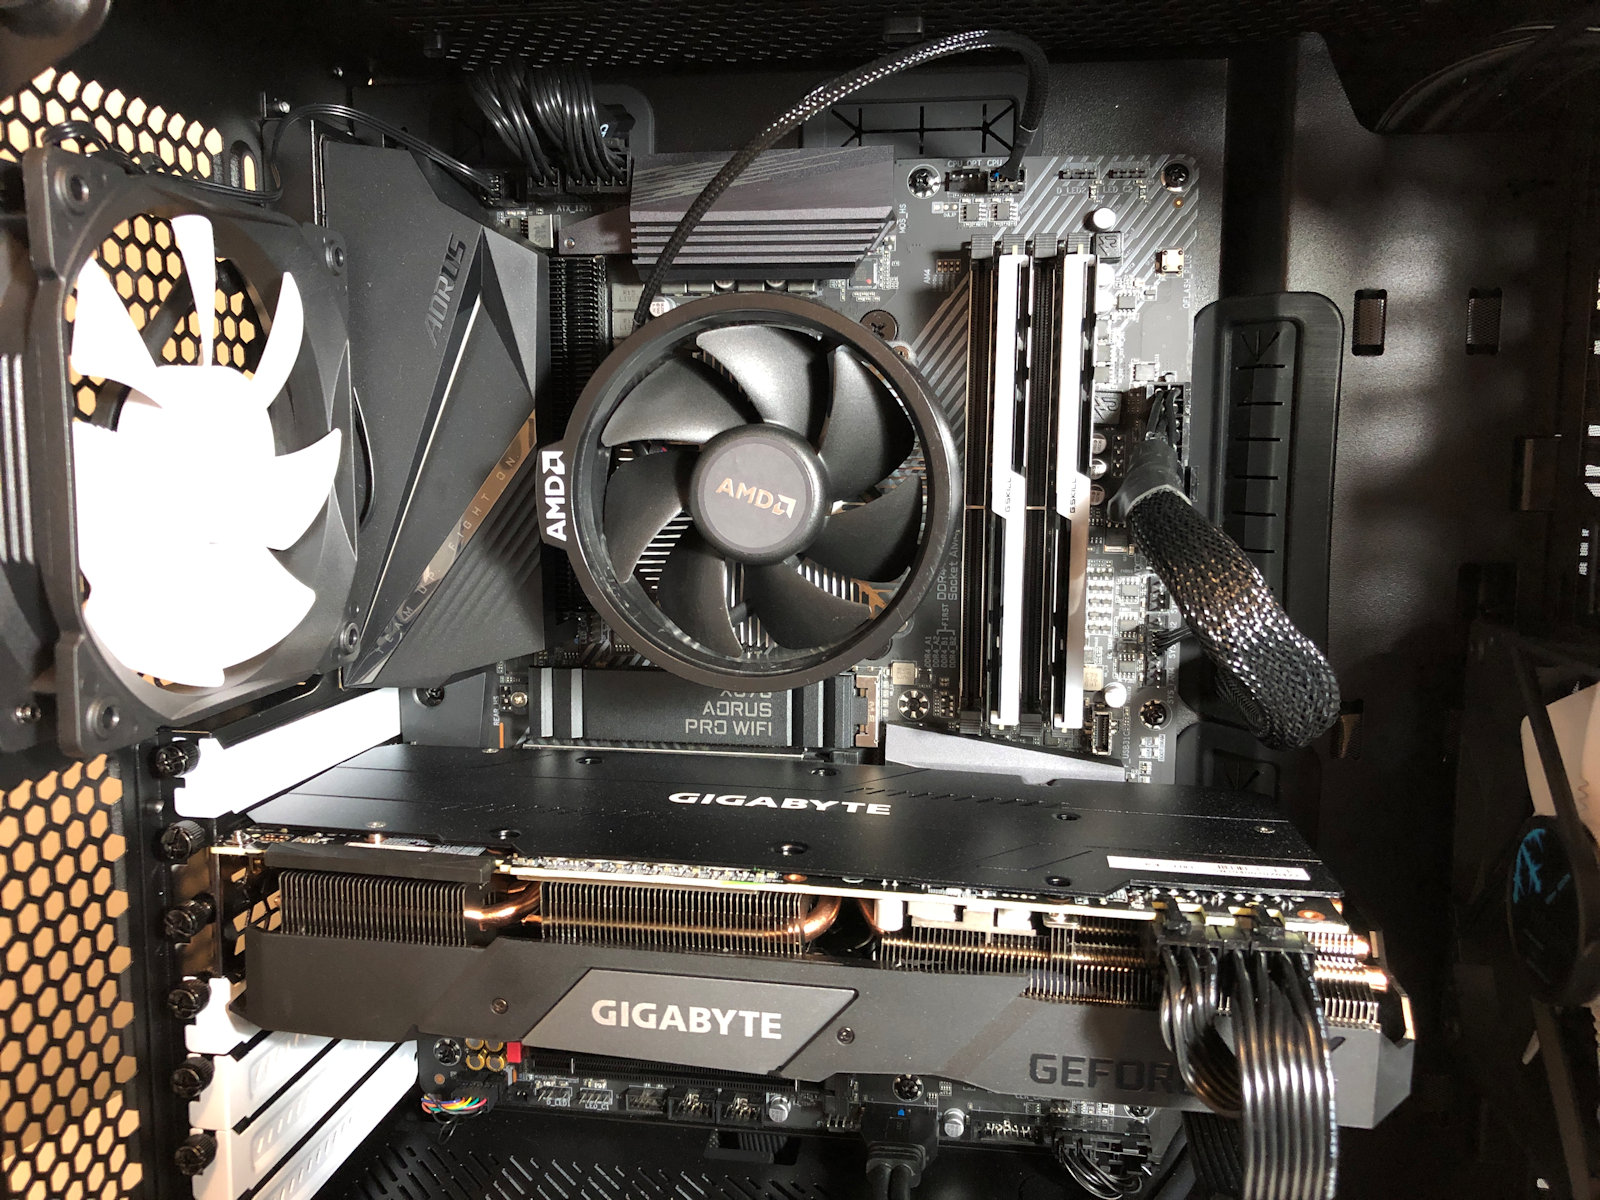
Noctua is an Austrian company well known for their low noise fans and high-end heatsinks. I’ve been using Noctua heatsinks for ages. In fact, I reviewed some of their original heatsinks and fans many years ago when I used to write hardware reviews. This included their original NH-U12P, the NH-C12P and the smaller NH-U9B. Back then, I praised them for their high-quality construction, near silent operation, excellent mounting hardware and most importantly – excellent cooling performance. That was over ten years ago, and it seems that Noctua is still very well respected for all the same reasons today.

Their gear has always been pricey compared to the competition, but when it comes to Noctua, you get what you pay for.

Noctua NH-U12S chromax.black

Noctua’s NH-U12S has been out for some time now, and it seemed to tick all of the right boxes for me. It is what Noctua calls a “classic sized” 120mm tower heatsink, designed to be somewhat slim and and sized to ensure compatibility with a variety of systems and motherboard layouts.

For this new Ryzen system, I wanted to try Noctua’s new chromax.black edition of the NH-U12S. Although I don’t mind Noctua’s signature beige/brown fans, I was excited to see their new all-black chromax version. Given the tempered glass window on my Fractal Design C case, I thought the all-black heatsink and fan would look pretty slick and match the look of the system beautifully.

With a matte black coating on the entire heatsink as well as a black NF-F12 fan, the NH-U12S chromax.black heatsink would look at home in any modern system.

Continue reading “Noctua NH-U12S chromax.black Heatsink Review”

Low-Voltage DDR3 – Performance, Heat and Power

When I built my new compute nodes, I chose PC3L-12800R DIMMs that could run in both standard 1.5V and 1.35V low-voltage modes. What I didn’t realize, however, is that Intel’s specification for 1.35V registered memory on Socket R based systems limits low-voltage operation to 1333MHz. The Supermicro X9SRL-F boards I’m using enforce this, despite the modules being capable of the full 1600MHz at 1.35V.

This meant I could run the modules at 1333MHz and enjoy the power/heat reduction that goes with 1.35V operation, or I could force the modules to run at 1600MHz at the ‘standard’ 1.5 volts. As I considered different configuration options, a lot of questions came to mind. Today I’ll be taking an in-depth look at DDR3 memory bandwidth, latency, power consumption and heat. I hope to answer the following questions in this post:

  1. What is the bandwidth difference between 1333MHz with tighter 9-9-9 timings versus 1600MHz at looser 11-11-11 timings?
  2. What is the latency difference between 1333MHz with tighter 9-9-9 timings versus 1600MHz at looser 11-11-11 timings?
  3. Just how much power savings can be realized at 1.35V versus 1.5V?
  4. How much cooler will my DIMMs run at 1.35V versus 1.5V?
  5. What about overclocking my DIMMs to 1867MHz at 12-12-12 timings?
  6. How does memory bandwidth and latency fair with fewer than 4 DIMMs populated on the SandyBridge-EP platform?

A Note On Overclocking

Although there are IvyBridge-EP CPUs that support higher 1866MHz DIMM operation, my SandyBridge-EP based E5-2670s and PC3L-12800 DIMMs do not officially support this. The Supermicro X9SRL-F allows the forcing of 1866MHz at 12-12-12 timings even though the DIMMs don’t have this speed in their SPD tables. Despite being server-grade hardware, this is an ‘overclock’ plain and simple.

I would never consider doing this in a production environment, but in a lab for educational purposes – it was worth a shot. Thankfully, to my surprise, the system appears completely stable at 1866MHz and 1.5V. Because the DIMMs can technically run at 1600MHz with a lower 1.35V, it would seem logical that at 1.5V they’d have additional headroom available. This certainly appears to be true in my case – even with a mixture of three different brands of PC3L-12800R.

With my overclocking success, I decided to include results for 1866MHz operation at 1.5V to see if it’s worth pushing the DIMMs beyond their rated specification.

Bandwidth and Latency

Back in my days as an avid overclocker, increasing memory frequency would generally provide better overall performance than tightening the CAS, RAS and other timings of the modules. Obviously doing both was ideal but if you had to choose between higher frequency and tighter timings, you’d usually come out ahead by sacrificing tighter timings for higher frequencies.

I fully expected the 1600MHz memory running at 11-11-11 timings to be quicker overall than 1333MHz at 9-9-9, but the question was just how much quicker. To test, I booted one of my X9SRL-F systems from a USB stick running Lubuntu 18.04 and used Intel’s handy ‘Memory Latency Checker’ (MLC) tool. MLC allows you to get several performance metrics including peak bandwidth, latency as well as various cross-socket NUMA measurements that can be handy for multi-socket processor systems. I’ll only be looking at a few metrics:

  1. Peak Read Bandwidth
  2. 1:1 Reads/Writes Bandwidth
  3. Idle Latency

memspeed-1

As I expected, despite the looser timings, memory bandwidth increases substantially as the frequency increases. About a 12% boost is obtained going to 1600MHz at 11-11-11 timings. An additional 10% was obtained by overclocking the modules to 1866MHz. Mixed reads and writes get a pretty proportional boost in all three tests.

Continue reading “Low-Voltage DDR3 – Performance, Heat and Power”

3D Printing CPU Trays

Better protection and storage for old Socket 7 and Socket 370 CPUs.

As you may know, I’ve been amassing a bit of a collection of retro hardware from the early to late nineties. This includes a number of CPUs from that era – especially those of the socket 7 variety. Storing these has been a bit of a challenge. I’ve never been satisfied with the protection a static bag alone provides for the delicate pins, and I don’t want to wrap up each CPU in bubble wrap either.

About ten years ago, I used to write PC hardware reviews and would quite often get processors from AMD in these neat little trays. Sometimes they held a single CPU, and sometimes as many as eight. They weren’t anything fancy but were perfectly sized for the chips and made of rigid plastic to protect the pins. You can still find these trays on eBay for more modern socket types, but they are much harder to come by for old processors.

3dtray-0
There are many varying socket 7 and socket 370 CPU designs out there.

Having acquired a 3D printer earlier this year, I thought this would be the perfect project to learn how to create 3D models from scratch. Up until now, I’ve mainly just printed community provided models and haven’t really done anything from scratch aside from some very basic shapes.

Getting the Measurements

I had already printed a couple of single CPU protectors from Thingiverse, but they were either not a good fit, used too much filament or took too long to print. I also wanted something that I could put a lid on and create trays that hold more than one CPU. These existing models gave me some ideas, but ultimately, I’d need to take some precise measurements of my CPUs and start from the ground up.

3dtray-4
A digital measurement caliper. A must-have for anyone with a 3D printer.

To begin, I used a ‘digital caliper’ tool that I purchased on Amazon for about $15. I can’t say enough how helpful this tool is to get precise measurements – it makes designing your objects so much easier.

To make sure the tray would work with a wide variety of socket 7 and socket 370 processors, I took a sample of each type I had in my collection:

  • Intel Pentium P54C (133MHz, ceramic top)
  • Intel Celeron Mendocino (400MHz, metal heatspreader). Same design and dimensions as later Pentium MMX CPUs.
  • Intel Pentium 3 (1000MHz Coppermine, no heatspreader)
  • Intel Pentium 3 (1400MHz, Tulatin, different heatspreader design)
  • Cyrix 6x86L (133MHz, gold-top, short heatspreader)
  • AMD K6-2 (500MHz, full heatspreader)
  • AMD K5 (100MHz, similar to Cyrix heatspreader).

Measuring all of these processors got me to the following conclusions:

  • The dimensions varied very slightly, but all were about 49.5mmx49.5mm +/- 0.1mm.
  • Pin height is 3mm on all CPUs
  • Most CPUs had a notch out of the corner, but some didn’t – like Coppermine P3s.
  • CPU thickness (not including pin height) varied from processor to processor due to the heatspreader designs. The thinnest was the P3 coppermine at only 2mm where the exposed core is located. The thickest was the Tulatin at 3.4mm.

Continue reading “3D Printing CPU Trays”

The 286 Revival

Being a retro PC enthusiast, my eyes are always open for deals on old hardware. A couple of weeks ago I came across an eBay listing for an as-is “Motherboard with ISA slots”. Looking closely at the posted images, I could see that the board was late-80s to early-90s vintage with sockets for individual memory ICs rather than the usual 30-pin SIMMs. Straining my eyes, I could faintly make out the markings on a Siemens brand 12MHz 286 processor. Having never owned a 286, I thought this may make a fun new project.

It was listed as-is because the seller didn’t have the hardware to test it. This is always a risky proposition, but when dealing with AT based systems, chances are that most people genuinely won’t have what’s needed. This is especially true if the seller doesn’t specialize in vintage hardware – which seemed to be the case here.

Continue reading “The 286 Revival”

5.25″ Floppy Drive Alignment

About a year ago, I bought a dusty old Panasonic WU-475 1.2MB 5.25” floppy drive from someone on Kijiji. It was being sold as-is, but for the price I decided to give it a go. To my surprise, it seemed to work initially, but within a few minutes it began to emit a horrid clanging and grinding noise. After opening the drive up, it was clear that the stepper motor had completely ceased up.

After applying some lubricant to the rail and cleaning the drive out, the motor was again functional. Thinking it would be good to go, I installed it and tested it out again. Excitement quickly turned to disappointment, however, when I discovered that the drive could no longer read any of my 5.25” floppies. After troubleshooting for a while, I discovered that if I formatted a disk using the drive, it could be read/written just fine. It was only diskettes from other sources that wouldn’t work. This behavior seemed to indicate that the drive somehow went out of alignment during my disassembly and cleaning.

I didn’t know much about floppy alignment aside from the fact that some specialized equipment that I didn’t have would be needed to correct the problem. Generally an oscilloscope is used to take readings during sector reads and then fine adjustments are made until the waveform looks correct. This was the suggested method I discovered in the Panasonic service guide for the WU-475.

Discouraged, I had shelved the drive and let it sit for the better part of a year. Fast forward to May 5th – the 26th anniversary of the classic PC game Wolfenstein 3D. It was time to do something retro. I really wanted to get this drive working again, so I did some more research on the subject. That’s when I came across an old thread at the Vintage Computer Forum. A commenter named Rick discussed a great piece of software called ImageDisk by Dave Dunfield. Because I had some brand new 1.2MB IBM formatted diskettes that had never been used or formatted by another drive, I could use these as a reference point and make the necessary adjustments. At any rate, it was certainly worth a try!


Every drive is different, but the WU-475 has a pair of screws that hold the stepper motor in position. The screw openings are not perfect circles and allow the mechanism to be slid back and forth a millimeter or so in each direction.


Firing up ImageDisk and running the alignment test, I was initially greeted by lots of question marks scrolling down the screen indicating that each sector could not be read. As I loosened the screws and slid the mechanism forward slowly, the PC speaker sprung to life and began to beep indicating successful reads. Once I had it in the position that seemed to yield the best results, I scrolled through all 80 tracks to ensure they could all be read. I then tightened the screws well and lo and behold, the drive works wonderfully again! I’m sure my alignment isn’t perfect, but for all intents and purposes, the drive works.

It’s always a great feeling when you can restore something old and forgotten. As always, do this at your own risk. Making adjustments like this on a live system is inherently risky, so be careful!

Unboxing a 22 Year Old Microsoft Mouse

Finding a functional serial mouse for my ongoing 486 restoration project has been a challenge. Up until now, my retro rigs have had PS/2 ports that work with a variety of older optical mice. This isn’t the case with many custom-built systems from the early to mid-nineties. Unless your system was an IBM or some other name brand, you likely had to use a serial mouse.

Because of the peripheral divide in those days, there was demand for PS/2 as well as serial mice. This prompted manufacturers to create what was then known as ‘combo mice’. These mice would come with a simple PS/2 to serial adapter to allow support for both standards. When it came to keyboards, most if not all PS/2 keyboards were compatible with the common 5-pin DIN connector with a simple adapter. This is because the two connectors are electrically compatible and just need pin translation. With mice, however, this is not the case. For a PS/2 mouse to work with a PS/2 to serial adapter, it must have hardware support for both standards under the hood. Today I’m going to be looking at one of the iconic combo mice from the mid-nineties – the Microsoft Mouse.

msmouse_1

I was fortunate enough to find this ‘new old stock’ mouse on eBay from a Canadian seller. It was brand new and still sealed, which is quite rare these days. Most of the serial compatible mice I’ve come across are quite worse for wear and demand exorbitant prices.

Continue reading “Unboxing a 22 Year Old Microsoft Mouse”

The 486 Restoration – Part 3

Welcome to part three of my 486 restoration project! Check out part one and two for more information on the parts I rescued from a badly neglected machine. I’m happy to report that the purchase of this banged up machine was not in vain. It didn’t come without it’s share of challenges but as you’ll see in this installment – it’s alive!

After removing the barrel battery and constructing an external battery pack in part 2, the next order of business was to get the machine put together on the work bench and powered up.

486_3-1
My test-bench isn’t pretty but it’s functional!

I’m using a modern PFC Seasonic 350W power supply with an AT 12-pin adapter. These old systems run almost entirely on 5 volt power and draw nothing from the 3.3V and little from the +12V rails. This can cause problems with some newer PSUs, but this Seasonic model fairs well with a 130W rating on the 5V rail. The only side effect of this power draw imbalance is a higher than usual +12.6V on the 12V rail. It’s not ideal, but I’d rather this than a flaky 25 year old AT power supply.

Since the system didn’t come with a video card, I pulled out an old ATI Mach 32 ISA card from the parts bin.


I recently picked this up from the great folks in the computer recycling department of The Working Center in Kitchener. It was sitting in a box full of old PCI graphics cards destined for e-waste. It’s always awesome to keep classic parts out of the landfill and support a great cause at the same time.

Continue reading “The 486 Restoration – Part 3”

The 486 Restoration – Part 2

Welcome to part two of my 486 restoration project! In my last post, I took a look at some of the rescued parts from a badly neglected tower. Today, I’ll be going through my adventures of getting a functional CMOS battery working on this system.

As mentioned briefly in part one, most 386 and early 486 systems included what are referred to as ‘barrel batteries’. These are rechargeable nickel cadmium (NiCAD) batteries and are usually rated at 3.6V fully charged. Unlike the coin cell batteries in newer systems, the battery charges whenever the system is powered on. In theory, this was great because the CMOS battery could last a long time in the system. Using a multi-cell rechargeable battery increases the cost of the board, so the CR2032 coin cell solutions were most likely used for cost savings first and foremost in the years following. This is all well and good, but nobody really envisioned these systems to be in use 25 years later as is the case with this system here.

486-8
A 25 year old Varta 3.6V NiCAD – it’s gotta go before the inevitable happens.

A quick google search on these barrel batteries, and you’ll see just how problematic these can be when they age. Not only can they leak and cease to function, but when they do they are very corrosive to copper traces and other types of metal on the board. If caught early enough, the board can be cleaned and may still be functional. Unfortunately, the damage can sometimes be permanent.

Continue reading “The 486 Restoration – Part 2”