I’ve been playing around with Synology’s DS1621+ in my home lab the last couple of weeks and have been thoroughly impressed so far. In my last couple of posts, I got the storage pools created and networking and iSCSI configured. As I was going through the manual setup process, I came across Synology’s Storage Console for VMware plugin. This plugin allows some degree of control of the NAS unit directly from within the vSphere Client and automates some simple workflows. Here are some high level features:
- Datastore Creation – Creates a backing LUN, target and the VMFS or NFS datastore in a single workflow.
- Datastore Resizing – Resizes the backing LUN and expands the VMFS datastore in a single workflow.
- Host Setting Optimization – Modifies timeout values, I/O queue depth and VAAI settings.
- Log Bundles – Allows collection of support log bundles of the Synology NAS from the vSphere Client.
- Status Dashboard – Provides NAS status and LUN status information.
- Enables application-consistent LUN snapshots.
You can find some more information on the storage console plugin here. As long as you have a supported Synology NAS running DSM 6.2.3 or later and vCenter Server 6.5 U2 or later, you can give it a try.
Installation is very straight-forward. The plugin is installed by deploying a small CentOS based OVA appliance into the environment. During deployment, you’ll be prompted for your vCenter credentials and connection information.

Once the VM powers on, it’ll automatically connect to vCenter Server and install the plugin for you. Opening the VM’s console will greet you with a simple GUI that allows you to change passwords and basic TCP/IP settings.
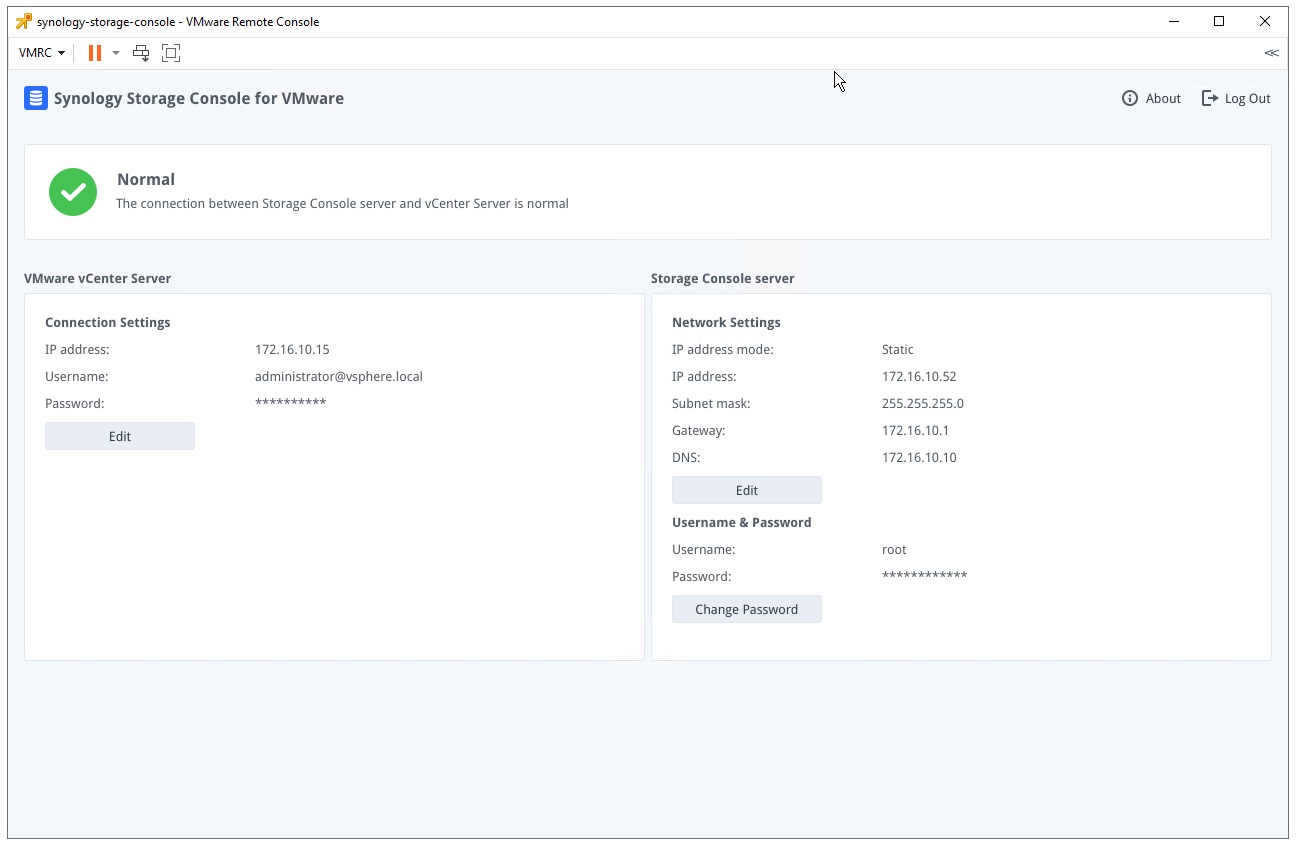
The default username and password for this appliance is root/synology, so be sure to change it.
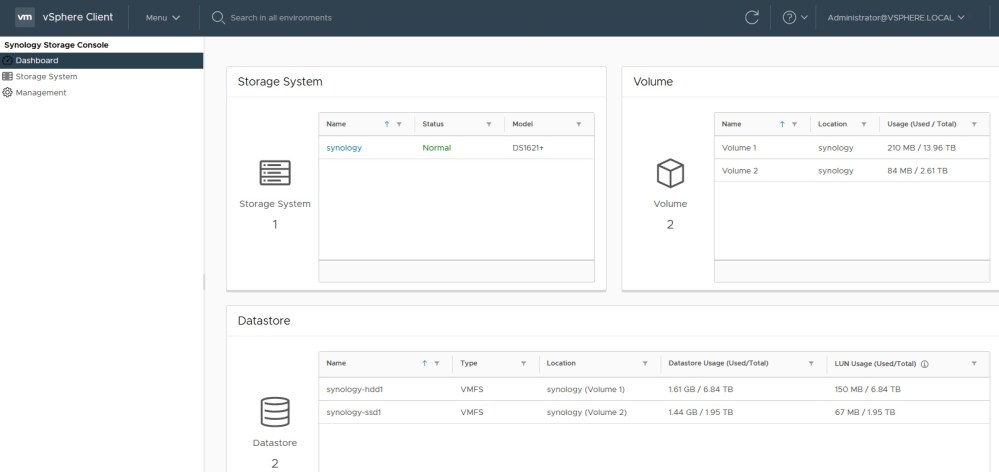
After logging out and back into the vSphere Client, the Synology Storage Console plugin should be available via the main menu. You’ll first need to add your NAS unit(s) in the Storage System page. Once done, you’ll be able to use the features the plugin offers. Some simple stats are available from the dashboard section. You can see your storage pools, volumes and available free space. This is useful if you are over-allocating space via thin provisioning.
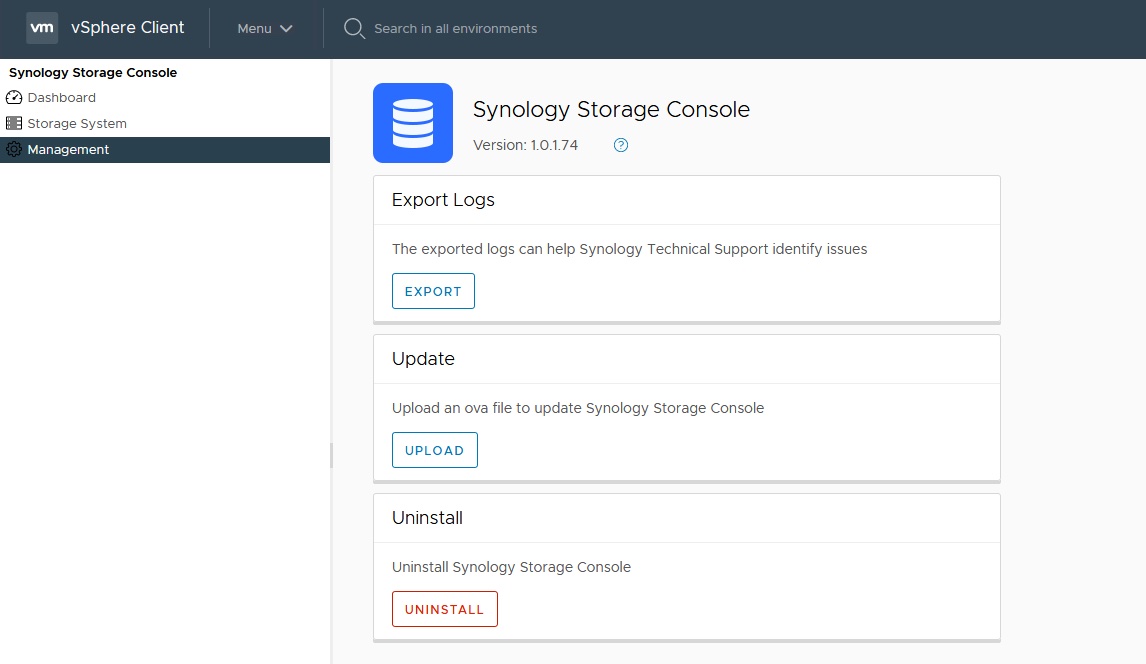
Under the management tab, you’ll find a few other options including the ability to generate and download support bundles for your NAS unit. You can also update and remove the plugin from here. Those installing this plugin may feel a bit underwhelmed by what’s found here, but the really useful features are found in right-click context menus for various objects in the vSphere Client.

You’ll notice a “Synology Storage Console” menu item when you right click an ESXi host in your inventory. From here, you have the option to create a new datastore and “optimize host settings”.
Datastore/LUN Creation
The plugin’s “New Datastore” workflow is useful because it combines iSCSI target creation, LUN creation, storage rescan and VMFS datastore creation all within a single workflow.
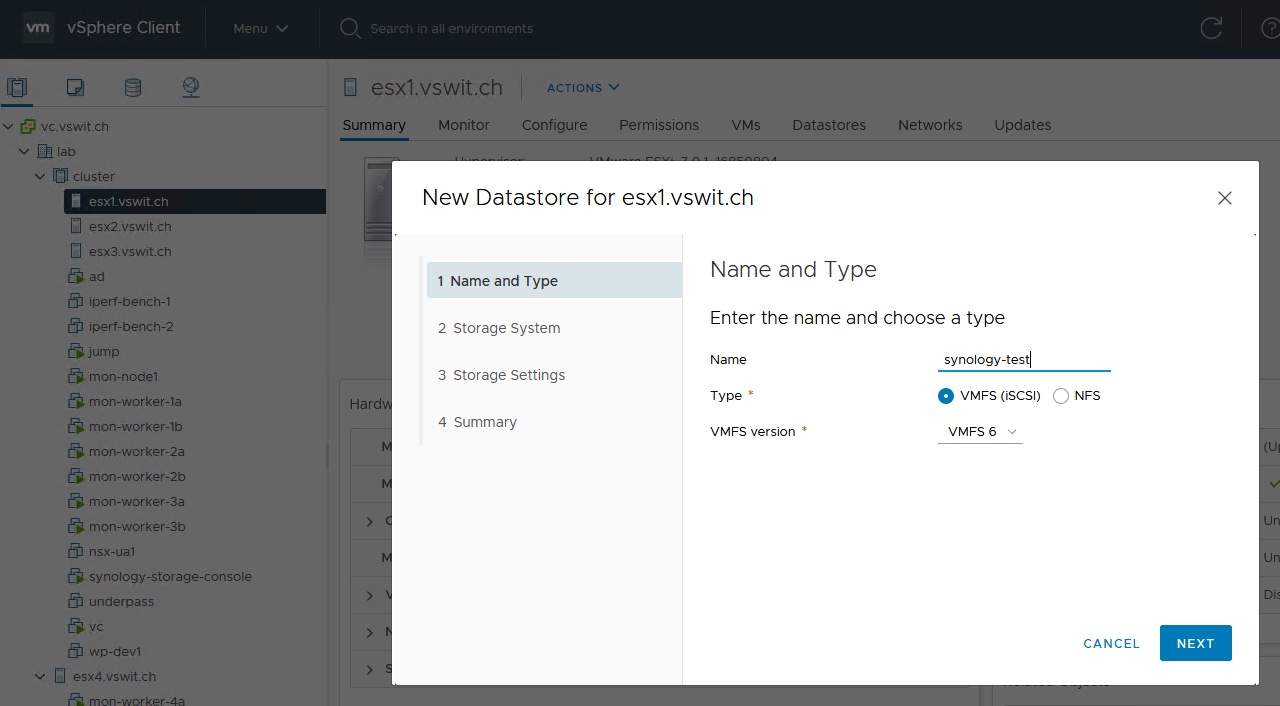
Both VMFS and NFS datastores can be created using the new datastore wizard. This can all done without ever having to login to the NAS.
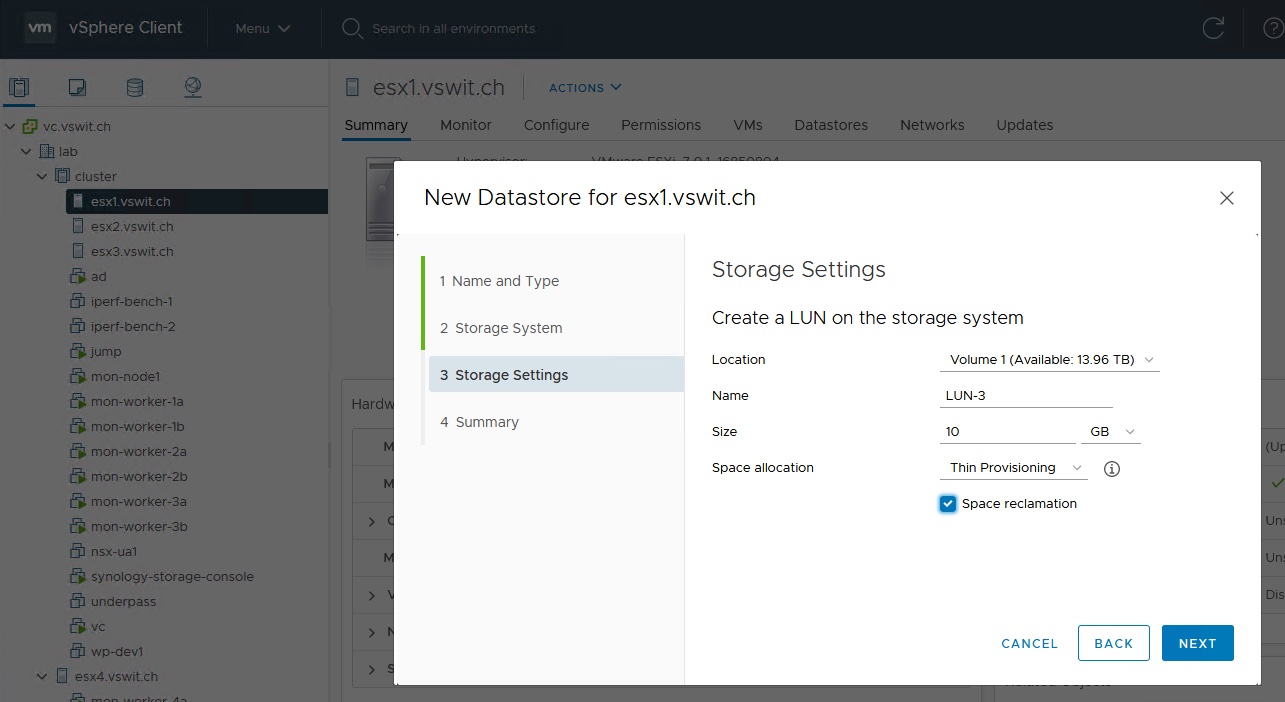
Most of the pertinent LUN configuration is available for selection, including network interface binding and space allocation type.
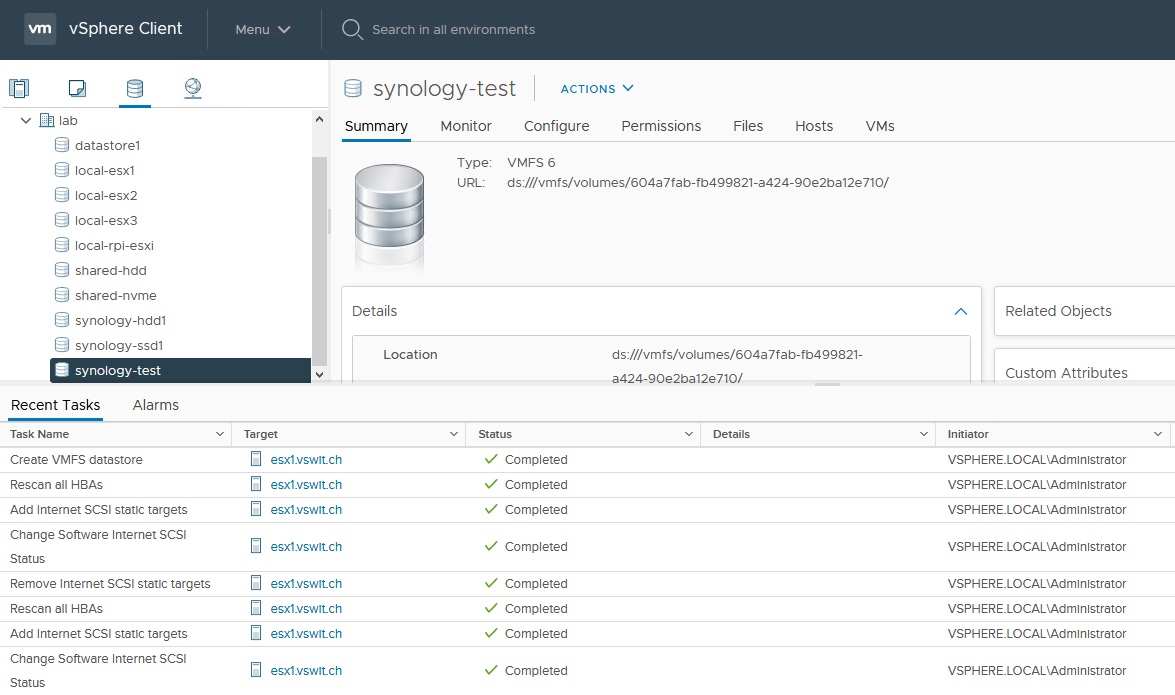
As seen above, there are a number of automated tasks that get performed during datastore creation, including iSCSI target addition, rescans and datastore creation. This is in addition to what is being done on the Synology NAS behind the scenes as well.
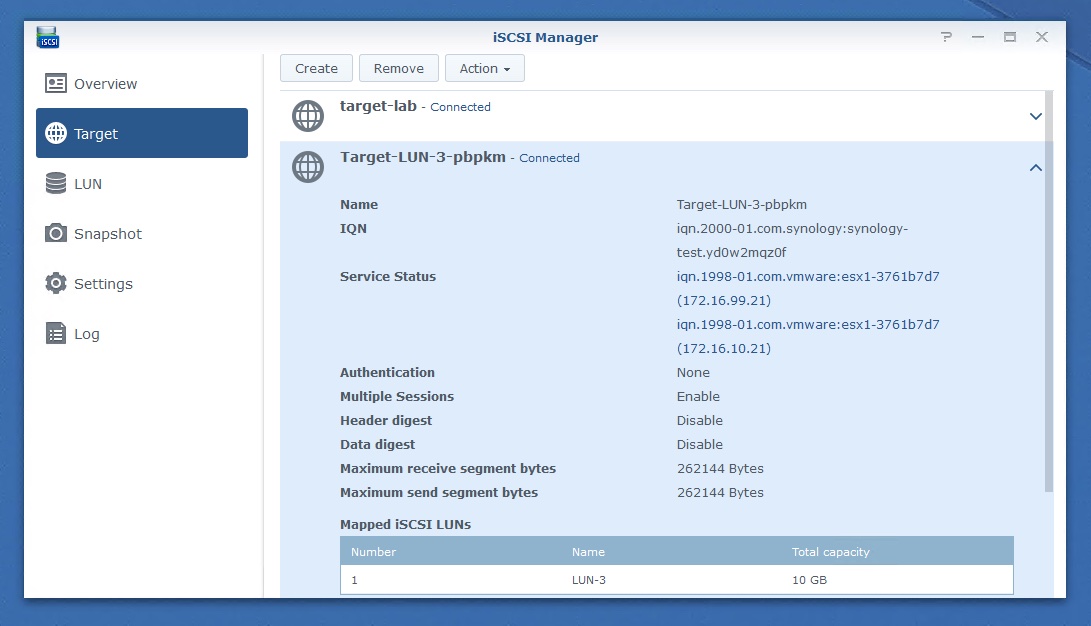
The process was very seamless, but the only unfortunate limitation is that using this workflow always creates a new target for each LUN as opposed to allowing the datastore to be associated with an existing target. This isn’t really a problem, but I would prefer to have multiple LUNs and datastores associated with a single target for simplicity. Above you can see the target associated with LUN-3 that was created using the Synology Storage Console plugin. I was happy to see the “Multiple Sessions” was enabled by the workflow. This is not enabled by default when creating targets manually.
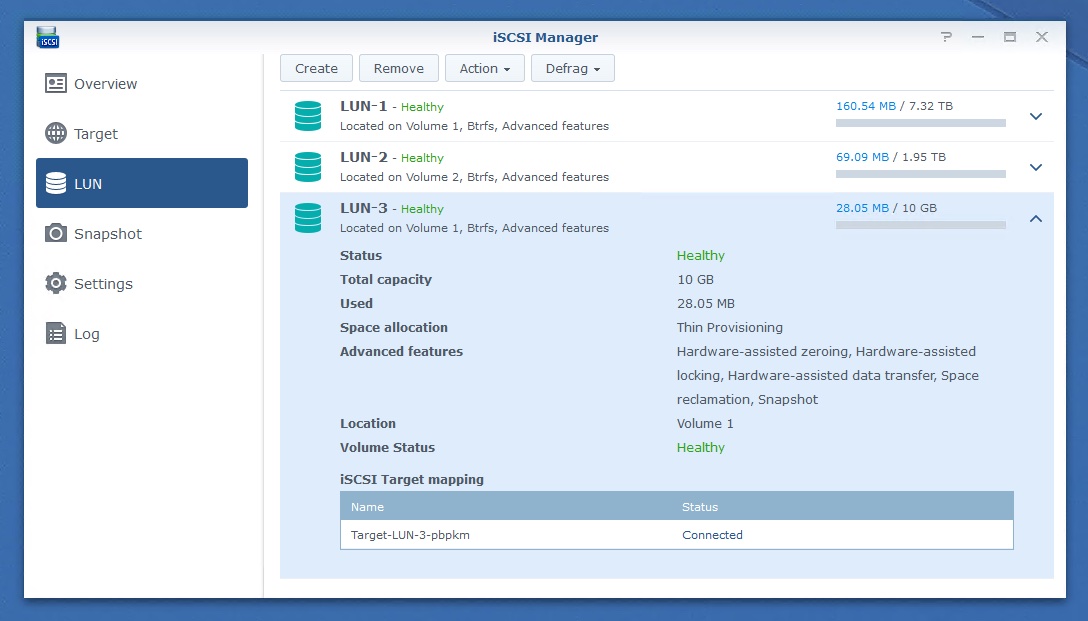
And here is the LUN created from the plugin as seen from Synology’s DSM. All of the relevant VAAI hardware acceleration features were enabled automatically, which is great.
Optimizing Host Settings
The other interesting feature found in an ESXi host’s right click menu is the ability to optimize the host settings.
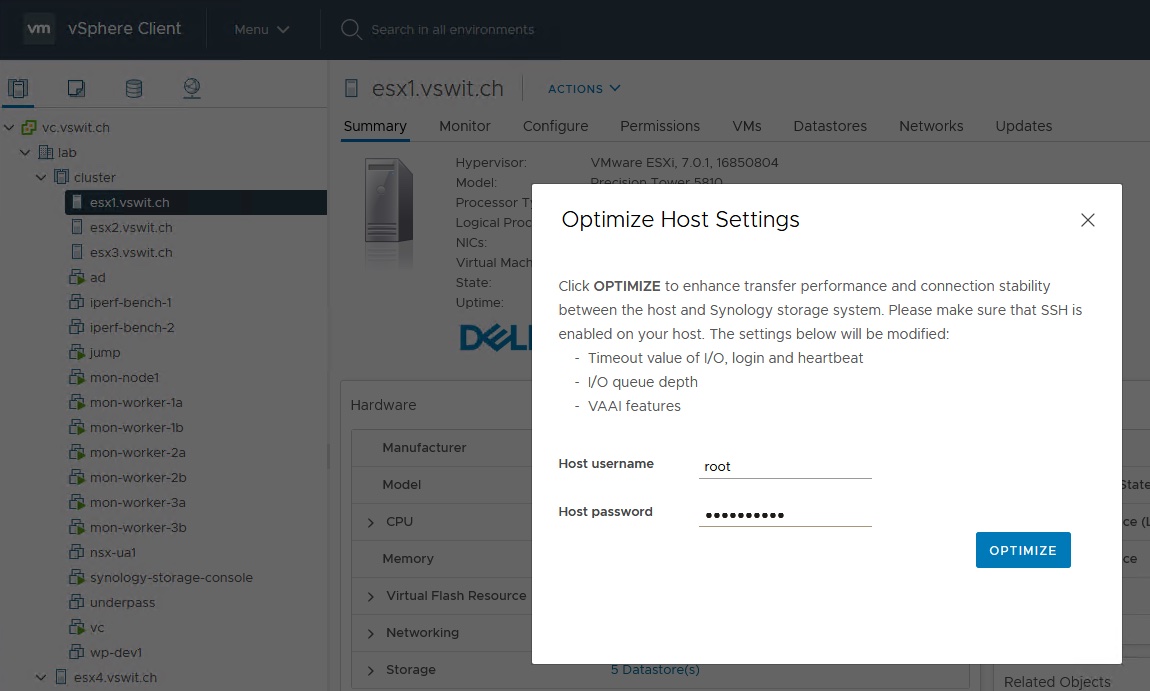
In addition to increasing, I/O queue depth, this optimization will also modify some timeout and heartbeat values. You need to provide the host’s root credentials in order for the plugin to connect and make the required configuration changes. I didn’t bother executing this as I found performance to be excellent out of the box and didn’t want to move away from the defaults. I may look more into these tweaks in the future.
Datastore/LUN Resizing
Another useful feature is the “Expand Datastore” workflow.
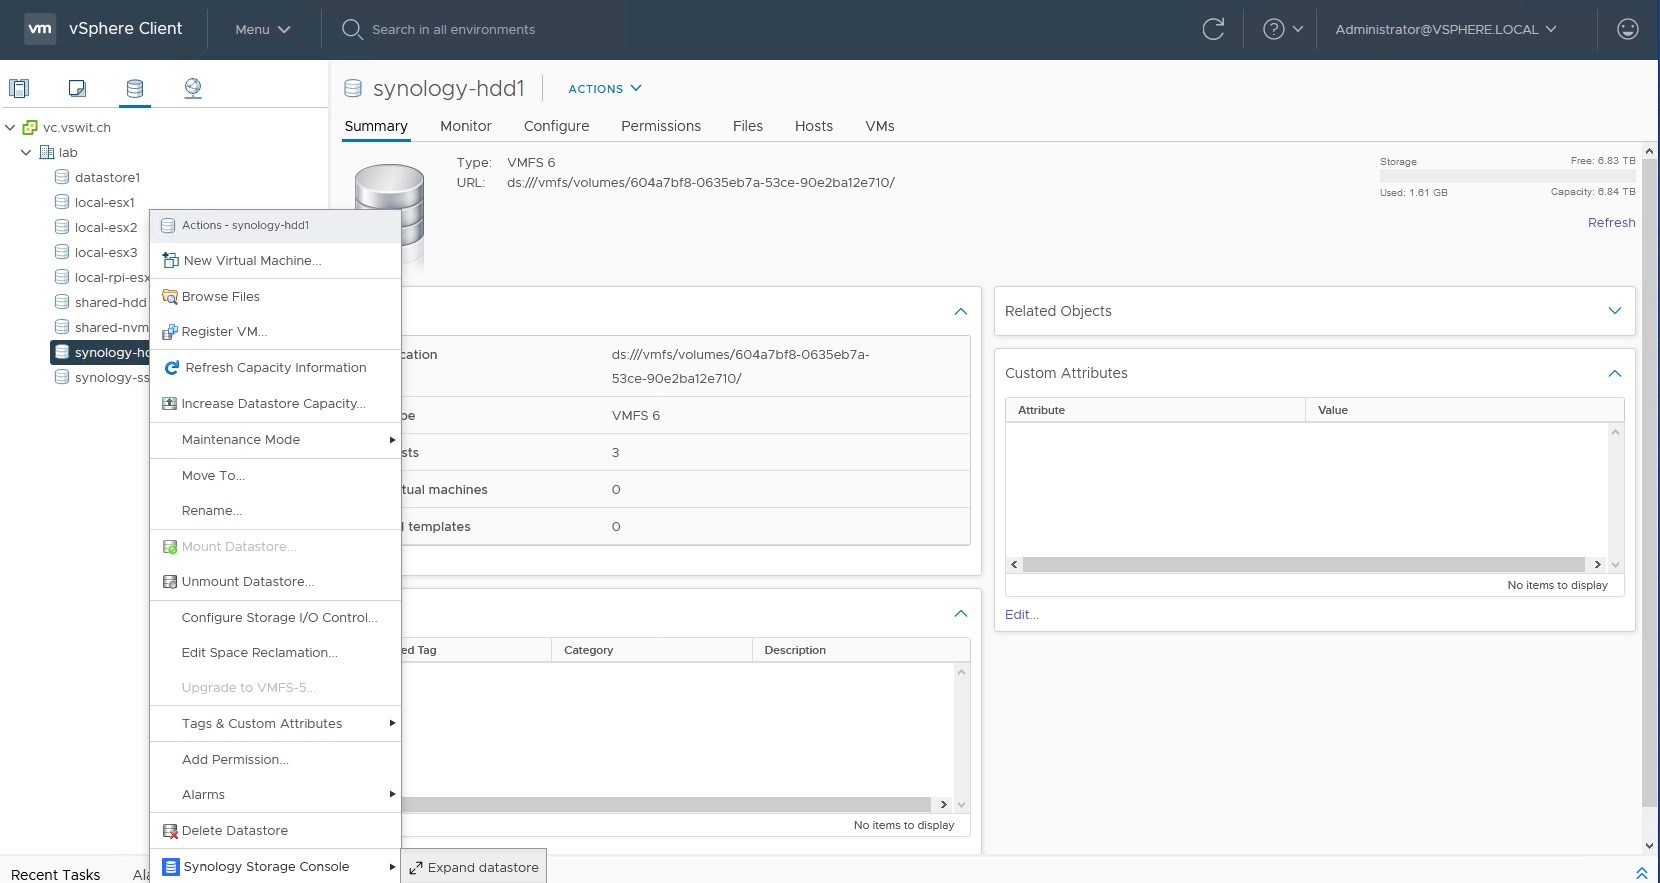
The Datastore expansion option can be found in the right-click context menu for a Synology backed datastore.
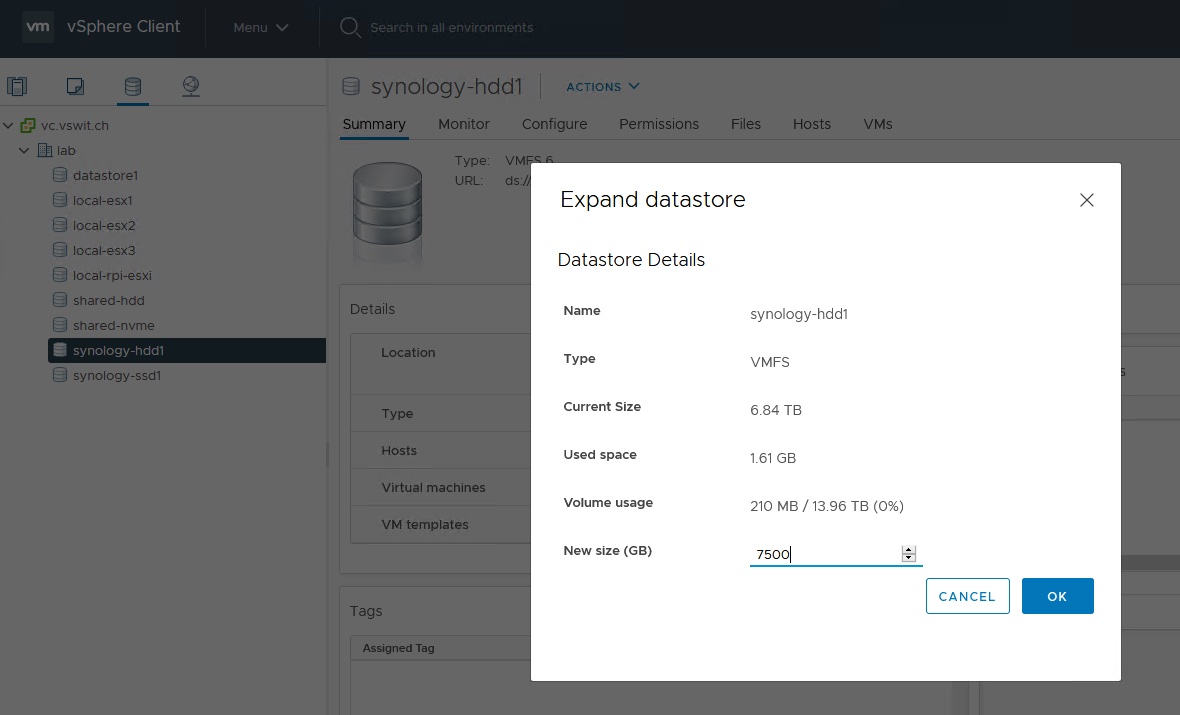
Normally, increasing the size of a datastore would be a three-step process. First, you’d need to increase the LUN size from your storage box, then rescan and finally, increase the VMFS datastore size. This workflow does all three steps in one simple operation. Volume usage is conveniently displayed, and you just need to enter your desired new size.
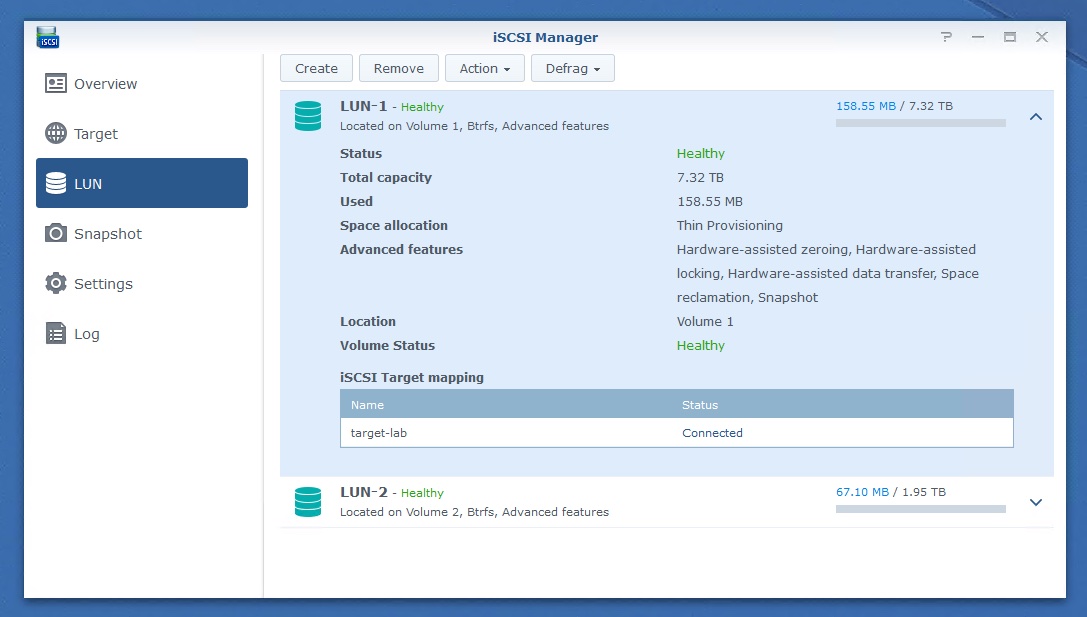
From DSM, you can see that the LUN is now about 500GB larger.
Application-Consistent Snapshots
last but not least, the Synology Storage Console enables “application consistent” snapshots to be taken from DSM.

And This type of LUN snapshot ensures that all in-flight data is written to the LUN before the snapshot is taken and ensures data consistency. DSM needs to be able to communicate with vCenter Server to ensure this happens before the snapshot is taken and the Storage Console VM is the link into vCenter to make this possible.
Conclusion
Synology’s Storage Console for VMware plugin allows storage administrators to execute several different multi-step tasks in convenient one-step workflows. Tasks that would normally require you to make changes in both DSM and in vSphere can be done without ever having to leave the vSphere Client. It also enables application-consistent LUN snapshots to ensure data consistency. It’s great to see Synology integrate more closely with VMware vSphere, rather than being a separate and discrete storage solution.

The current release supports also VASA 1.0. the url is: https://:8443/vasa/services/vasaService
Username and people is root/synology