In my previous post, I got the hardware all setup on the DS1621+ test unit that Synology was gracious enough to loan me. Today, I’ll be doing some of the initial storage configuration in preparation for getting iSCSI configured for use in my vSphere lab.
But first, I’ll need to get some flash storage added to the NAS.
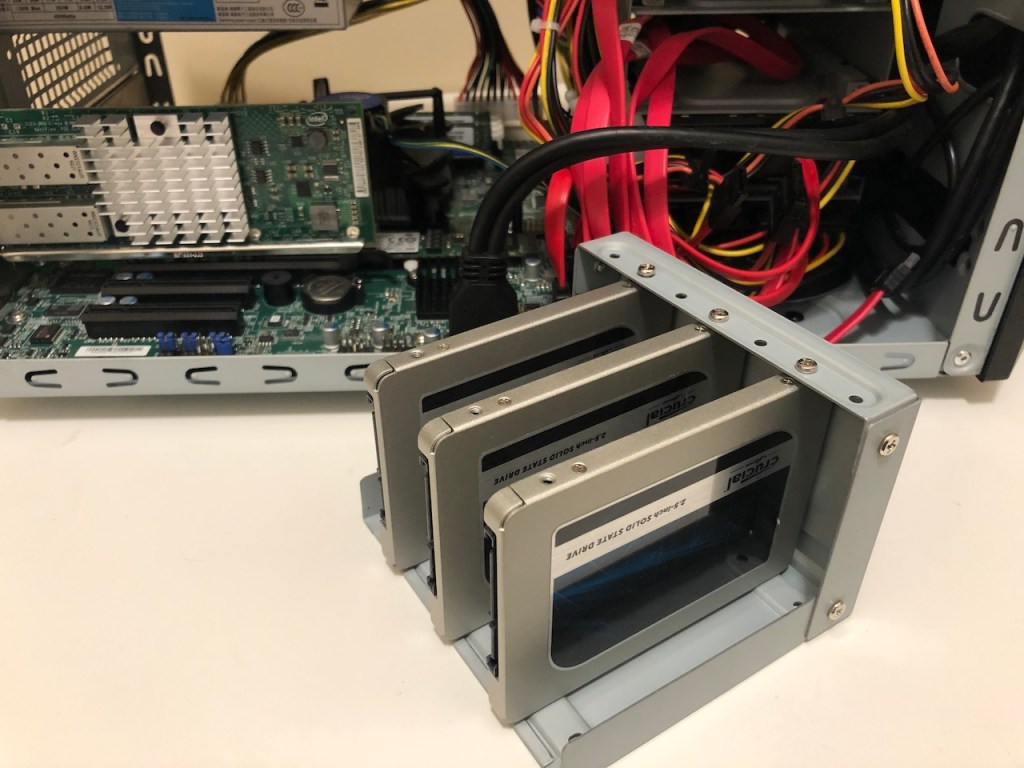
I’ve got three Crucial MX500 1TB drives that I’ll be removing from my TrueNAS box for testing in the DS1621+. Although they are getting a bit dated, they are still solid performing SATA SSDs. Don’t forget to properly remove your LUNs/Datastores!
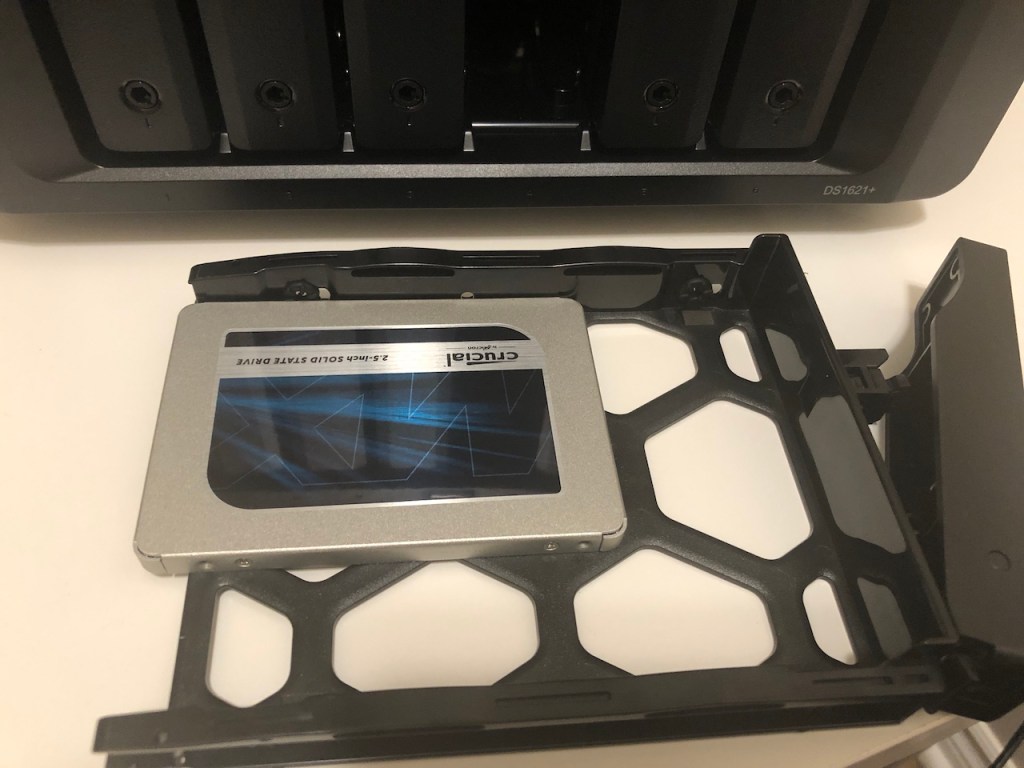
Installing the 2.5-inch drives is an easy job. Four small screws attach to the back of each sled and hold the drives in the correct position.
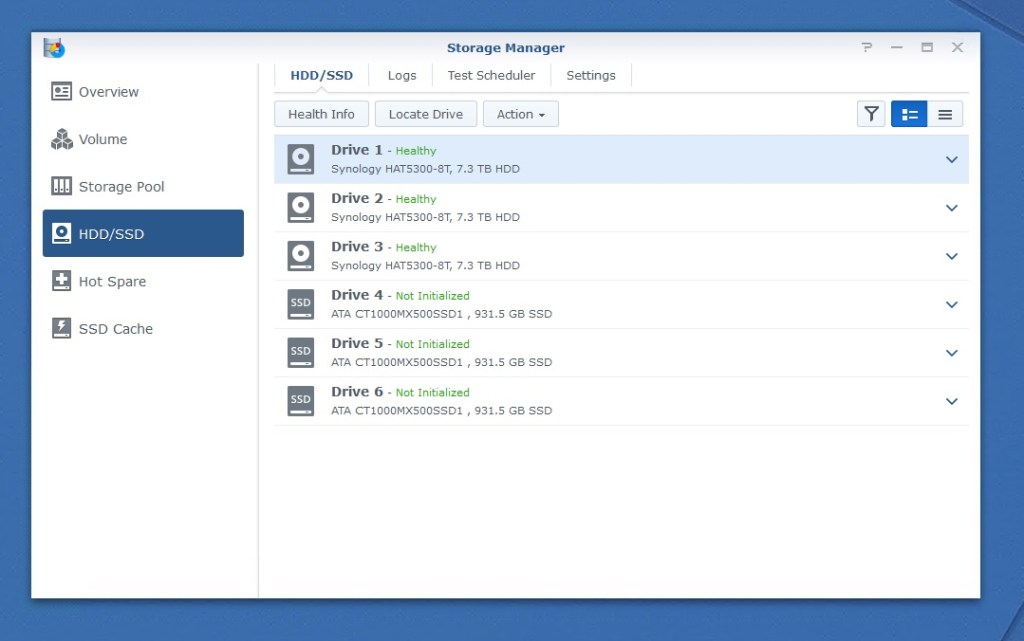
With all six drive bays populated, we’re ready to begin getting the storage prepared for use on the DS1621+.
Creating Storage Pools
The first thing that needs to be done before you can use the drives is to create one or more storage pools. This is where you group disks and apply a RAID level to them. When clicking the Create button, you’ll be greeted by the storage pool creation wizard.
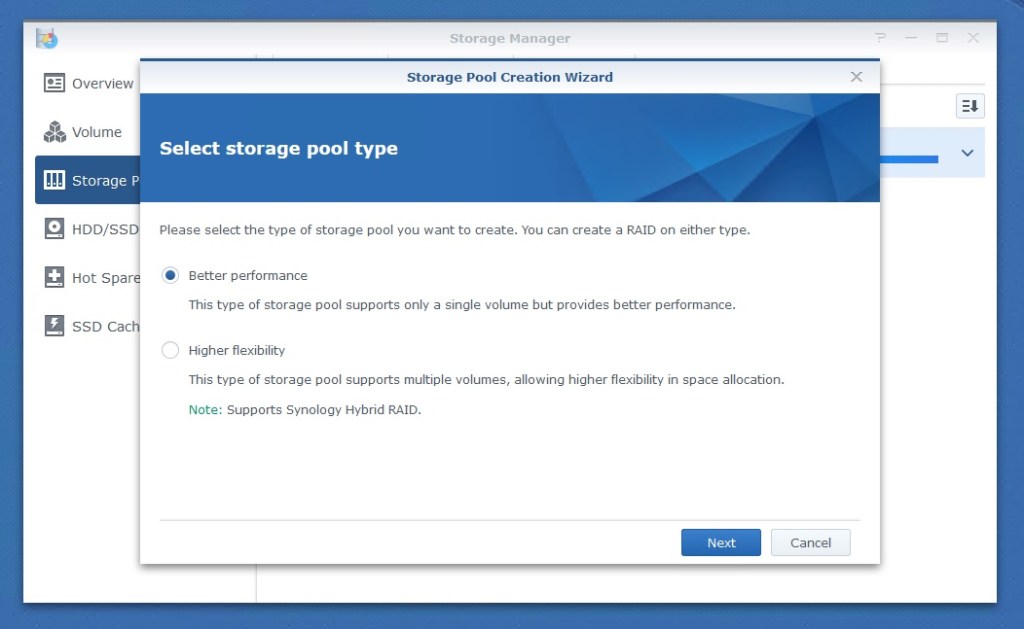
You’ll first be prompted to use classic RAID levels or to use Synology’s Hybrid Raid or SHR. SHR makes the creation of a pool easier, but its best feature is the ability to make use of all disk space when disks of different sizes are in the pool. Traditional RAID levels can waste a lot of space in this type of situation. It is great for beginners, but we’ll stick with the classic RAID-levels.
Continue reading “Synology DS1621+ Storage Pool and Volume Creation”