This is admittedly a well-covered topic in both the VMware public documentation and in blogs, but I thought I’d provide my perspective on this as well in case it may help others. Unfortunately, improper LUN removal is still something I encountered all too often when I worked in GSS years back.
Having done a short stint on the VMware storage support team, I knew all too well the chaos that would ensue after improper LUN decommissioning. ESX 4.x was particularly bad when it came to handling unexpected storage loss. Often hosts would become unmanageable and reboots were the only way to recover. Today, things are quite different. VMware has made many strides in these areas, including better host resiliency in the face of APD (all paths down) events, as well as introducing PDL (permenant device loss) several years back. Despite these improvements, you still don’t want to yank storage out from under your hypervisors.
Today, I’ll be decommissioning an SSD drive from my freenas server, which will require me to go through these steps.
Update: Below is a recent (2021) video I did on the process in vSphere 7.0:
Step 1 – Evacuate!
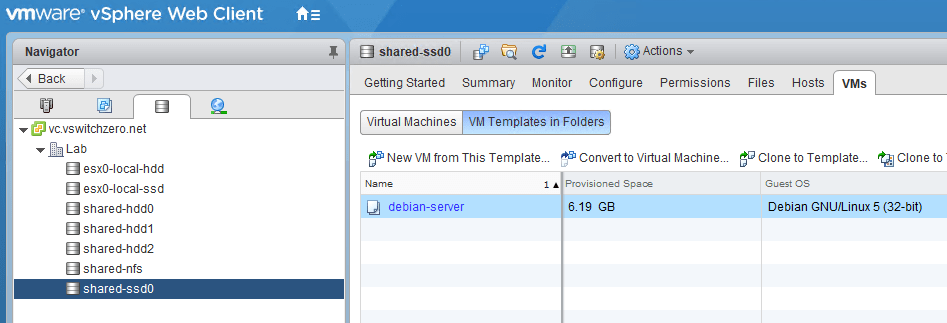
Before you even consider nuking a LUN from your SAN, you’ll want to ensure all VMs, templates and files have been migrated off. The easiest way to do this is to navigate to the ‘Storage’ view in the Web Client, and then select the datastore in question. From there, you can click the VMs tab. If you are running 5.5 or 6.0, you may need to go to ‘Related Objects’ first, and then Virtual Machines.

In my case, you can see that the datastore shared-ssd still has a VM on it that will need to be migrated. I was able to use Storage vMotion without interrupting the guest.
Templates do not show up in the normal view, so be sure to check specifically for these as well. Remember, you can’t migrate templates. You’ll need to convert them to VMs first, then migrate them and convert them back to templates. I didn’t care about this one, so just deleted it from disk.
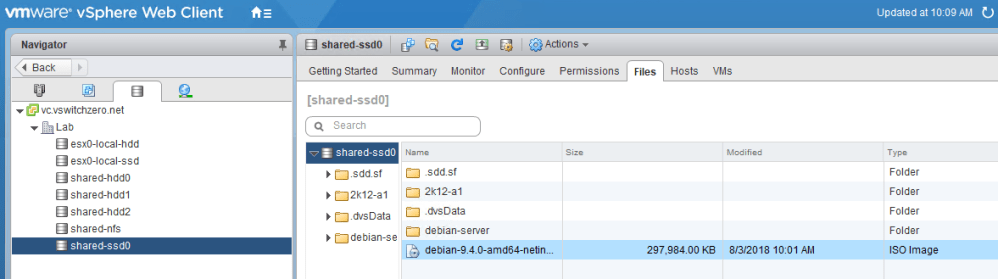
Last but not least, you’ll want to look for other files that may be stored on this datastore. In my case, I’ve got an ISO sitting in the root of the datastore. It’s possible that you may find other VMs stored here that have been removed from inventory at some point as well. At any rate, be sure to move these files off if you want to keep them.
Note: You’ll notice a directory called .dvsData in my datastore view above. This is a distributed switch configuration backup of sorts that can be used by ESXi hosts if vCenter Server becomes unavailable. This can be safely disregarded as vCenter stores this in multiple locations and can automatically re-create it elsewhere if required.
After migrating off all VMs, templates and files, I’m ready to move on to the next step.
Step 2 – Unmount the Datastore
Once your datastore has been cleared of VMs, templates and files, you can unmount it. Unmounting a datastore does not wipe it out or remove the LUN from your hypervisors. Rather, it instructs your hosts to stop using the datastore and it’s underlying VMFS filesystem in any way, shape or form. In a sense, the datastore will be completely ignored.
In more recent versions of vSphere – including 6.0, numerous hosts can have a datastore unmounted using the ‘Unmount Datastore’ wizard. You can find this by right clicking on your datastore in the storage view of the Web Client.
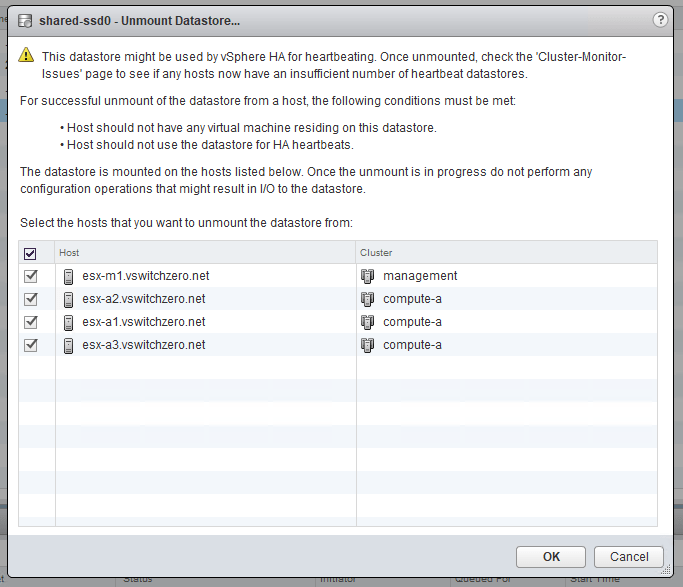
In my case, I’ve got four hosts utilizing this datastore across two clusters. Take heed of the HA heartbeating warnings in the above dialog. In my case, that datastore wasn’t used for heartbeating, but you may want to proactively select specific datastores in your HA cluster settings to avoid impacting HA reliability in any way.
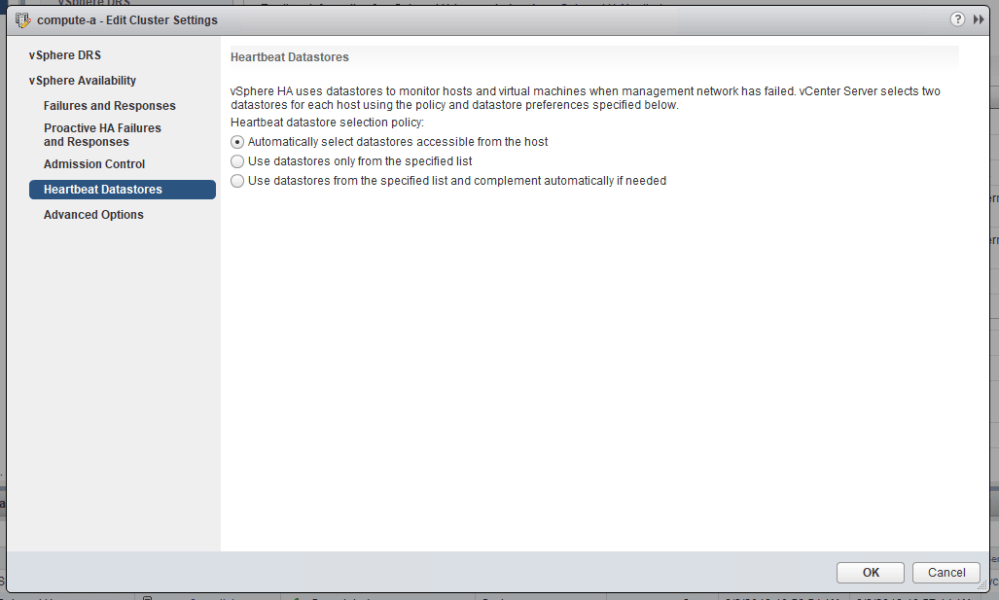
If you do happen to unmount a datastore used for HA heartbeating, you’ll get a cluster alarm after it’s completed, but it shouldn’t stop you from proceeding. Because HA selects two shared datastores for heartbeating in it’s automatic setting, the removal of a single datastore likely won’t break HA functionality in any way – unless of course you are removing your only shared datastore.
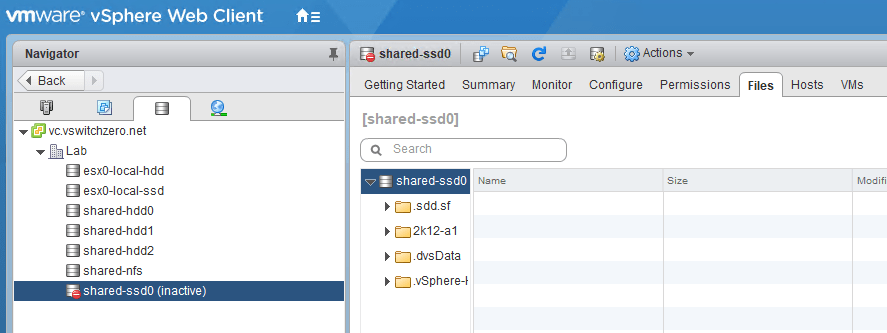
Once the process is finished, you’ll see the datastore in question appear as ‘inactive’ with a red badge on it.
Note: I see many administrators assume this is the point where the LUN can be safely removed or unpresented from their SAN. It is NOT safe to do this yet. We’re only half way through the process. We’ve only dealt with the filesystem at this point – not the underling storage device/LUN.
Step 3 – Detach the LUNs
The final step in the process from vSphere’s perspective is detaching the underlying storage device. Because the datastore sitting on this LUN has been unmounted, it’s now safe to detach the LUN from all of the ESXi hosts using it.
Update (2021): Newer versions of vSphere (i.e. 7.x) allow you to detach a LUN from multiple ESXi hosts simultaneously. You’ll be prompted to detach from multiple hosts if this feature is available for you.
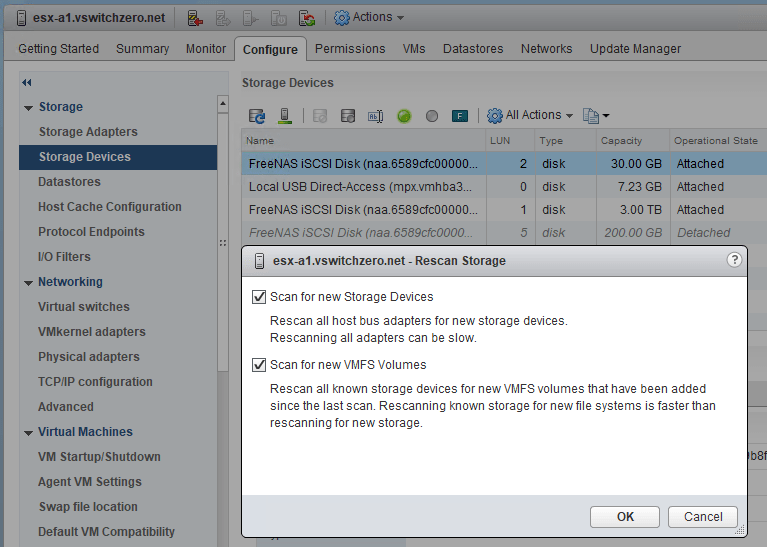
This can be achieved in the ‘Storage Devices’ view from each ESXi host in the inventory:
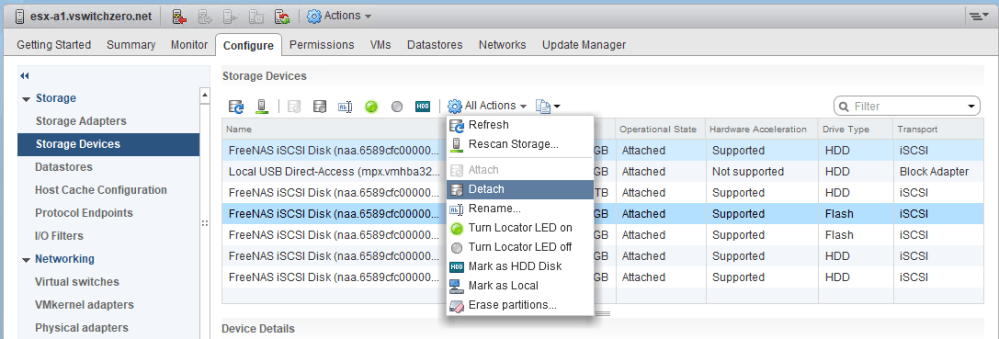
Once the disk/LUN is detached, it’ll appear greyed out and italicized as shown below:
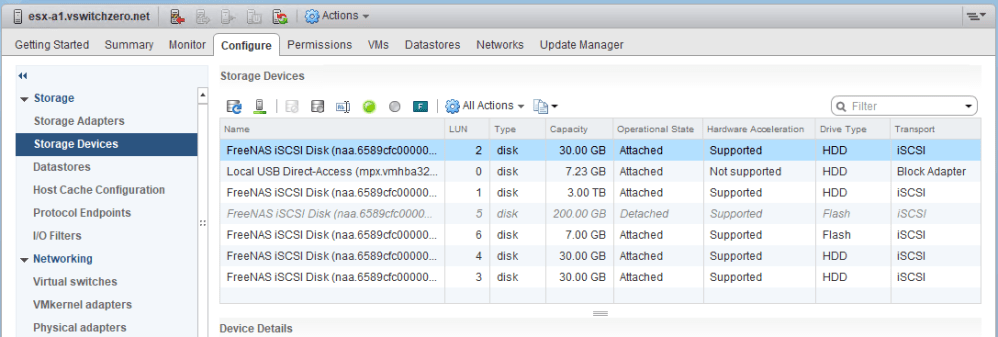
At this point, we’ve essentially instructed each ESXi host to completely ignore this storage device. The host will no longer issue any SCSI commands to the LUN, nor will it care about anything that happens to it. Should this LUN disappear from existence – which is exactly what we’ll be doing next – it is of no consequence to the hypervisor whatsoever.
Unfortunately, there isn’t a LUN detachment wizard in the UI – at least not yet – so this can be a very manual process. If you’ve got many hosts, I’d recommend looking into some PowerCLI scripting options, which can save you a lot of time. David Stamen has a great script that you can use that does just that. You can find it here.
Step 4 – Remove the LUN Presentation
So once your LUN has been detached from all your hosts, it’s now safe to either ‘unpresent’ it from your storage fabric, or nuke it completely from your SAN.
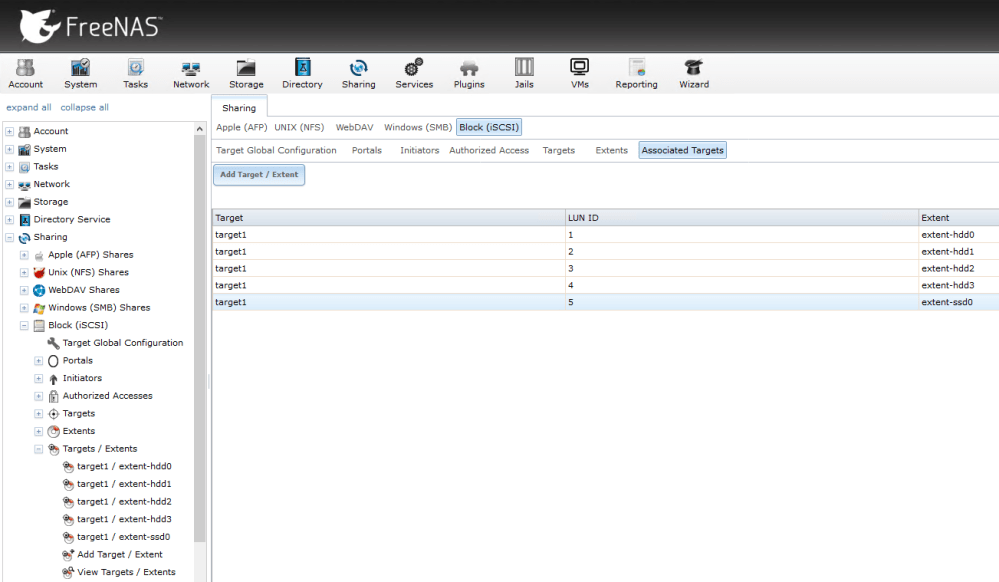
Since I’m using freenas, I’ll be removing the iSCSI extent associated with LUN 5 before I deal with the underlying disks. This is sufficient to ‘unpresent’ it from all of the hosts. I won’t get into this part of the process as it’s going to vary for each storage vendor. Please be sure to refer to your SAN documentation or reach out to your vendor if you need assistance with this part.
Step 5 – Rescan!
After removing the iSCSI extent in FreeNAS, LUN 5 no longer exists. From an ESXi host perspective, however, LUN 5 is still showing up as an italicized detached device. We now need to rescan the HBA in order for ESXi to discover that this LUN is no longer associated with the configured iSCSI target.
Rescanning the HBA may take some time depending on how many LUNs you have. In my case it only took a few seconds.
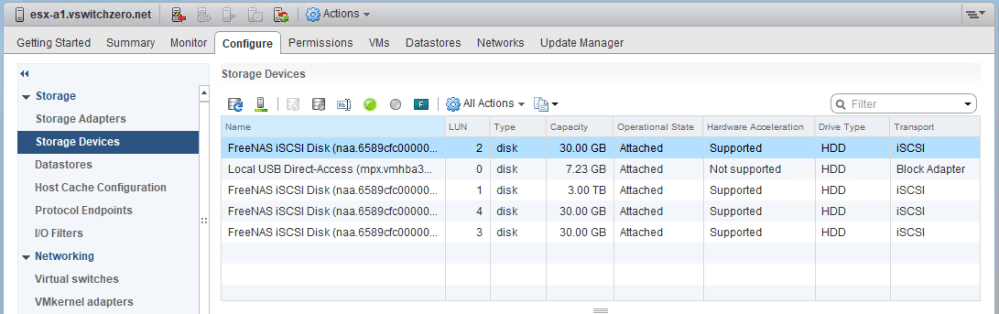
As you can see above, LUN 5 is gone – all traces of the old datastore and the storage device have been removed. You’ll need to repeat this rescan on all ESXi hosts that had the LUN detached. Alternatively, you can do the rescan operation on all hosts in a cluster by right clicking the cluster, going to storage and then rescan.
Conclusion
And there you have it. There are a few steps in this process but believe me when I say it’s worth taking the time to do it properly.
If you have any questions, please feel free to comment below or reach out to me on Twitter (@vswitchzero).

Fantastic! Worked perfectly and didn’t run into any issues.
Excellent!
This process still leads to vCenter throwing all-paths-down alarms. Any way to avoid?
As a matter of fact it did here too (VCSA 6.5U2) and having done this procedure a lot of times before I don’t think that was always the case. Strange.
Also I am wondering what has become of “esxcli storage core device detached remove -d naa…..” which usually had to be issued after SCSI rescan.
Thanks a lot for your post cause it really helped on my issue. I followed the steps and got the job done.
Great tutorial. Thanks.
Very nicely done guide! The best I found on Internet. Mike – thank you doing it.
I do not have VCenter, do i have to do this manually on all ESX host? it’s v5.5
Hi Sayeed, yes if vCenter is not in the picture it will need to be done on a host-by-host basis. Sorry for my slow reply on this.