On my daily perusal through my favorite eBay seller’s inventory, I came across a well used and somewhat scratched up Dell T110 tower server. It probably didn’t garner a lot of interest with its meager 1GB of RAM, lack of hard drives and rough appearance. Despite this, the seller’s asking price of $99 wasn’t bad when you consider that is had a Xeon X3430 quad core processor and was tested and functional.
Since I already had a working Perc H200 card – an optional and supported card in the Dell T110 – as well as a pair of 4GB 2Rx8 ECC DIMMs collecting dust, this box was suddenly appealing to me.
The next day, I saw the price drop to $75, and almost pulled trigger on it until I saw the hefty shipping cost. I didn’t think it would last long at that price, but decided to make an offer of $63 to offset the shipping a bit and was pleased to find that the seller accepted.


It needed a lot of TLC when it arrived. I spent a fair amount of time removing caked-on dust from the fan assembly and also spent some quality time with a can of compressed air.
Why the Dell PowerEdge T110?
So before we take a closer look at the server, I want to answer the question “So why would I pick a six year old Dell tower for use as a FreeNAS server?”
- Cheap – $63 plus shipping – can’t beat that!
- Spare Parts – With 8GB of unbuffered ECC collecting dust in my parts bin, I didn’t have to worry about the spartan amount of RAM it came with and had enough to get started. The Perc H200 I bought earlier was also a perfect match for this server and even came with the Dell breakout cable.
- Plenty of CPU Power – The Intel Xeon X3430 is a 4 core, 2.4GHz part that can boost up to 2.8GHz. This is plenty of processing power for small to mid-sized FreeNAS server. This may not be impressive compared to modern CPUs, but for the price this knocks the socks off any Atom or consumer grade NAS appliance.
- Low Power – This may be surprising, but despite their age, the 45nm Lynnfield generation Xeon processors are quite power efficient at idle. Since this box will spend most of its time idling in the lab, this was an important consideration. I’ll be taking a look at idle power consumption later in this post.
- ECC Memory Support – Although it may work fine for years without it, a proper ZFS build should always use error correcting memory of some sort. The T110 doesn’t support registered DIMMs, which are generally cheaper on the second hard market, but requires Unbuffered ECC memory. This works just as well from an error correction standpoint.
- Multiple x8 PCI-E slots – They may not be PCI-E 3.0 slots, but the Dell T110 has two x8 slots running off the integrated PCI-Express controller in the CPU. On top of this, it has an x4 slot, which is great for dual port NICs and even a single lane slot as well. Plenty for a SAS card, a 10Gbps NIC and even a few other cards.
- Multiple HDD Options – The T110 has four internal 3.5 inch drive mounting locations that are perpendicular to the case. There are also two optical drive bays that I can consider using if I want to pick up a hot swap enclosure. Getting 4×3.5 inch and as many as 8×2.5 inch drives into this server shouldn’t be difficult and gives me all the drive space I’ll ever need.
- Not Overly Loud – Although the T110 isn’t quiet by any stretch of the imagination, it sounds a lot more like a desktop PC than the screaming of 40mm high-RPM fans in a rackmount server.
A Closer Look
You can’t really see it in the pictures, but there were some nasty scratches all along the top and side of this server. Thankfully the thing is HEAVY and Dell uses thicker gauge steel in its construction – superficial wounds only.
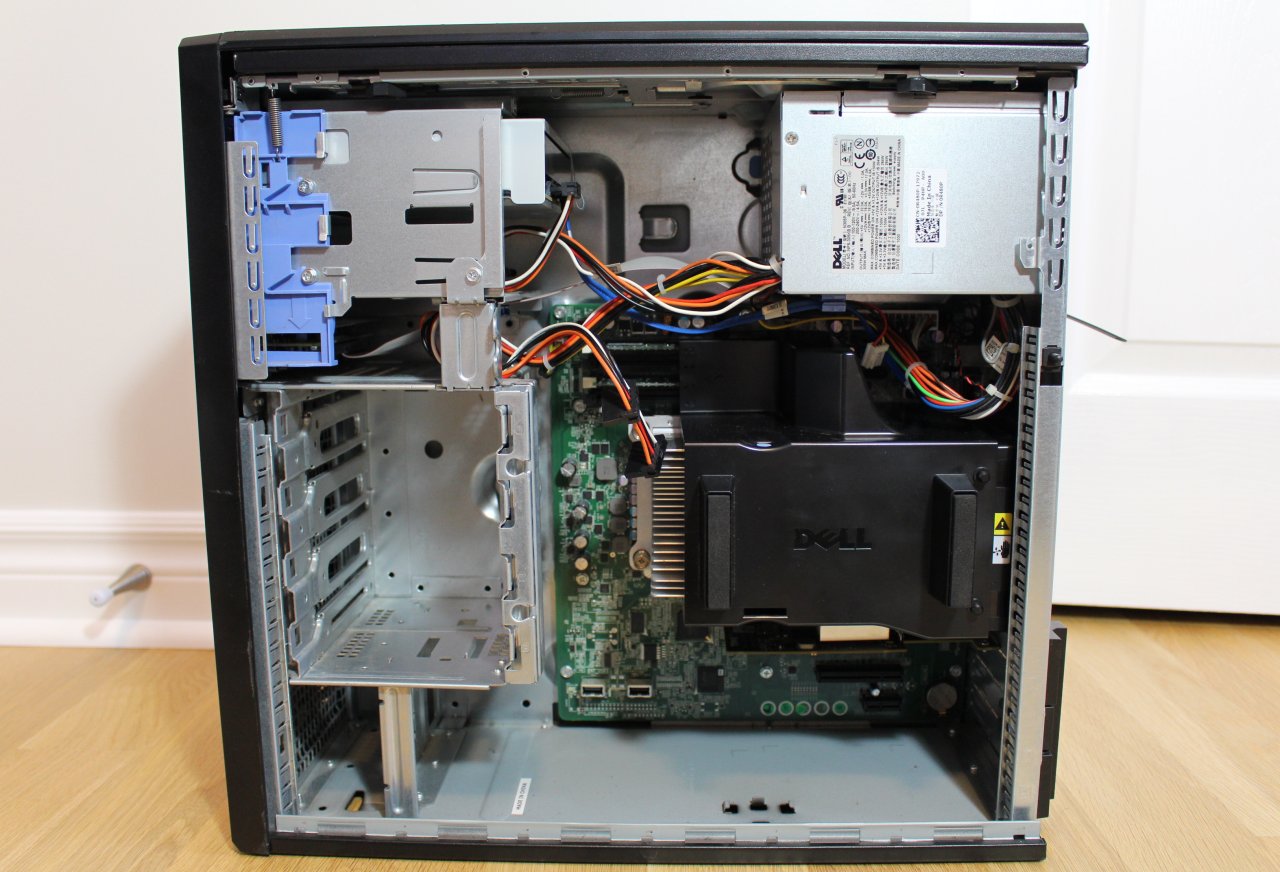
Although it looks pretty clean now, it was a bit nasty inside when it arrived. Notice the large black plastic shroud that covers the CPU heatsink and partially covers the memory. This effectively directs airflow over the passive CPU heatsink and across the DIMMs before it’s exhausted from the case. On a positive note, this means instead of an independent CPU fan and case exhaust fan, there is a single fan doing both duties. Thankfully it’s a high-quality Delta electronics brand model that should last for years.
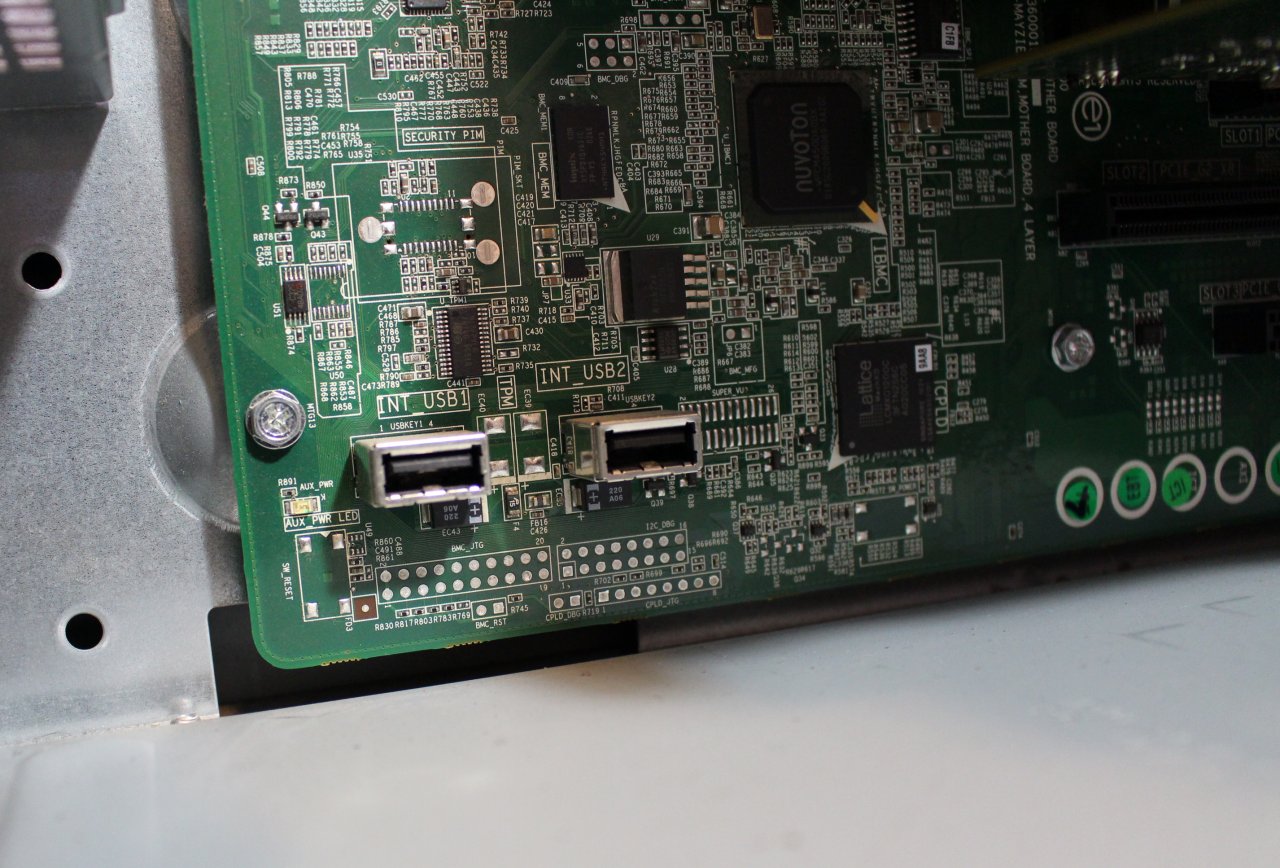
Another nice feature of the T110 is the dual internal USB ports. These aren’t wiring headers, but regular ports that you can just stick a thumb drive into. It’s nice to have these on the board instead of worrying about a protruding USB drive at the back of the case that can get knocked around. Since there are two internal ports, I may try to run a mirrored boot drive in FreeNAS at some point.
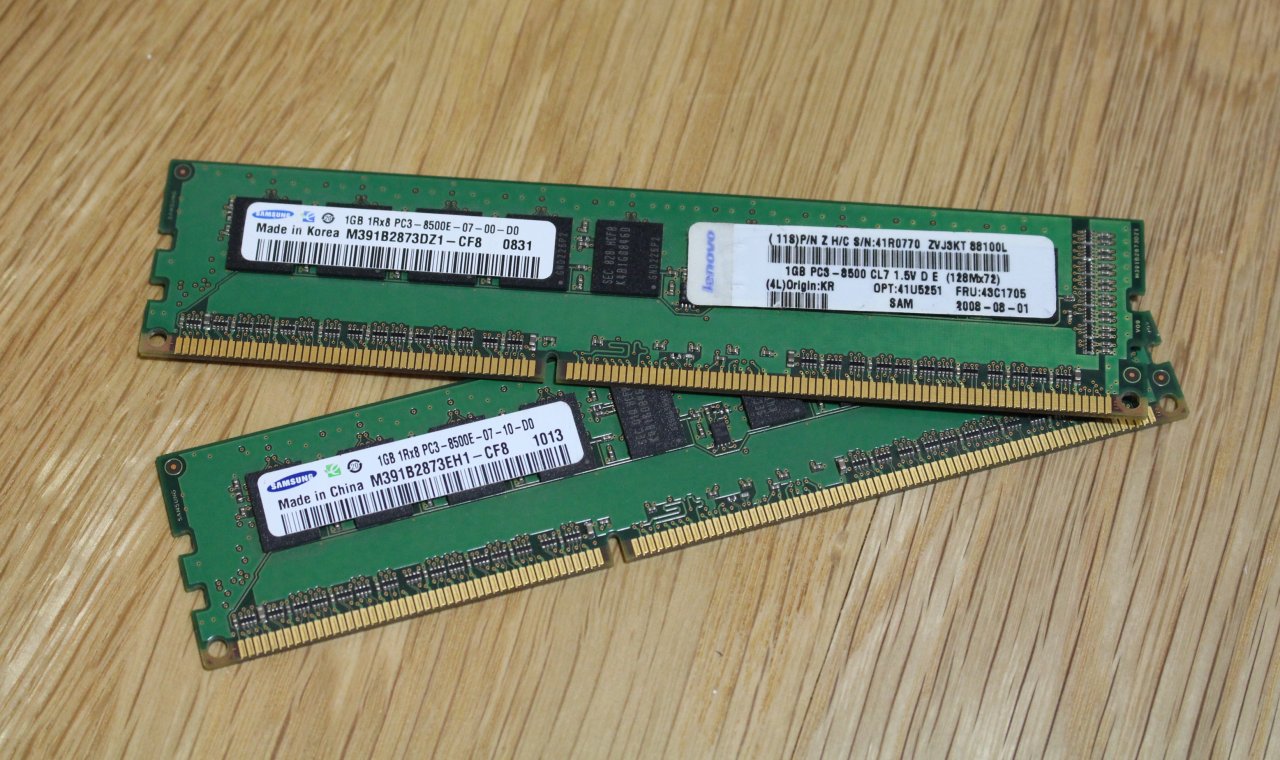
There were a couple of parts I removed from the server right away including the memory and a Dell SAS 6/iR adapter. The server was advertised as having 1GB of RAM on eBay, but it actually had two 1GB sticks installed. They both worked just fine independently, but the server complained and disabled one stick if they were both installed. One of them didn’t have a working thermal sensor so I suspect that may be the issue. I contemplated trying to run with three sticks and 9GB total, but these ECC DIMMs are PC3-8500 parts. I’d rather run 8GB at PC3-10600 (1333MHz) than an asymmetric 9GB downclocked to PC3-8500 (1066MHz). I’m going to keep an eye out on ebay for another 2x4GB or possibly 2x8GB.


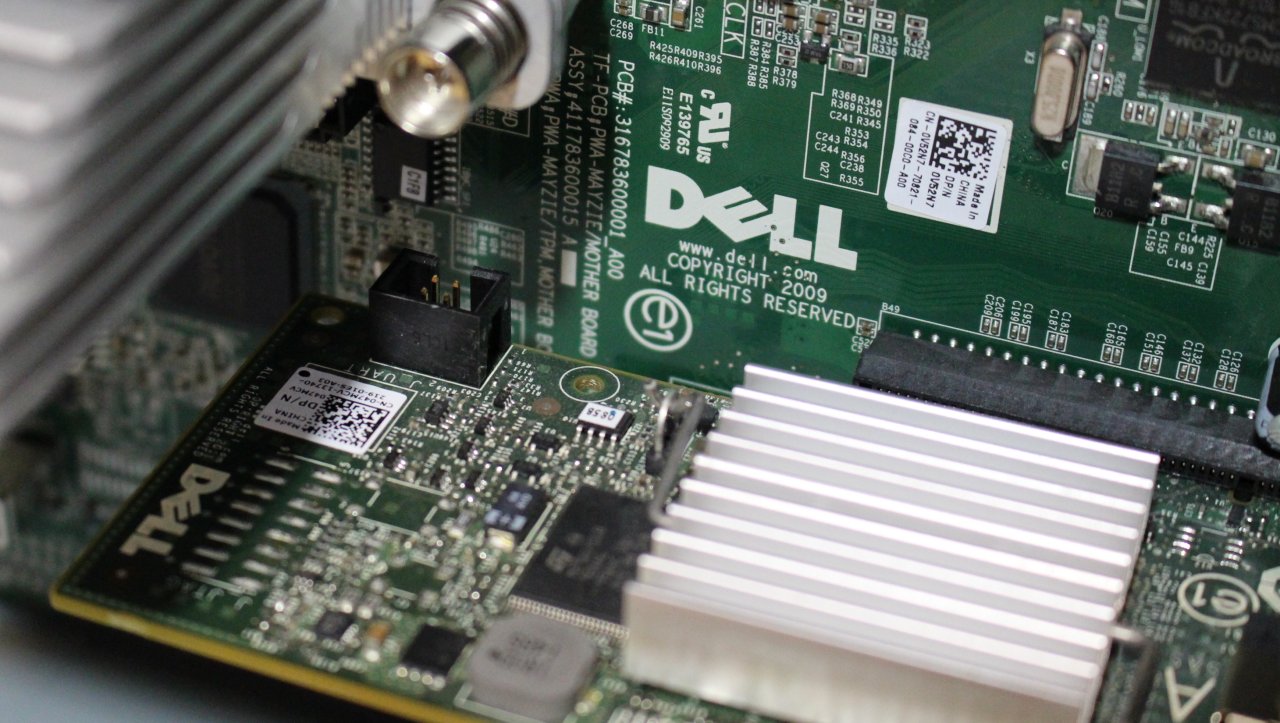
The Dell SAS 6/iR adapter was a nice surprise. I didn’t expect an HBA in the server as nothing was mentioned in the listing and there are five onboard SATA ports on the board. Although it is possible to use this card with FreeNAS, it’s a much older LSI 1068E based card. Its two main disadvantages are that it is SATA2 (3Gbps) only, and doesn’t support drives larger than 2TB in size. I’ll be sticking with my PERC H200.


Unfortunately, I was disappointed to see that the server did not come with any drive caddies. This is not uncommon with second hand servers as drives are usually removed in the quickest manner possible for secure wiping or disposal. This means that the caddies are usually just pulled out along with the drives before the server is sent on for recycling or resale. On a positive note, since this is a popular server model, I had no difficulty finding caddies on eBay. I paid about $3 CDN each, so not a big deal.


Installing my PERC H200 was a piece of cake and didn’t require the use of any tools. As you can see above, the plastic shroud hinders the cooling of the PCI slot area, so I’m in the same situation I outlined in part 3 of this series.
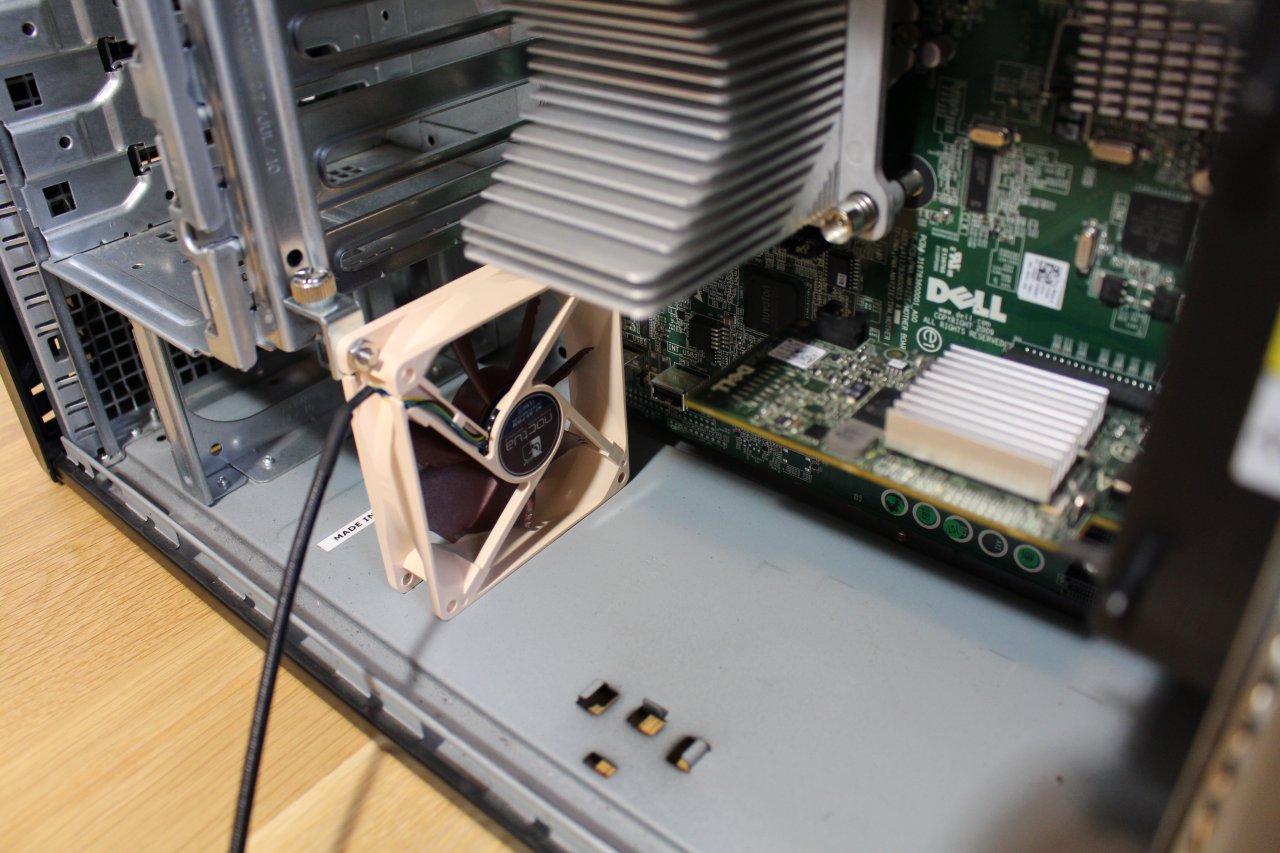
Thankfully my trusty Noctua NF-B9 fan seems to have some potential once again. I can’t easily mount it over the PCI cards directly as I did in my Enthoo Pro due to lack of clearance, but there is plenty of space to direct some airflow from the mid-section of the case to the back. It won’t be ideal, but I don’t need to keep the card cool – I only need to keep it from melting down into a piece of molten PCB and aluminum at the bottom of the case! 🙂
I’m going to tinker with some mounting options and see what I can come up with. Because this is an OEM server, there are no standard 3 or 4-pin fan headers on the board. I’ll need to rig up a power source for the fan.
Power Consumption and Noise
Power consumption is a very important consideration for most people building home labs. Hydro isn’t cheap in Ontario, so it’s certainly important to me.

After powering up the system with nothing but a USB installation of FreeNAS, I was very happy to see that the idle power consumption was a paltry 40W. I was aware of the C-state defaults with FreeNAS, so did have to enable C3 to achieve this result – I hope to write a quick post on this another day.
Powered off: 8W (BMC and standby power usage)
Powered on: 40-42W idle (No storage adapter or drives)
Powered on with PERC H200: 49-50W idle
As expected, the hot running PERC H200 adds about 8-10W at idle, but I’m still quite pleased with a result of only ~50W. Things will obviously increase further once I add HDDs and SSDs into this server, but I was pleasantly surprised.
And finally, a quick note on the noise. This box is not quiet, but it’s not loud either. I can only describe the sound as a lower frequency wooshing of air and not an annoying whine or hum. The server starts at 100% fan speed, which is very loud, but that lasts for only about 30 seconds at boot up. Once the fan ramps down, it’s not at all obnoxious. I can’t be sure, but it does seem that the power supply fan contributes a fair bit to the noise levels.
On a positive note, the high RPM Delta system fan is BMC managed and as the CPU load and temperature increases, the fan speed will adjust to keep the system cool. At idle it’ll be fairly quiet, and under heavy load the cooling performance – and noise – will increase.
What’s Next?
So now that I have the hardware in-house, I’ll be completing the build and getting FreeNAS configured. I really don’t have the ideal hard drives for this build, but will be using what I’ve got for now – a pair of Western Digital 2TB Black drives and a pair of Kingston 120GB MLC SSDs.
Stay tuned!
FreeNAS 9.10 Lab Build Series:
Part 1 – Defining the requirements and flashing the Dell PERC H200 SAS card.
Part 2 – FreeNAS and VMware PCI passthrough testing.
Part 3 – Cooling the toasty Dell PERC H200.
Part 4 – A close look at the Dell PowerEdge T110.
Part 5 – Completing the hardware build.

One thought on “FreeNAS 9.10 Lab Build – Part 4”