I’ve been playing around with Synology’s DS1621+ in my home lab the last couple of weeks and have been thoroughly impressed so far. In my last couple of posts, I got the storage pools created and networking and iSCSI configured. As I was going through the manual setup process, I came across Synology’s Storage Console for VMware plugin. This plugin allows some degree of control of the NAS unit directly from within the vSphere Client and automates some simple workflows. Here are some high level features:
- Datastore Creation – Creates a backing LUN, target and the VMFS or NFS datastore in a single workflow.
- Datastore Resizing – Resizes the backing LUN and expands the VMFS datastore in a single workflow.
- Host Setting Optimization – Modifies timeout values, I/O queue depth and VAAI settings.
- Log Bundles – Allows collection of support log bundles of the Synology NAS from the vSphere Client.
- Status Dashboard – Provides NAS status and LUN status information.
- Enables application-consistent LUN snapshots.
You can find some more information on the storage console plugin here. As long as you have a supported Synology NAS running DSM 6.2.3 or later and vCenter Server 6.5 U2 or later, you can give it a try.
Installation is very straight-forward. The plugin is installed by deploying a small CentOS based OVA appliance into the environment. During deployment, you’ll be prompted for your vCenter credentials and connection information.

Once the VM powers on, it’ll automatically connect to vCenter Server and install the plugin for you. Opening the VM’s console will greet you with a simple GUI that allows you to change passwords and basic TCP/IP settings.
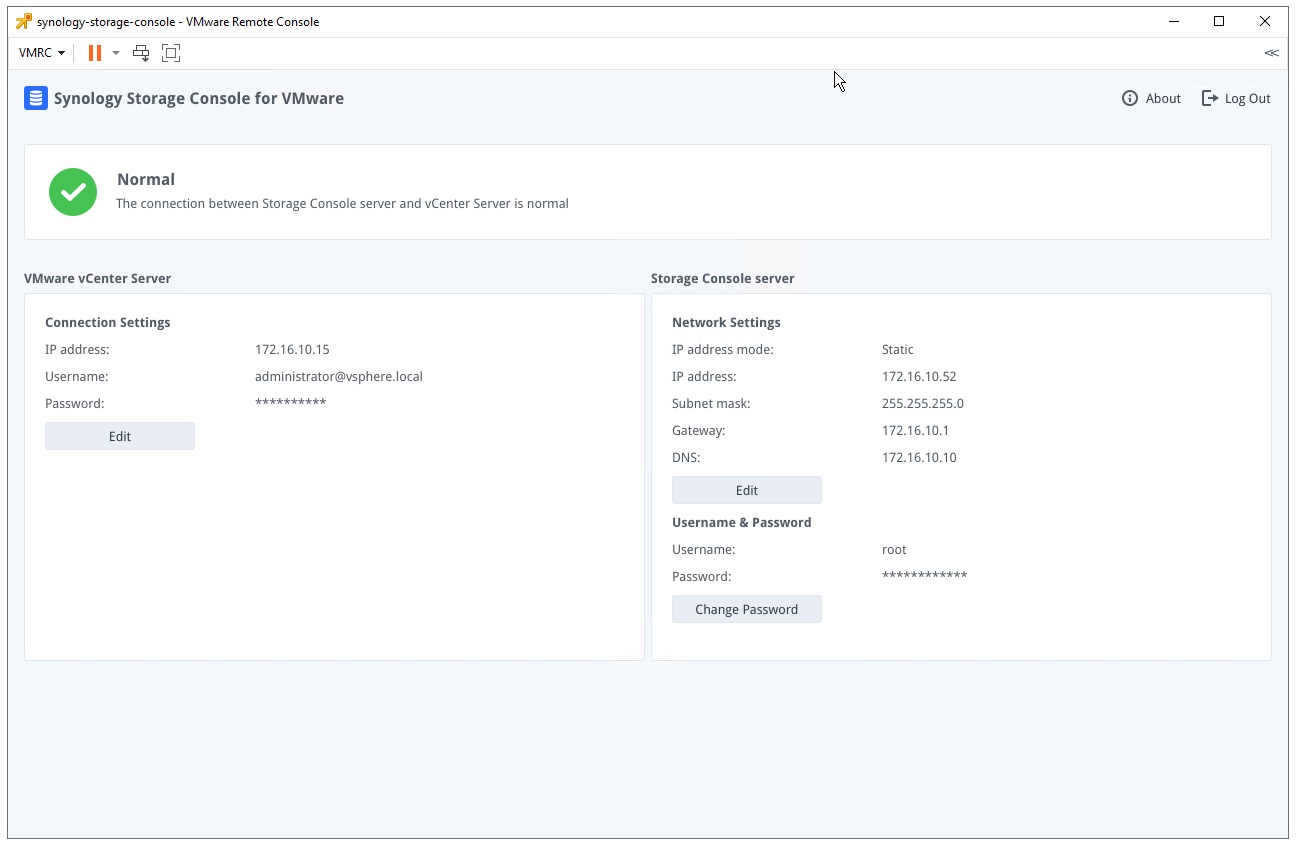
The default username and password for this appliance is root/synology, so be sure to change it.
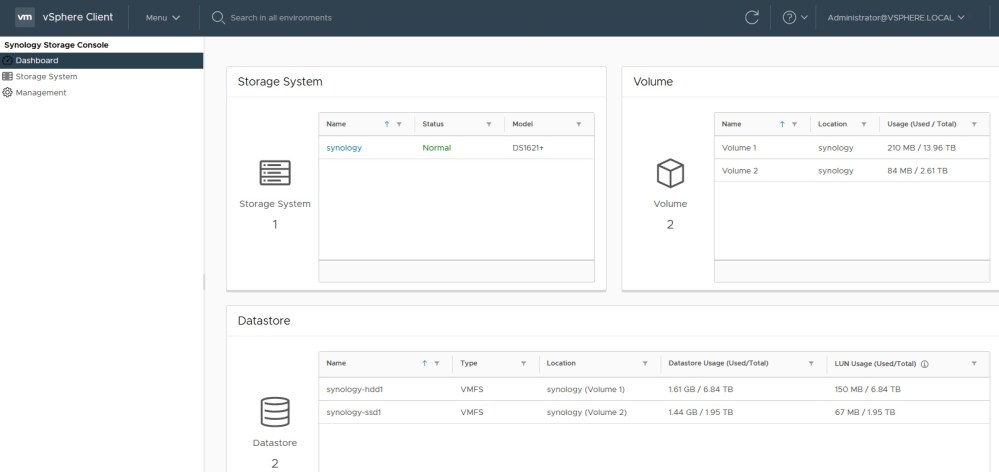
After logging out and back into the vSphere Client, the Synology Storage Console plugin should be available via the main menu. You’ll first need to add your NAS unit(s) in the Storage System page. Once done, you’ll be able to use the features the plugin offers. Some simple stats are available from the dashboard section. You can see your storage pools, volumes and available free space. This is useful if you are over-allocating space via thin provisioning.
Continue reading “Synology Storage Console for VMware”