Welcome to a new hardware build series where I’ll be sharing my experiences building a retro Intel gaming system. In part 1, I’ll be going over some of the hardware I picked out for this build and doing a bit of a photo shoot. I apologize in advance for the copious amounts of trivial history and nostalgic rambling in this post, so please feel free to skip the first few sections if you’d like to get straight to the gear. For those who appreciate the trip down memory lane, please read on! 🙂
Introduction
Twenty seventeen has been a real year of nostalgia for me when it comes to PC hardware. It all started earlier this summer when my Brother in-law was cleaning out his basement and gave me a couple of classic PC systems. One was a 1993 era DEC 486 and the other, a 1995 era NEC Pentium 90 system. These systems brought back so many good memories and were a real joy to use and restore. Although the first PC we had in my house growing up was a much older clone from the late 80s – possibly an 8088 or 286, I was really too young to appreciate it and preferred my NES/SNES at the time. I remember teaching myself how to use DOS with it but it wasn’t until 1994 that I could convince my parents that I needed a new computer – you know, for gaming educational purposes. After doing some research and shopping around, I got a shiny new 486 DX2/66. It may not have been state of the art at the time, but with 8MB of RAM, a CDROM, 430MB Hard drive and a real Soundblaster 16, it ran like a dream. I spent hours upon hours on that machine and it wasn’t long before I had added a 14.4 modem and really got into the BBS scene as well. About a year later, my parents surprised me with a top of the line NEC Pentium 100 system with 16MB of RAM and the 486 replaced the old monochrome 8088 in the basement. Coincidentally it was almost identical to the Pentium 90 given to me by my brother in-law.
The Goal
Although these two retro rigs were a lot of fun to restore and use, I wanted to build a machine that was a bit more flexible, could be customized and used for not only demanding DOS/Windows 9x games but also most of the classics as well. The main issue with these two older machines is that they are both proprietary AT based systems with many BIOS quirks, compatibility issues and other limitations. Even the Pentium 90 with 24MB of RAM just wasn’t fast enough for newer DOS games like Quake. In short, I wanted a custom retro build that was fast, reliable and compatible – something with some nostalgic value and some pizzazz but also well suited for daily use.
The Requirements:
- Something ATX based, so that newer cases and ATX power supplies could be used.
- Nothing OEM or proprietary so that I have the flexibility to build the system as I like.
- New enough to run early Windows 9x titles like Quake 2 and Diablo but also compatible with most older DOS games.
- Early Direct3D and OpenGL support would be ideal.
- ISA slots for older sound cards – this is a must.
- The ability to run in a real DOS mode or Windows 9x.
- A mix of new and old hardware – i.e. modern power supply, flash based storage for fast and silent operation.
Finding The Balance
After doing some research, I found that there were some great resources on-line for retro gaming systems and some very active communities as well. Guys like Phil from PhilsComputerlab, Victor Bart from RETRO Machines and sites like Vogons have a real wealth of information available.
When it comes to hardware, there are many options for building retro DOS rigs, and choices can vary a lot based on the titles you want to run. This can be especially true if you are running much older ‘speed sensitive’ DOS titles. Quite a few older games were designed for 386-era PCs and simply ran too quickly to be playable on faster hardware. This is why many older AT based 486 and early Pentium systems had the ‘Turbo’ button that could down-clock the system for better compatibility with these applications. Although the Turbo button doesn’t exist on most motherboards made after this era, a similar type of performance drop can be obtained by under-clocking the CPU as far as it can go and disabling the processor cache from the BIOS.
Super Socket 7 AMD machines are very popular for these types of DOS rigs because they can be under-clocked using software for speed sensitive games, but are also quick at full frequency. Although this seemed to tick the right boxes, Super Socket 7 is getting increasingly rare, expensive and many boards are AT based. Having never owned a Super Socket 7 system, it also lacked that nostalgic factor for me.
After looking though a list of two dozen or so DOS games that I really like, none of them are really old enough to have an issue with CPU frequency. What was going to be most important for me was ensuring compatibility with legacy sound cards. This means I’d need at least one ISA slot, and would be limited to a system of about the 1997-1998 vintage before ISA slots were dropped in favor of PCI.
Slot-1 – A Good Compromise
Knowing that I wanted a relatively quick system with ISA compatibility, I started looking at gear from the 1997/1998 second generation Pentium era – the Slot-1. This period in time was very exciting for PC hardware enthusiasts. The long awaited Pentium successor had finally arrived and was in the physical form that no one expected. Rather than a simple looking CPU, we were greeted with a high-tech looking cartridge, wrapped in plastic and metal with the famous Pentium II hologram on it. Along with the Pentium II came the new ATX motherboard form-factor, which was also a welcome change to the very dated AT standard. I still remember the first time I saw a Pentium II and ATX motherboard at the repair desk of a local computer shop sitting in a large ATX full-tower case. I don’t know how to describe it, but it just felt like the future and I immediately wanted one.
The Motherboard
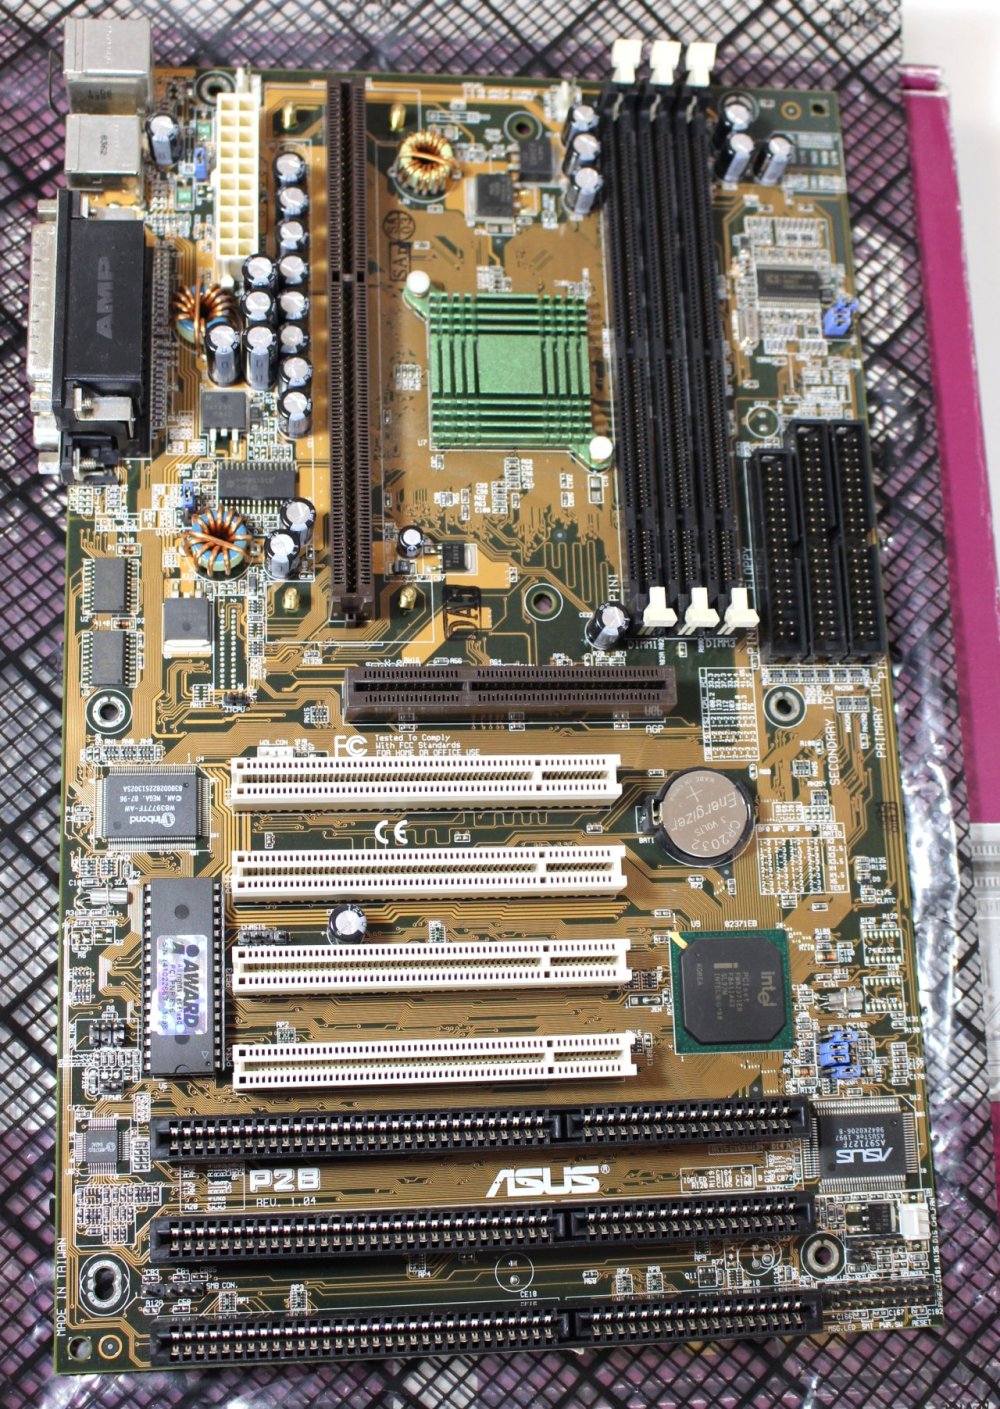
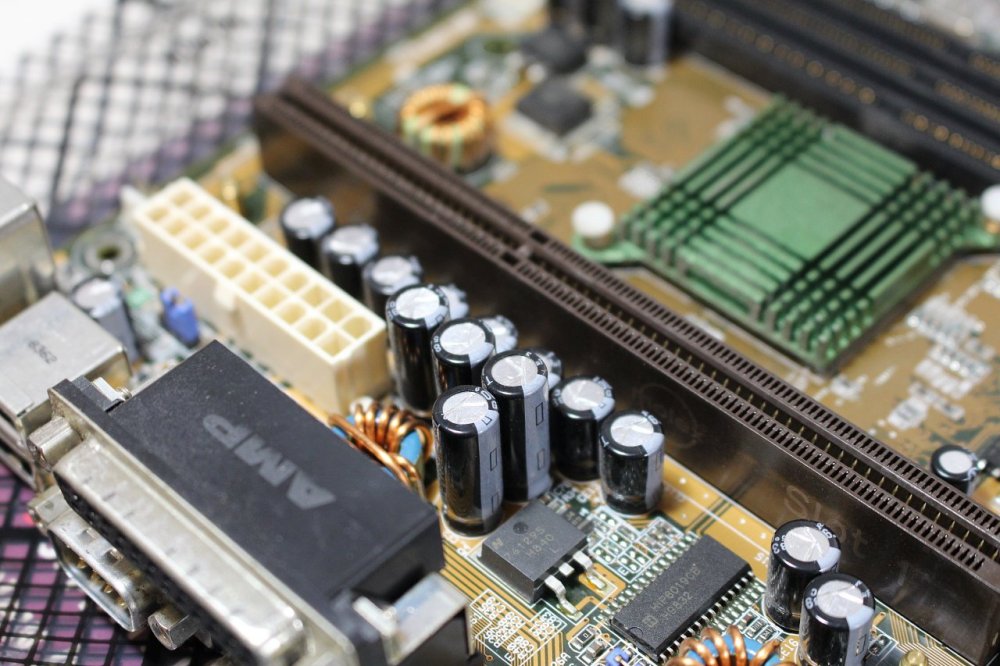
The motherboard for this build was really the key component that everything else would be centered around. Slot-1 boards are getting surprisingly rare these days – especially name brand ones with ISA slots. There were several options I was considering, but the best bet seemed to be the Intel 440BX based Asus P2B. The P2B had – and continues to have – a reputation for being a very solid and reliable slot-1 board. It’s built with good quality components and capacitors, and omits many of the frills that I’d prefer to avoid – like onboard audio.
I managed to find a great combo deal on eBay including a tested and working P2B motherboard, a Celeron CPU and 256MB of SDRAM for around $65 CDN. I was very fortunate to find this because these boards are getting rare and often fetch closer to $100 for nothing but an untested P2B.

It’s the simplicity of the P2B that really makes it shine. It really does feel like its got one foot in the old-school and a foot in the modern era. Released in 1998, the 440BX is actually more of a second generation Pentium II based platform with its 100MHz FSB support. The Pentium II and the 440LX/slot-1 socket were released about a year earlier in 1997. With 100MHz FSB support, the P2B supports a very wide range of processors. Everything from the earliest 233MHz Pentium II and Intel’s first Celerons processors to much faster Pentium 3 processors can run on this board. It isn’t officially supported, but this version 1.04 PCB has jumpers for a 133MHz FSB frequency as well, which could open up some interesting possibilities.
Interestingly, Anandtech – one of my favorite PC hardware sites – reviewed the P2B on April 14th, 1998 and still has it online. Reading this review was a real trip down memory lane.
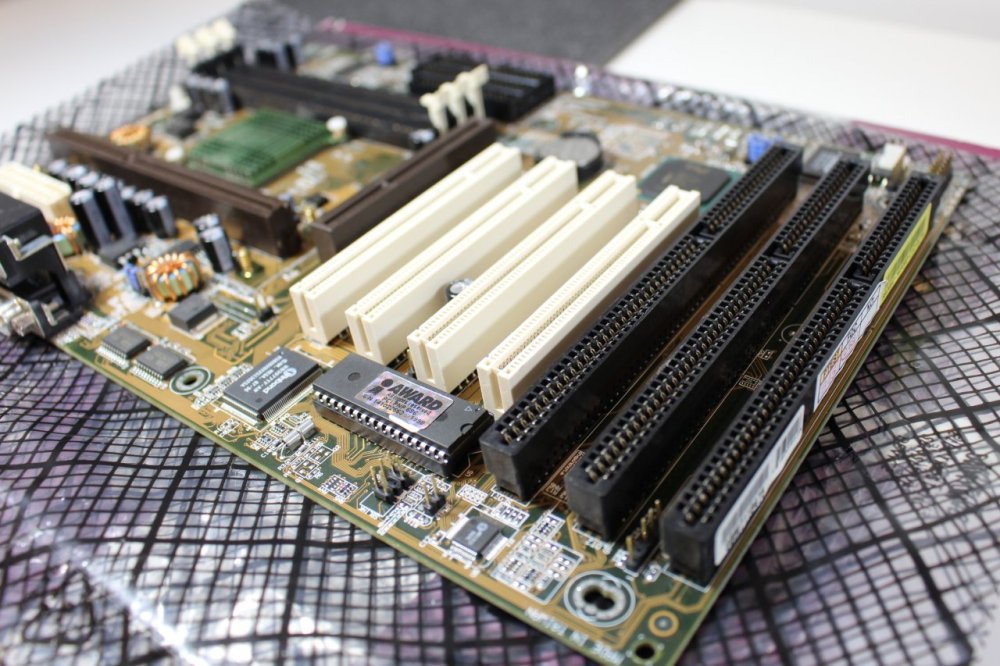
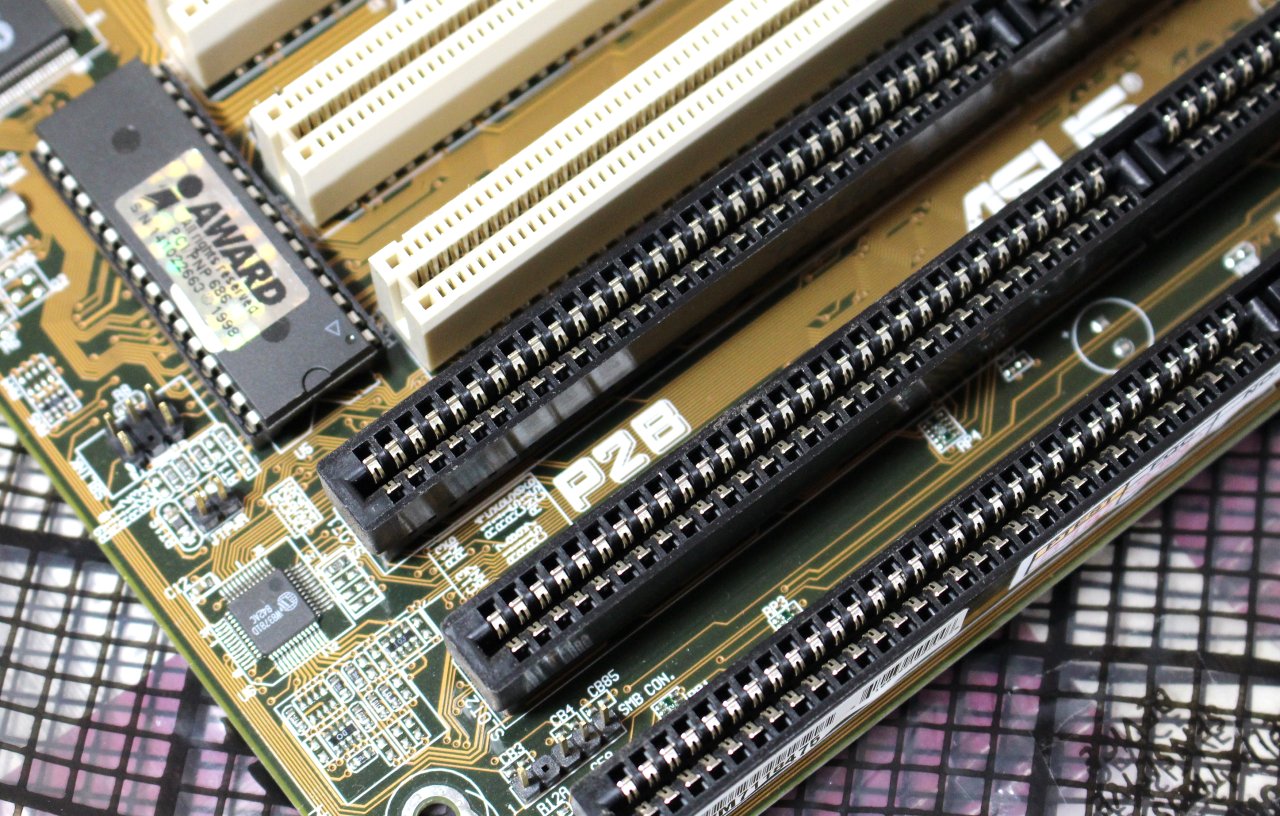
Even in 1998, most board manufacturers were trying to phase out ISA slots in favor of AGP and more PCI slots. The P2B has three usable slots, one of which shares a physical position with a PCI slot. This is probably the most generous ATX board with respect to ISA slots that I’ve seen and makes the board very appealing in a retro gaming rig.
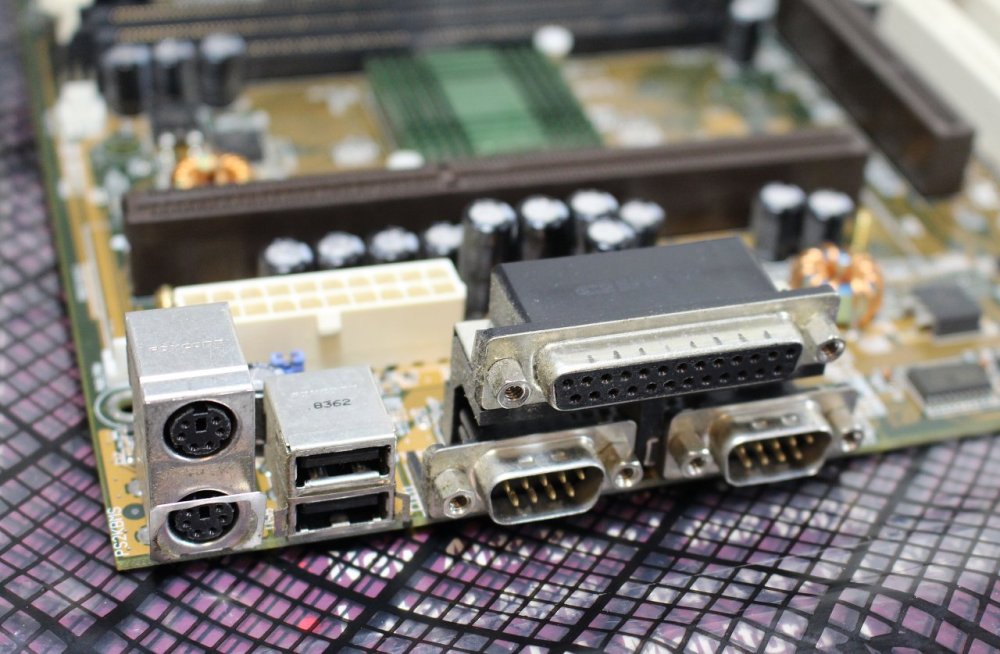
The P2B’s rear I/O panel is very sparse with only the standard ATX outputs. One major benefit that ATX has over AT for a retro rig is PS2 mouse and keyboard support. Most standard AT boards require an old AT keyboard and serial mouse, which really limits your choice of peripherals. It’s still possible to find PS2 compatible optical mice and some decent keyboards.
It was also the advent of the Pentium II that also brought first generation USB to the mainstream. This won’t be useful for DOS, but could have some limited use in Windows 9x.


On the old-school front, the P2B requires jumpers for CPU multiplier and FSB speed selection. No auto-detection or fast and easy BIOS settings for this. Thankfully they put some handy tables on the PCB to guide in making the correct selection and it’s also well documented in the manual.
You’ll also notice a few intermediate FSB selections that can be used for overclocking aside from the usual 66 and 100MHz. This does put the PCI bus a bit out of spec when using frequencies other than 66, 100MHz, but allows for some overclocking potential and flexibility.
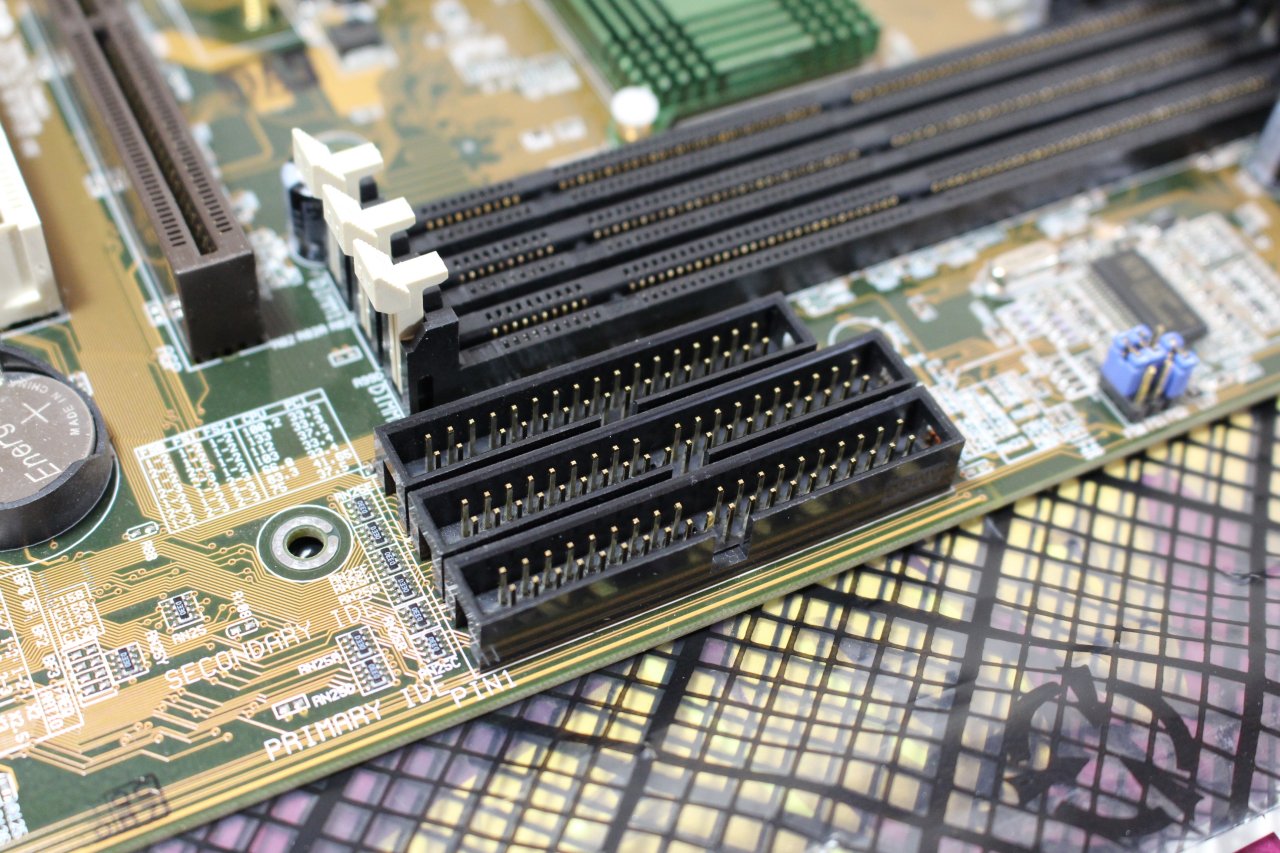
As expected, the board comes with the usual two IDE channels and a floppy controller. The IDE controller is on the PCI bus, but limited to only 33MB/s. UDMA 66/100 and eventually 133 came years later.


The front panel connection ATX headers are located in the usual lower right corner of the board along with a chassis fan header. Another interesting header I came across on the board is called ‘SB Link’. Apparently this was a short lived feature that allowed the connection of the motherboard to certain Creative Labs PCI sound cards to aid in the direct hardware access expected by legacy DOS games and applications. Clearly, backward compatibility was already on the mind of many hardware vendors moving their cards to PCI in 1998.


I was surprised to get the original P2B box included in the combo, which was a nice bonus. Obviously this isn’t really useful, but cool to see as these old boxes are getting rare.


The eBay combo also came with two CPU retention mechanisms, but not the universal bracket that was supposed to come with the P2B. This created a few challenges that I’ll talk more about later in this post. Unfortunately, the rear I/O plate is proprietary and doesn’t fit most cases. I’m hoping that I’ll be able to find a generic one that I can use.
The Processor – Celeron 333
Another item included in the combo deal was a slot-1 Celeron 333MHz processor. This was a nice bonus as these early ‘Mendocino’ based Celerons were actually very capable CPUs and were in some ways superior to their Pentium II counterparts at the time. Intel skipped the fancy looking plastic cartridge and hologram cover on the Celeron, but it’s whats under the heatsink that counts.


The processor was unfortunately missing its heatsink fan. It probably died at some point and was removed as I could see the faint impression of where the screws held it before. With a TDP of less than 20W it may run fine passively, but I will try to find a 50mm replacement at some point.
The great thing about the second generation Mendocino based Celerons was that they had 128KB of L2 cache on the CPU die itself, not sitting on the PCB of the CPU cartridge like it does on the Pentium II. Because of this, Intel could run the L2 cache of these Celerons at full CPU frequency. Despite having way more cache at 512KB, the Pentium II had to run the off-die cache at half the CPU frequency – and presumably higher latency – via what’s known as the ‘back side bus’. Because of this, a similarly clocked Celeron could actually outperform a much more expensive Pentium II in some scenarios. Only the 100MHz FSB variants of the Pentium II released at around the same time could really differentiate themselves due to higher FSB and memory clock speeds.
From Wikipedia:
“…most industry analysts regarded the first Mendocino-based Celerons as too successful—performance was sufficiently high to not only compete strongly with rival parts, but also to attract buyers away from Intel’s high-profit flagship, the Pentium II.”
Back in the day, I had a dual Celeron 300A system running on the famous Abit BP6 motherboard. I was able to easily overclock both processors to 450MHz on a 100MHz FSB. The board eventually suffered swollen and leaking capacitors and was given away. I still kick myself for not keeping it as it would have been an easy repair. That combo would be worth a lot today.
Another Option – Pentium III 550MHz
Although the Celeron 333 would probably be fine for the rig I’m building, it was lacking the pizzazz of the Intel flagship models. Shortly after getting the P2B combo, I stumbled across a great deal on a 100MHz FSB slot-1 Pentium III processor. For only $14, it seemed to be in good cosmetic shape, with a working retail cooler. Why not?

The Pentium III 550MHz was one of the first generation P3s based on the 250nm Katmai core. In reality, there isn’t much difference in architecture between the late 100MHz P2s and the first generation P3. They are basically higher clocked 100MHz FSB P2s with the addition of SSE instructions. These Katmai P3s still had 512KB of off-die L2 cache running at half CPU speed.


With a TDP of 30W, this 550MHz model is also one of the most power hungry out of all the P3s, including the 1GHz+ models released later on. This is due to its higher operating voltage and larger 250nm manufacturing process. The 180nm “Coppermine” P3s that came out a bit later were much more power efficient. That said, having a functional fan on this one will be important.
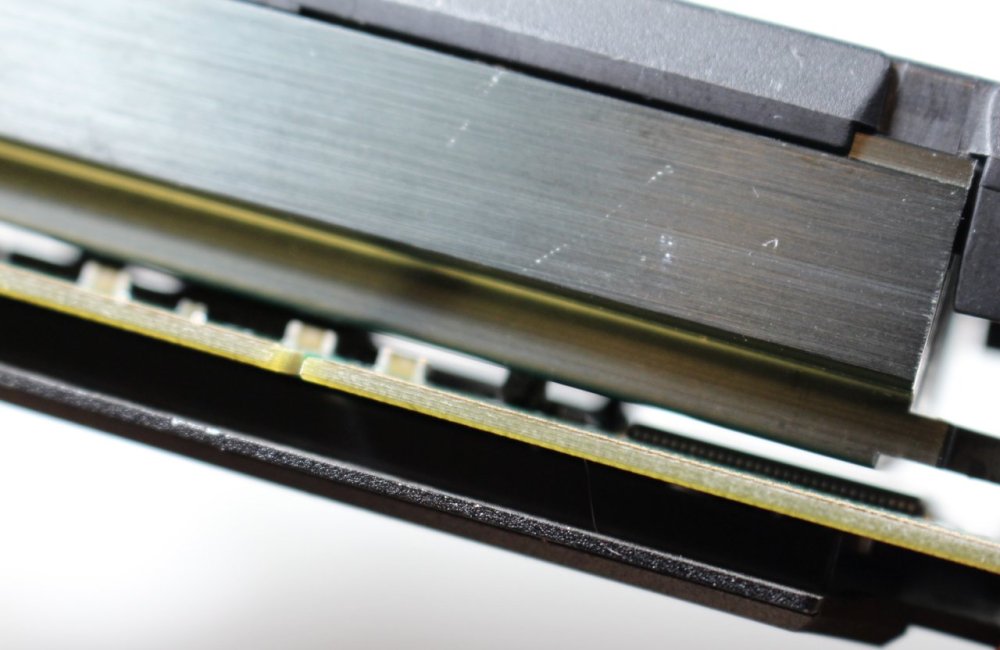
The Pentium III – and also late Pentium IIs – had what’s known as the SECC2 cartridge type. The plastic shroud covers only the rear part of the processor, and the heatsink makes direct contact with the CPU die on the front. The cache modules are barely visible, but you can see that the heatsink does not make contact with them or aid at all in keeping them cool.
Mounting the CPUs
There are pros and cons to the practical aspects of slot-1. On one hand, the CPUs are very easy to install. If you can install an expansion card, you can install a slot-1 CPU. Because it’s a card of sorts, you don’t have to worry about bent pins or levers. But on the other hand, there are numerous different cartridge types and brackets that can make things a bit confusing.


I had no difficulty getting the Celeron 333 mounted using the included bracket. There is essentially a tall two-post bracket, with a plastic cross-bar that has a channel to hold the PCB tightly in place.

The Pentium III was another story, unfortunately. It seems that the included retention bracket was intended for older Pentium II and Celeron processors only. It’s simply incompatible with newer SECC2 based processors, like the Pentium III. I thought about just letting the pressure from the socket hold it in place, but I was concerned about it becoming dislodged.
The really unfortunate thing is that these brackets are becoming very rare and are expensive. To get a working bracket, I’d have to shell out at least $30, which is twice what I paid for the CPU. But hey, that’s the price you’ve got to pay if you like retro gear 🙂
The Memory
The eBay combo very conveniently came with a stick of 256MB SDRAM included. It may not look very glamorous, but this will be plenty of memory for a retro gaming rig. These systems were before the days of ‘dual channel’ technology, so the number of sticks used is irrelevant from a performance perspective.


I was pleased to see that this was very good quality Micron branded PC133 SDRAM. Although the memory will only run at the FSB speed – 66MHz with a Celeron and 100MHz with the Pentium III – it’s nice to know it’ll do 133MHz while remaining within spec.
What’s Next?
Well, that’s probably more than you ever wanted to know about 20 year CPUs and motherboards! Stay tuned for part 2, where I’ll explore some other components for the build including some sound card options.
Part 2 – 3D Video Card Options >>
Building a Retro Gaming Rig Series
Part 1 – ASUS P2B and Slot-1 CPUs
Part 2 – 3D Video Card Options
Part 3 – The mATX MSI MS-6160 and BIOS Woes
Part 4 – Choosing a Sound Card
Part 5 – Hard Drive/Storage Options
Part 6 – The Completed Build!

Hey, I came here via Twitter, where I saw a re-tweet by I think @dosnostalgic linking to this blogpost.
Nice article!
Regarding the PC133 SDRAM running with 66/100 MHz: the advantage is that they usually have no problem with the fastest latency settings at those busspeeds and that can really improve performance. I ran PC133 SDRAM on my Gigabyte 6BXC back in the day because of that.
Very good point on the timings. I noticed the PC-100 memory I have in the MSI MS-6160 seems to have no issue with 2-2-2 timings at 66MHz. It doesn’t seem I can tighten them up any further, but at least if I’m limited to 66MHz, I can take advantage or lower latency 🙂
Thanks for your comment!