The 486 Restoration – Part 3

Welcome to part three of my 486 restoration project! Check out part one and two for more information on the parts I rescued from a badly neglected machine. I’m happy to report that the purchase of this banged up machine was not in vain. It didn’t come without it’s share of challenges but as you’ll see in this installment – it’s alive!

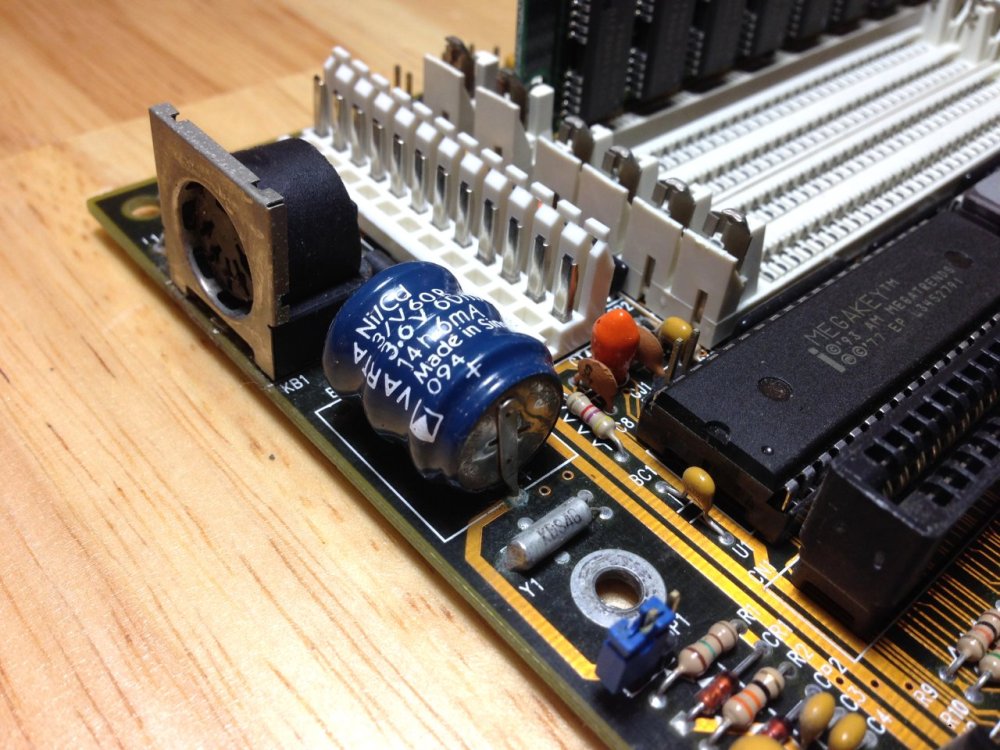
After removing the barrel battery and constructing an external battery pack in part 2, the next order of business was to get the machine put together on the work bench and powered up.

486_3-1
My test-bench isn’t pretty but it’s functional!

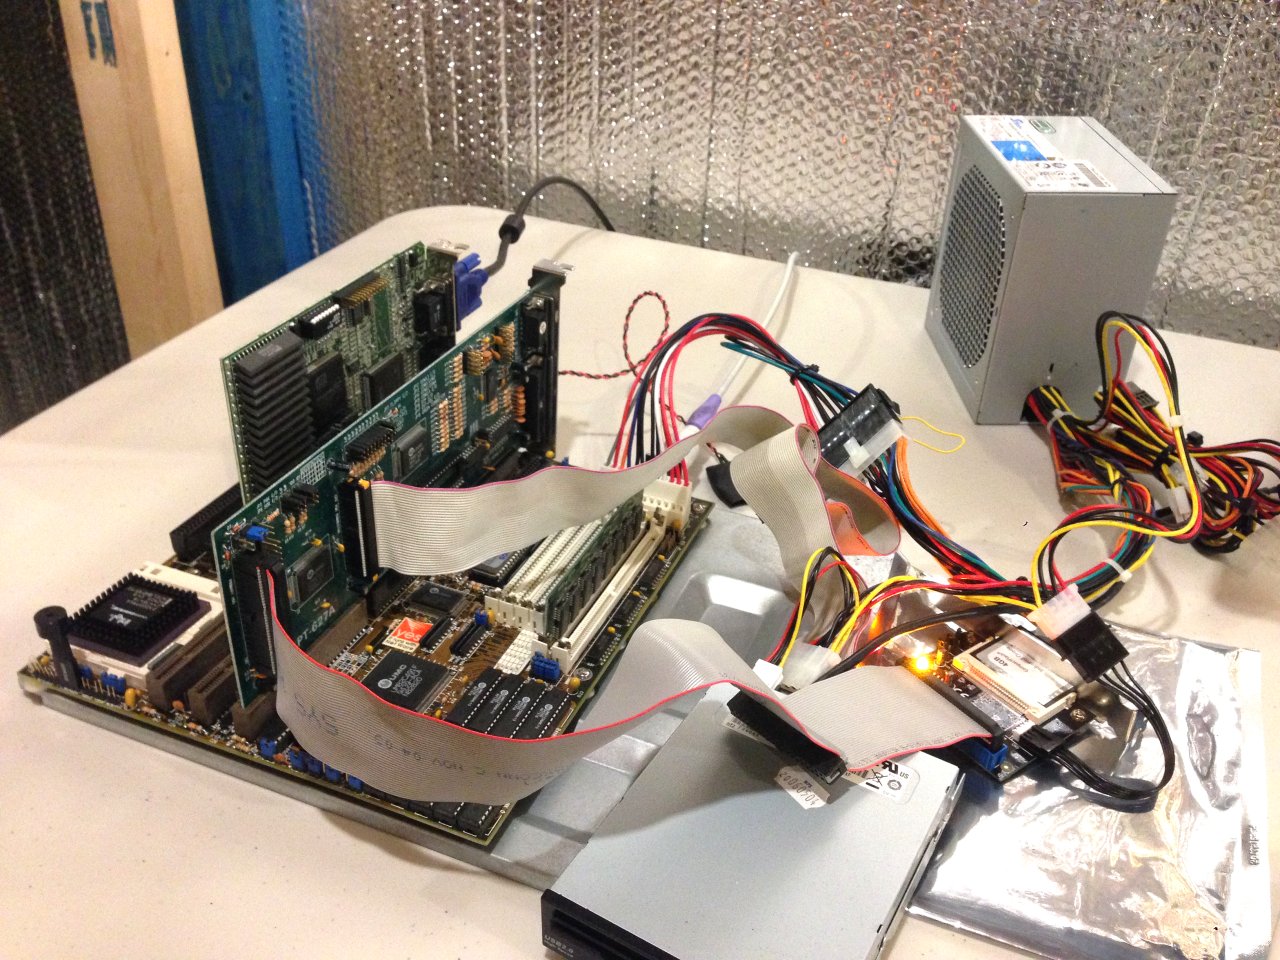
I’m using a modern PFC Seasonic 350W power supply with an AT 12-pin adapter. These old systems run almost entirely on 5 volt power and draw nothing from the 3.3V and little from the +12V rails. This can cause problems with some newer PSUs, but this Seasonic model fairs well with a 130W rating on the 5V rail. The only side effect of this power draw imbalance is a higher than usual +12.6V on the 12V rail. It’s not ideal, but I’d rather this than a flaky 25 year old AT power supply.

Since the system didn’t come with a video card, I pulled out an old ATI Mach 32 ISA card from the parts bin.


I recently picked this up from the great folks in the computer recycling department of The Working Center in Kitchener. It was sitting in a box full of old PCI graphics cards destined for e-waste. It’s always awesome to keep classic parts out of the landfill and support a great cause at the same time.

Continue reading “The 486 Restoration – Part 3”

The 486 Restoration – Part 2

Welcome to part two of my 486 restoration project! In my last post, I took a look at some of the rescued parts from a badly neglected tower. Today, I’ll be going through my adventures of getting a functional CMOS battery working on this system.

As mentioned briefly in part one, most 386 and early 486 systems included what are referred to as ‘barrel batteries’. These are rechargeable nickel cadmium (NiCAD) batteries and are usually rated at 3.6V fully charged. Unlike the coin cell batteries in newer systems, the battery charges whenever the system is powered on. In theory, this was great because the CMOS battery could last a long time in the system. Using a multi-cell rechargeable battery increases the cost of the board, so the CR2032 coin cell solutions were most likely used for cost savings first and foremost in the years following. This is all well and good, but nobody really envisioned these systems to be in use 25 years later as is the case with this system here.

486-8
A 25 year old Varta 3.6V NiCAD – it’s gotta go before the inevitable happens.

A quick google search on these barrel batteries, and you’ll see just how problematic these can be when they age. Not only can they leak and cease to function, but when they do they are very corrosive to copper traces and other types of metal on the board. If caught early enough, the board can be cleaned and may still be functional. Unfortunately, the damage can sometimes be permanent.

Continue reading “The 486 Restoration – Part 2”

The 486 Restoration – Part 1

As you may have noticed in my recent Building a Retro Gaming Rig series, I’m quite passionate about 1990s era PC hardware. Machines from this time are very nostalgic to me as this is when I really started getting interested in PCs and technology in general. Granted, PC gaming is what really drove my interest in hardware initially, but down the line, I really started enjoyed the hardware just for the sake of it.

I’ve only recently started acquiring and collecting vintage hardware in the last year or so, but I’ve always been drawn to 486 systems. Although we had an old monochrome 8-bit machine growing up – some kind of XT clone – the first PC I was really interested in was a 486 system bought in 1994.

486-2

This won’t be the first 486 system I have in my collection. I got a well maintained DEC low profile system from my brother-in-law last summer. It’s a nice system that I hope to take a look at in another post, but it’s very integrated. Everything is on-board and proprietary so it leaves very little room for tweaking. That said, I really wanted something I could customize.

Today’s project all started with an ad on Kijiji I stumbled on a few weeks back – a 486 tower system in “working condition”. Inspecting the posted images carefully, I could see that the system was far from complete – it was missing a video card and didn’t have a hard drive.

Continue reading “The 486 Restoration – Part 1”