One of the great things about NSX-T is its complete independence from vCenter Server. You can still link to vCenter Server if you’d like to automate certain tasks, but unlike NSX-V, you can accomplish many deployment tasks manually. One of the firsts things you’ll be doing in a new NSX-T setup is to deploy your control cluster.
Although automated deployment through vCenter and the UI is convenient, there are some additional benefits to manual controller deployment. Firstly, you can select a non-production ‘small’ sized form factor that isn’t selectable in the UI saving you a couple of vCPUs and about 8GB of RAM per appliance. Secondly, deploying manually also allows you to thin-provision your controller VMDKs off the bat. In a home lab, these are some desirable benefits. And of course, there is always the satisfaction you get from running through the process manually and better understanding what happens behind the scenes.
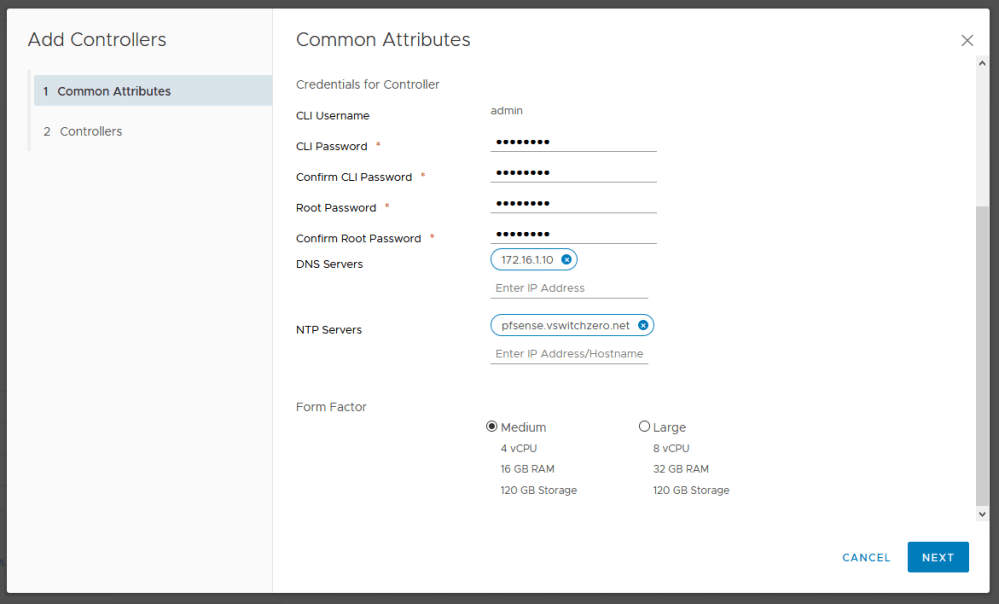
As seen above, the automated controller deployment wizard does not allow the selection of a ‘Small’ form factor.
Deploying Controllers
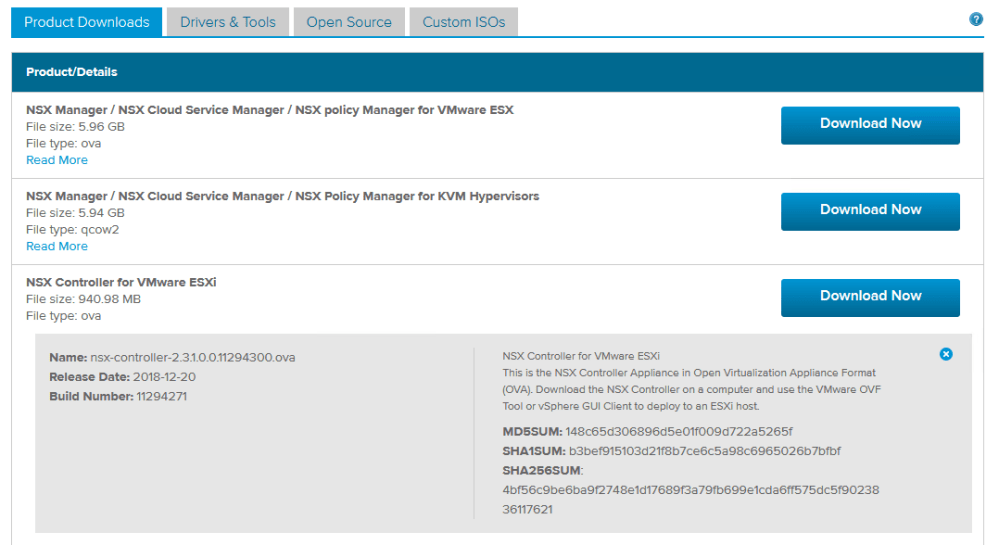
To begin, you’ll need to download the NSX-T controller OVA. You’ll find it listed along with the other NSX-T deliverables on the download page.
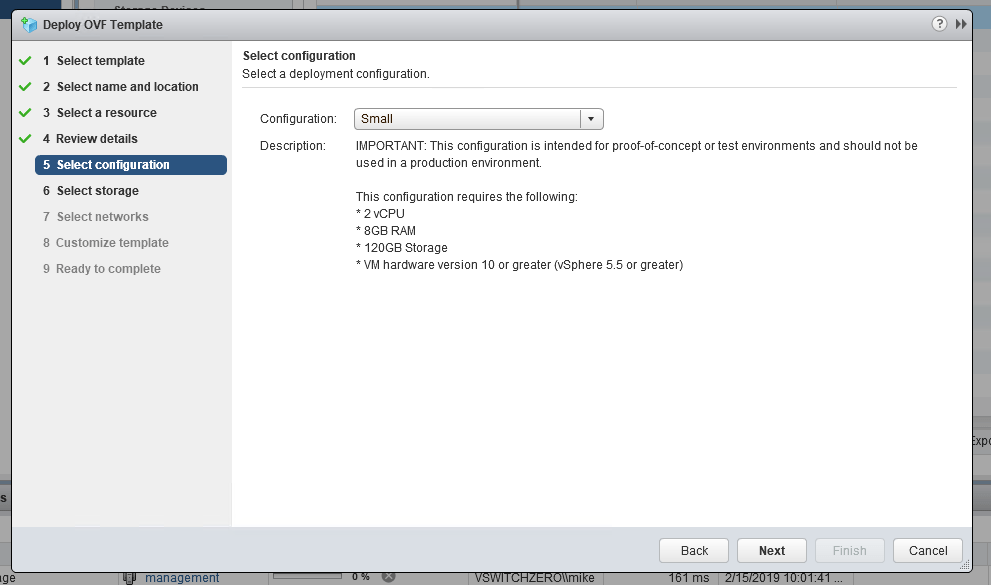
There are a few different ways that you can deploy the OVA including with ovftool. I’m just going to use the vSphere Client for this example. As you can see below, we can now select an unsupported ‘Small’ form-factor deployment:
In addition to this, you’ll get the usual template customization options along with a few new ones you may not have seen listed under ‘Internal Properties’:
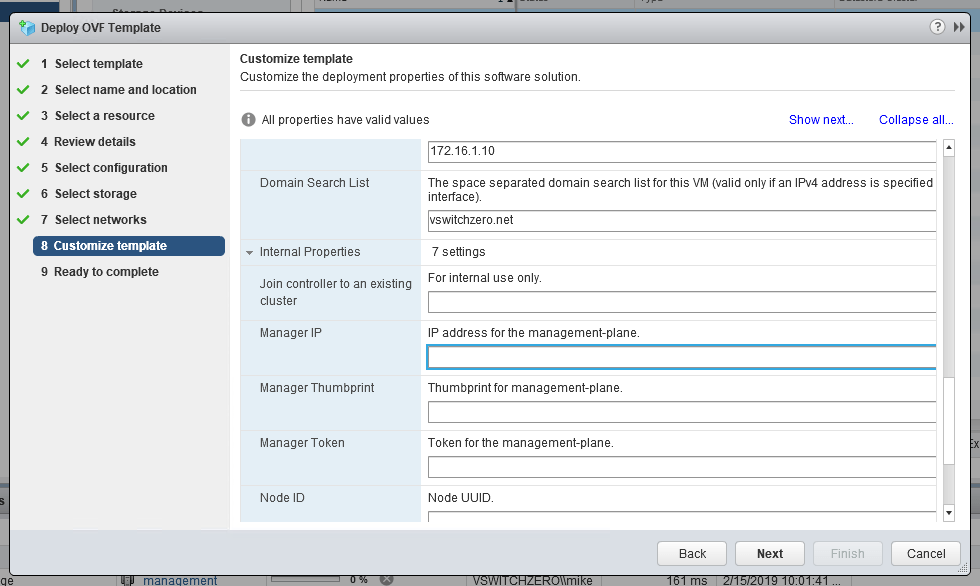
As you probably have guessed these internal properties can be used to save some of the work needed to get it connected to the management plane and to the control cluster. I’m going to skip this entire section and run through the process manually from the CLI post-deployment.
Once your OVA is deployed, it would be a good idea to ensure the IP address you configured in the template customization has stuck:
controller1> get interface eth0
Interface: eth0
Address: 172.16.1.43/24
MAC address: 00:50:56:aa:09:54
MTU: 1500
Default gateway: 172.16.1.1
Broadcast address: 172.16.1.255
Link status: up
Admin status: up
RX packets: 281
RX bytes: 23913
RX errors: 0
RX dropped: 0
TX packets: 118
TX bytes: 17472
TX errors: 0
TX dropped: 0
TX collisions: 0
Then, a quick ping to the NSX Manager appliance will ensure we’ll be able to establish a management plane connection when the time comes:
controller1> ping 172.16.1.40
PING 172.16.1.40 (172.16.1.40) 56(84) bytes of data.
64 bytes from 172.16.1.40: icmp_seq=1 ttl=64 time=0.223 ms
64 bytes from 172.16.1.40: icmp_seq=2 ttl=64 time=0.513 ms
64 bytes from 172.16.1.40: icmp_seq=3 ttl=64 time=0.480 ms
^C
--- 172.16.1.40 ping statistics ---
3 packets transmitted, 3 received, 0% packet loss, time 1998ms
rtt min/avg/max/mdev = 0.223/0.405/0.513/0.130 ms
Connecting to the Management Plane
As you can see, post-deployment there is no connection to the management plane.
controller1> get managers
No managers configured
To get our new controller node talking to NSX Manager, we’ll first need to get the SSL thumbprint from the manager:
nsxmanager> get certificate api thumbprint
ccdbda93573cd1dbec386b620db52d5275c4a76a5120087a174d00d4508c1493
Once we have this, we can connect using the join management-plane command along with the thumbprint we just retrieved. Note that 172.16.1.40 is the IP address of the NSX Manager in my environment.
controller1> join management-plane 172.16.1.40 username admin thumbprint ccdbda93573cd1dbec386b620db52d5275c4a76a5120087a174d00d4508c1493
Password for API user: ********
Node successfully registered and controller restarted
Now we can see that the connection is established:
controller1> get managers
- 172.16.1.40 Connected
As you can see, NSX manager now has knowledge of the first controller node. We can confirm this as well from the NSX Manager CLI:
nsxmanager> get management-cluster status
Number of nodes in management cluster: 1
- 172.16.1.40 (UUID be142a42-b6aa-ad39-1a28-3a7767de073a) Online

Management cluster status: STABLE

Number of nodes in control cluster: 1
- 172.16.1.43 (UUID 6dd856a6-6a01-4a01-a14d-ff4e0df1c7ab)

Control cluster status: UNSTABLE
Notice that the control cluster status is listed as ‘UNSTABLE’ because we haven’t initialized it yet. Our single node has not yet assumed the master role.
Initializing the Control Plane
Before we initialize the control cluster, we’ll define the shared secret that’ll be used for adding other controllers to the cluster. We do this with the set control-cluster security-model command.
controller1> set control-cluster security-model shared-secret secret VMware1!
Security secret successfully set on the node.
Once that is done, it’s finally time to initialize the control cluster:
controller1> initialize control-cluster
Control cluster initialization successful.

controller1> get control-cluster status
uuid: 6dd856a6-6a01-4a01-a14d-ff4e0df1c7ab
is master: true
in majority: true
uuid address status
6dd856a6-6a01-4a01-a14d-ff4e0df1c7ab 172.16.1.43 active
Notice that we now have a single node active and is listed as the master in majority. Let’s confirm that the control plane is stable from the NSX manager now:
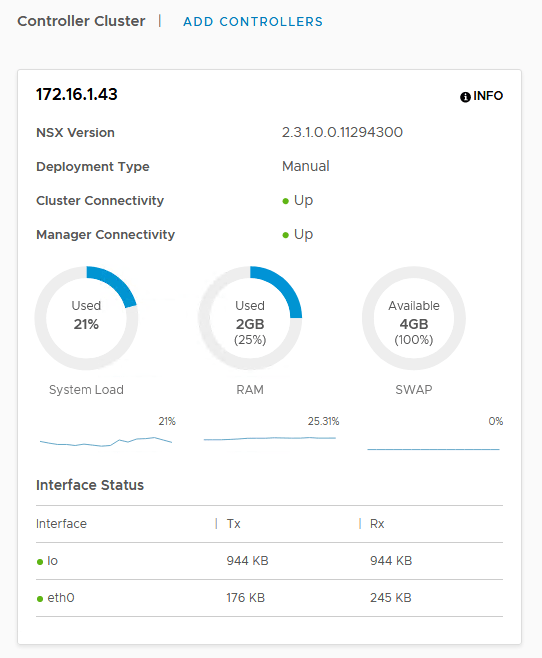
Everything looks green in the UI. We can also double check from the CLI:
nsxmanager> get management-cluster status
Number of nodes in management cluster: 1
- 172.16.1.40 (UUID be142a42-b6aa-ad39-1a28-3a7767de073a) Online

Management cluster status: STABLE

Number of nodes in control cluster: 1
- 172.16.1.43 (UUID 6dd856a6-6a01-4a01-a14d-ff4e0df1c7ab)

Control cluster status: STABLE
Adding Additional Controllers
Once you’ve got your first controller deployed, connected and initialized, it’s time to add two more to the cluster. Just like the first one, we first need to connect it to the management plane:
controller2> join management-plane 172.16.1.40 username admin thumbprint ccdbda93573cd1dbec386b620db52d5275c4a76a5120087a174d00d4508c1493
Password for API user: ********
Node successfully registered and controller restarted
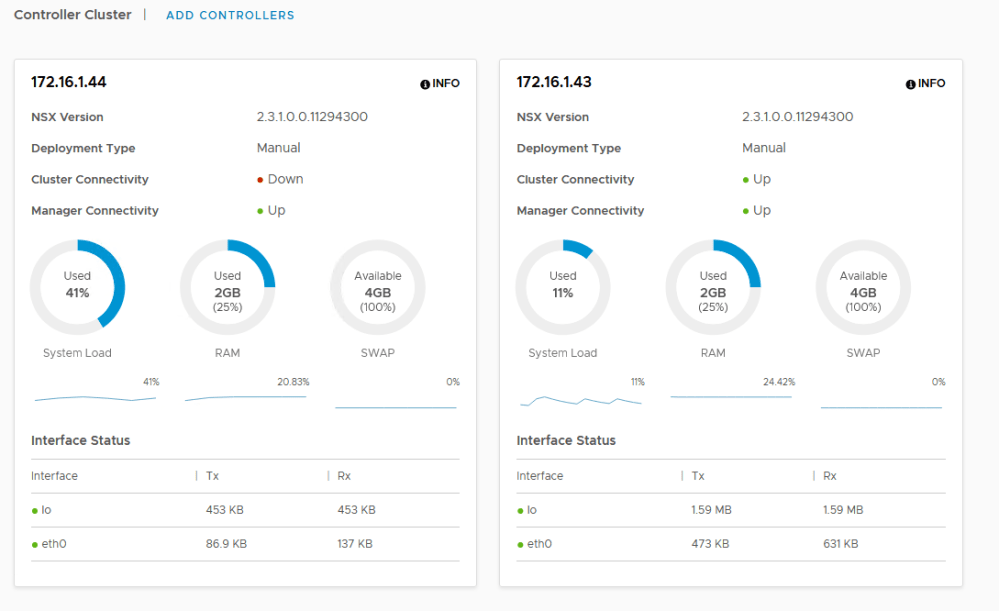
Once that’s done, the controller is now visible in the NSU Manager UI. You’ll notice that it’s cluster connectivity is still ‘down’ because we haven’t connected it to the control cluster yet.
First, we’ll set the shared secret to match what we had on the first controller:
controller2> set control-cluster security-model shared-secret secret VMware1!
Security secret successfully set on the node.
Next, we’ll need to get the SSL thumbprint of the controller we just deployed:
controller2> get control-cluster certificate thumbprint
0e5cc3e10bdc4be27a556c538ea785b58518acd4e44d016e7fc0d26b1c3f498a
Once we have the thumbprint, we’ll return to the master node and execute the ‘join control-cluster’ from there.
controller1> join control-cluster 172.16.1.44 thumbprint 0e5cc3e10bdc4be27a556c538ea785b58518acd4e44d016e7fc0d26b1c3f498a

Node 172.16.1.44 has successfully joined the control cluster. Please run 'activate control-cluster' command on the new node.
Once that’s done, we’ll need to activate the control cluster from the new node as mentioned in the output of the previous command:
controller2> activate control-cluster
Control cluster activation successful.
Once that’s done, we simply repeat this process with the third and final controller node. Once done, we can confirm the control cluster health:
controller1> get control-cluster status
uuid: 6dd856a6-6a01-4a01-a14d-ff4e0df1c7ab
is master: true
in majority: true
uuid address status
6dd856a6-6a01-4a01-a14d-ff4e0df1c7ab 172.16.1.43 active
42bf0b7c-f98c-4028-9795-1acc655e11a6 172.16.1.44 active
cb4f67e5-d43c-43a4-a6dd-f352b12d1f25 172.16.1.45 active

controller1>

And there you have it – three nodes all up and running all without the help of vCenter Server or the NSX-T UI.
