I’ve been using FreeNAS for several years now for both block and NFS storage in my home lab with great success. For more information on my most recent FreeNAS build, you can check out the series here.
Although I’ve been quite pleased with this setup, I had to repurpose the SSDs in the box and had yet another USB boot device failure. This meant I had to reinstall FreeNAS and left me with just a single ZFS pool with a pair of 2TB mechanical drives. It just didn’t feel right to have a full system up and running for just a pair of 2TB drives when I could run them just fine in my management ESXi host. Not to mention the fact that I’ve got 224GB of RAM available there to provide for a much larger L1 ARC cache.
In part 2 of my FreeNAS build series, I looked at using VT-d to passthrough a proper LSI SAS HBA to a VM. This is really the best possible virtual FreeNAS configuration as it bypasses all of the hypervisor’s storage stack and grants direct access to the HBA and drives. I considered using this setup, but I didn’t think it was worth the extra power consumption and cooling needed for the toasty PERC H200 card I’ve been using. Since I wanted to preserve all data on the drives, RDMs seemed to be the next logical solution. This isn’t as ‘pure’ as the VT-d solution, but it still gives the VM full block access to the drives in the system. At any rate, it was worth a try!
Disclaimer: If you are using ZFS and FreeNAS for production purposes or for any critical data that you care about, using a proper physical setup is important. I wouldn’t recommend virtualizing FreeNAS or any other ZFS based storage system for anything but testing or lab purposes.
What I hoped to do was the following:
- Take the 2x2TB Western Digital hard drives out of the Dell T110.
- Re-install the 2x2TB drives in my Intel S2600 management host on the integrated SATA controller.
- Create a new FreeNAS virtual machine.
- Add the two drives to the VM as virtual mode RDMs.
- Import the existing ZFS volume that is striped across these two drives in FreeNAS.
- Re-create the iSCSI target and NFS shares and have access to all existing data in the pool! (assuming all goes well).
Creating a new FreeNAS VM
Once I got the two drives installed in my Intel S2600 management host, I created a new VM and got the FreeNAS OS installed. Below is the virtual hardware configuration I used:
Guest OS type: Other, FreeBSD 64-bit
CPUs: 2x vCPUs
Memory: 16GB (a minimum of 8GB is required)
Hard Disk: 16GB (for the FreeNAS OS boot device, a minimum of 8GB is required)
New SCSI controller: LSI Logic SAS
Network adapter type: VMXNET3
CD/DVD Drive: Mount the FreeNAS 11.2 ISO from a datastore
You’ll notice that some of the options I selected are not defaults for FreeBSD based VMs. This includes the LSI SAS adapter, and the VMware VMXNET3 NIC. LSI Parallel is the default for FreeBSD VMs, but the SAS adapter works well with all recent BSD builds. The same holds true for the VMXNET3 adapter, which has many benefits over the emulated E1000 adapter type.
Adding Local RDMs
I should start by noting that VMware does not support using local disks as RDMs – especially consumer grade SATA disks. Only iSCSI and FC based disks are officially supported. Although local disks may not support all the SCSI commands needed to get through the RDM disk filter, that doesn’t mean they won’t work.
I started by identifying the two disks in the system. They are 2TB Western Digital black series drives:
[root@esx-m1:/vmfs/volumes/58f77a6f-30961726-ac7e-002655e1b06c/freenas] ls -lh /vmfs/devices/disks
total 9778771016
-rw------- 1 root root 7.3G Feb 19 21:26 mpx.vmhba32:C0:T0:L0
-rw------- 1 root root 4.0M Feb 19 21:26 mpx.vmhba32:C0:T0:L0:1
-rw------- 1 root root 250.0M Feb 19 21:26 mpx.vmhba32:C0:T0:L0:5
-rw------- 1 root root 250.0M Feb 19 21:26 mpx.vmhba32:C0:T0:L0:6
-rw------- 1 root root 110.0M Feb 19 21:26 mpx.vmhba32:C0:T0:L0:7
-rw------- 1 root root 286.0M Feb 19 21:26 mpx.vmhba32:C0:T0:L0:8
-rw------- 1 root root 2.5G Feb 19 21:26 mpx.vmhba32:C0:T0:L0:9
-rw------- 1 root root 465.8G Feb 19 21:26 t10.ATA_____MKNSSDRE500GB___________________________MK170206100336626___
-rw------- 1 root root 465.8G Feb 19 21:26 t10.ATA_____MKNSSDRE500GB___________________________MK170206100336626___:1
-rw------- 1 root root 465.8G Feb 19 21:26 t10.ATA_____TOSHIBA_MK5065GSXF_________________________________X1TRC0ZQU
-rw------- 1 root root 465.8G Feb 19 21:26 t10.ATA_____TOSHIBA_MK5065GSXF_________________________________X1TRC0ZQU:1
-rw------- 1 root root 1.8T Feb 19 21:26 t10.ATA_____WDC_WD2002FAEX2D007BA0________________________WD2DWCAY00318449
-rw------- 1 root root 2.0G Feb 19 21:26 t10.ATA_____WDC_WD2002FAEX2D007BA0________________________WD2DWCAY00318449:1
-rw------- 1 root root 1.8T Feb 19 21:26 t10.ATA_____WDC_WD2002FAEX2D007BA0________________________WD2DWCAY00318449:2
-rw------- 1 root root 1.8T Feb 19 21:26 t10.ATA_____WDC_WD2003FZEX2D00Z4SA0_______________________WD2DWMC1F1704510
-rw------- 1 root root 2.0G Feb 19 21:26 t10.ATA_____WDC_WD2003FZEX2D00Z4SA0_______________________WD2DWMC1F1704510:1
-rw------- 1 root root 1.8T Feb 19 21:26 t10.ATA_____WDC_WD2003FZEX2D00Z4SA0_______________________WD2DWMC1F1704510:2
<snip>
In my case, the two drives were the WD2003 and WD2002 prefixed devices. Because these are consumer grade SATA drives, they have t10 identifiers and not the usual naa or eui identifiers that FC or iSCSI devices usually do. I’ll need the full t10 identifier strings as follows:
t10.ATA_____WDC_WD2003FZEX2D00Z4SA0_______________________WD2DWMC1F1704510
t10.ATA_____WDC_WD2002FAEX2D007BA0________________________WD2DWCAY00318449
You’ll notice that in the output above, these drives showed up three times each – twice with a colon and a number at the end. These are partition identifiers – a good indication that these drives already have a filesystem on them. I want to copy the t10 identifiers without the partition identifiers for use in the next set of commands.
To add these disks, I simply navigated to the freenas VM’s VMX location and then used the vmkfstools utility to create the RDM pointers:
[root@esx-m1:~] cd /vmfs/volumes/esx-m1-ssd0/freenas/
vmkfstools -r /vmfs/devices/disks/ t10.ATA_____WDC_WD2003FZEX2D00Z4SA0_______________________WD2DWMC1F1704510 ./freenas-rdm1.vmdk
vmkfstools -r /vmfs/devices/disks/ t10.ATA_____WDC_WD2002FAEX2D007BA0________________________WD2DWCAY00318449 ./freenas-rdm2.vmdk
I used the -r instead of -z option to create a virtual mode RDMs. Both physical and virtual modes provide direct block-level access to the drives, but physical mode would allow the FreeNAS VM to see the drives as actual Western Digital black models, serial numbers, and all. In my situation there is no benefit to this, and I’d actually prefer for FreeNAS to see the disks as ‘VMware Virtual Disks’ just in case there are features these drives use that aren’t passed through correctly in physical mode. In some cases, a bit of abstraction can be a good thing.
[root@esx-m1:/vmfs/volumes/58f77a6f-30961726-ac7e-002655e1b06c/freenas] ls -lha *rdm*
-rw------- 1 root root 1.8T Feb 11 21:07 freenas-rdm1-rdm.vmdk
-rw------- 1 root root 492 Feb 20 19:23 freenas-rdm1.vmdk
-rw------- 1 root root 1.8T Feb 11 21:08 freenas-rdm2-rdm.vmdk
-rw------- 1 root root 492 Feb 20 19:23 freenas-rdm2.vmdk
Now that the pointers are created, I can use the vSphere Web Client to ‘Add an Existing Virtual Disk’.
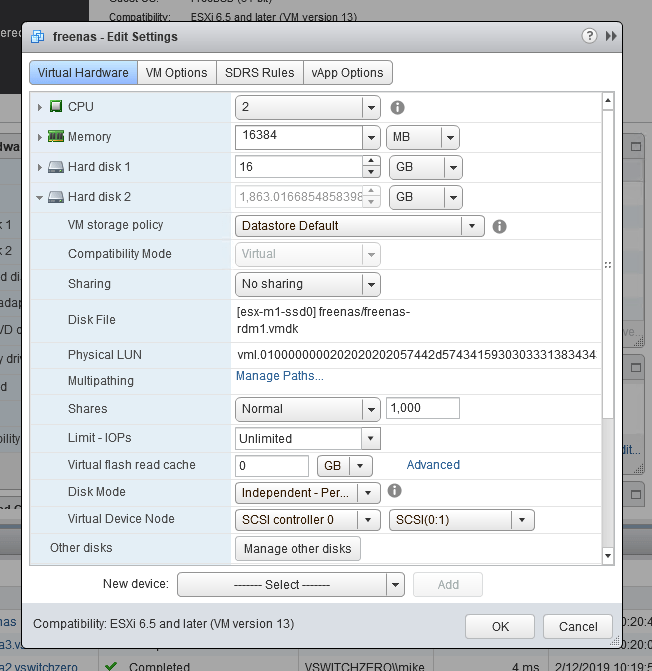
Hard disk 2 and 3 are now added and show up correctly with their ~1.8T sizing. Time to power on the VM.
Importing the ZFS Pool
Because the filesystem was untouched on these two drives, and the FreeNAS VM has direct block-level access to them, I should in theory be able to import the existing ZFS stripe and have full access to all of the existing data.
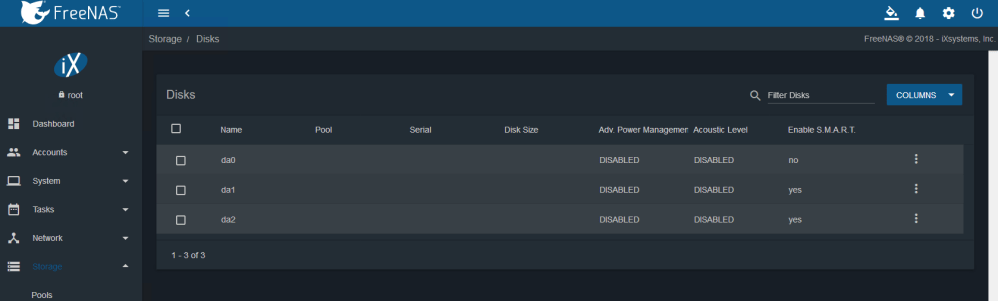
Once the VM booted, FreeNAS could see the virtual mode RDMs just fine. They are identified as disks da1 and da2 in the UI.
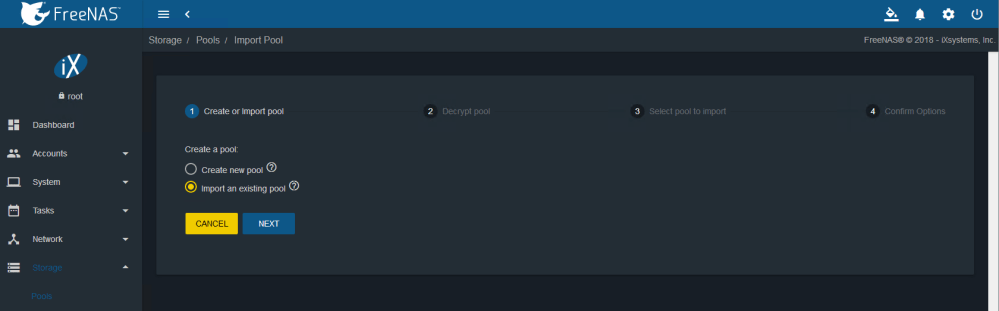
Next, I opened the ‘Create or import pool’ wizard and selected ‘import an existing pool’.
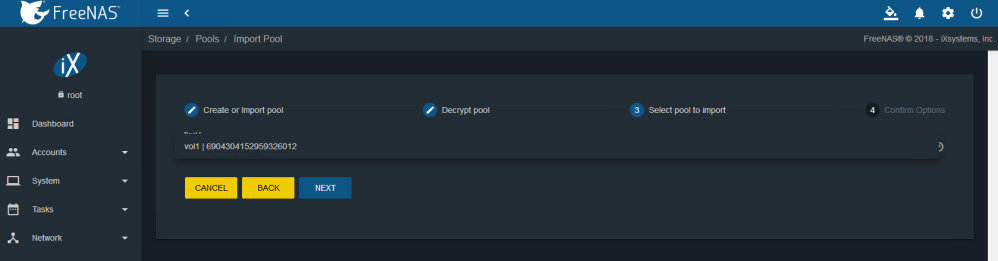
My pool called ‘vol1’ was identified and allowed me to select it for import. So far, a very good sign.
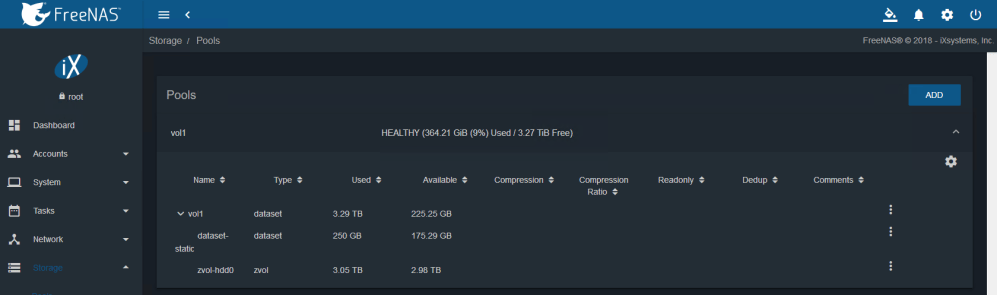
After a tense few seconds, the process completed successfully, and I had full access to all the datasets and zvols that were there. Even the permissions configured were retained. All I had to do was to recreate the SMB/NFS shares and configure iSCSI.
Conclusion
Although most people associate RDMs with specific clustering solutions or other ‘edge’ scenarios, there is clearly some value in being able to grant VMs block-level access to storage devices. Again, I would never recommend doing this for a production deployment, but for a lab or test environment it can be a good option.
By doing this, I was able to reduce total power consumption in my lab by about 70 watts or so and reduced noise and heat as well. Once I upgrade my compute hosts, I’ll be using vSAN for VM storage, but this will likely be a good long-term solution to supplement for NFS, CIFS, FTP and all other storage services my lab will require.

Did this work reliably? any issues?
Hi Andrew, it was fine for the short period of time I used it. Should be fine for a lab or testing environment, but I wouldn’t recommend using local disks as RDMs for any production or important data.